Rubber Guard: The Meathook DVD by Brandon McCaghren

Rubber Guard: the Meathook

Every time someone mentions 10th Planet Jiu-Jitsu people picture Eddie Bravo straight away. The enigmatic founder of the franchise is an unforgettable character, that’s for sure, but he’s not the only one. The 10th Planet community features a lot of very talented high-level grapplers. One great example everyone has heard of is Geo Martinez, and Ebi champion and ADCC veteran. Another name you might not know so much is Brandon McCaghren. Although not in the spotlight, he is probably the best teacher inside the system. So, when he comes out with an instructional, you should buy it immediately. And with a catchy title like Rubber Guard: The Meathook DVD, you better hurry up!

Simply put Brandon’s Rubber guard: The Meathook DVD is as comprehensive a guide to 10th PLanet’s signature guard system as you can get. So far, Eddie Bravo has a few instructionals that address the position, but nothing recent. Given the constant evolution of the position, thanks to the input of the many black belts Eddie now has, the rubber guard has come a long way since then. Brandon McCaghren is by far the utmost authority on anything 10th PLanet (perhaps second to Bravo only). He has immense knowledge of Jiu-Jitsu and has a great knack for teaching.
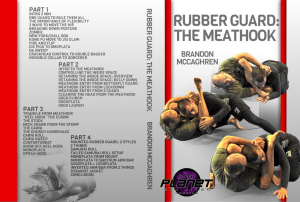
ON SALE:
Rubber Guard The Meathook by Brandon McCaghred DVD/DIGITAL
Brandon McCaghred Rubber Guard The Meathook Technique List

Rubber Guard: the Meathook DVD Review
Techniques List

As far as the legitimacy of the position goes, the rubber guard works. 10th planet members have been super successful in grappling, combat Jiu-Jitsu, and even MMA. The rubber guard is a very elaborate system that might seem like more fuss than it’s worth. Once you give it a try, though, you’ll never look into other closed guard variations. It’s that good and that effective. And, to dispell the most common myth straight away, freakish flexibility is not a pre-requirement. Yeah, you read that right, even the stiffest of grapplers can be effective from the rubber guard. How? Brandon McCaghren has the answers.

A Look At Brandon McCaghren

Since most of you probably never came across Brandon McCaghren until now, let’s shed some light on this mysterious grappling genius. As far as BJJ nerds go, Brandon is right up there with the best of them. He is completely obsessed with Gentle Art. Although faithful to the 10th Planet system he is a huge part of, Brandon tends to have a deeper teaching style. In that sense, he is more alike Firas Zahabi and John Danaher than the free-flowing artistic Eddie Bravo. It is a very nice contrast to the usual way of 10th Planet instructions, which makes him the premier coach to demonstrate the system.

Brandon became a black belt under Eddie Bravo in 2016. An impressive fact about Brandon is that when he began training, he didn’t really have a coach or resources at his disposal. It’s hard to imagine a world without video instructionals today, but that’s exactly how Brandon started. Since Eddie Bravo was not near him, he had to learn by trial and error. As painstakingly slow as this process is, it’s is effective nonetheless. Ultimately Brandon turned into the most detail-savvy grappler out there, and a great teacher.

One more thing to note is the time and effort Brandon McCaghren puts into being a better teacher. he is constantly discovering new and improved ways of teaching and communicating with his students. This is apparent throughout the Rubber Guard: The Meathook DVD, which is his first digital release. Hopefully, there will be plenty more to follow.

Rubber Guard: The Meathook DVD Content

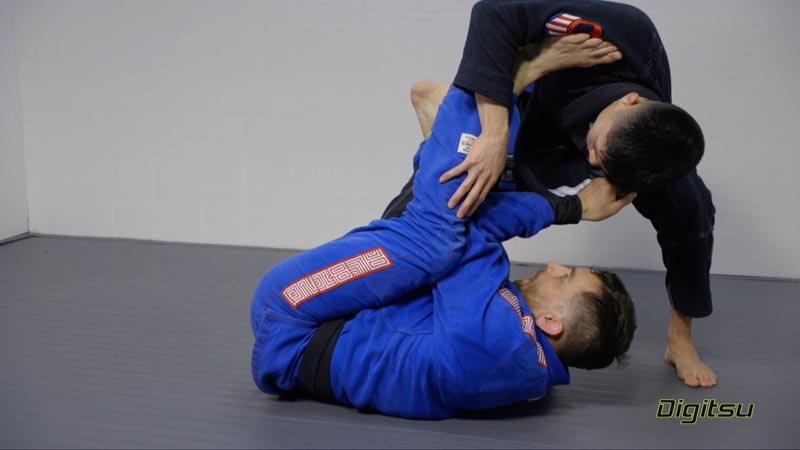
Before we get into the content of this great new release let’s do a rubber guard crash course really fast. The rubber guard is basically a closed guard variation in which your legs and arms connect behind the back of your opponent in specific ways. This allows you for constant control of their posture as well as plenty of attacking opportunities. the system is very elaborate and has lots of small maneuvers and positions within it. All of these are originally named by Bravo, who likes to put funky names on every step of a technique.

One such crucial component of the rubber guard is the meathook. It is a painful way of improving your control over an opponent while creating a great opening.  Why would you focus so much on just one same adjustment within the guard? Read along, or better yet, get the DVD and everything is going to become crystal clear!

The Basics

Rubber guard: The MeathookDVD
Click to Watch Full Technique

Since the inner workings of the rubber guard are not commonly known among grapplers, Brandon takes it from the very top. Rubber Guard: The Meathook DVD number 1 is all about rubber guard essentials. It all starts with some flexibility advice as well as crucial points on hip placement. It turns out the angle of your hips is much more important for rubber guard than flexibility.

From there on it’s all tuber guard classics, with a modern twist. All of the basic positional checkpoints, like Zombie, NY, Chill Dog, Ju Claw and the rest are there, explained in great detail. Before the DVD concludes, Brandon goes over the easiest submission to get from the rubber guard – the Omoplata. At the very end, there are a few essential modern rubber guard concepts like the sorcerer and invisible collar to tease you over what’s coming next.

Introducing The Meathook

Finally, meathook. What is this meathook we can’t seem to stop talking about? Well, let’s put it this way. If you stick the meathook when in rubber guard you can do whatever you want to your opponent. Just like a meathook in a carcass.

Basically, what Eddie Bravo calls the meathook is armpit control with the palm. You can achieve this by putting a hook grip into an opponent’s armpit, over their shoulder. However, the manner in which you get it (from the rubber guard) involves much more tangles and positioning. Fear not, Brandon dumbs down everything to the bones, so much so that even I got it from the first attempt.

In terms of the meathook though, Brandon expands the concept to other positions as well. Butterfly guard, Z-guard and lockdown entries might turn out to be a better fit for certain grapplers. The final touch in this second DVD is the few Gogoplata setups that round it off.

The Stock, The Carni, And Other Wicked Stuff

This is where things turn, err, strange. The third volume goes deep into 10th Planet territory both in terms of techniques and nomenclature. For your everyday Gi student, a glance at the content of this DVD is going to be as foreign as looking at a Tai Chi release. Once again, Brandon is there to make things painfully simple.

There’s no way around the 10th PLanet terminology but there is a system to help you understand it. From the Stock, via the Churchill handshake all the way to the Carni, you’ll learn moves that are as effective as their names are fun. There’s no way of explaining them here that’s going to do them justice so just pick up the DVD and learn from Brandon himself. Al I’m going to say is that if you’re looking to turn an opponent into a pretzel, you need to learn the Carni.

Deep Into The Rubber Guard

Finally, McCaghren goes over all the possible directions in which the rubber guard game can expand. One great example is the mounted rubber guard. Sweeping from the rubber guard is simple if you follow all the rules. What’s really cool about it is ending up in mount while still having the rubber guard on. I doubt many opponents are going to be able to get away from there.

Some very cool finishes follow the basics of the mounted rubber guard. The Monoplata is one such submission that ties in the rubber guard with other submissions perfectly. Once you have it the door is open to inverted armbars, Locoplatas, the straight jacket and everything else you might think of. Oh and the best thing? Even if you get reversed, you just end up in a rubber guard again. There’s no way out once you master the Rubber Guard: The Meathook DVD.

ON SALE:
Rubber Guard The Meathook by Brandon McCaghred DVD/DIGITAL
Brandon McCaghred Rubber Guard The Meathook Technique List

Rubber Guard: the Meathook DVD Review
Techniques List

Jiu-Jitsu Gear Essentials To Keep In Your BJJ Gi Bag

Jiu-Jitsu Gear Essentials To Keep In Your BJJ Gi Bag

Jiu-Jitsu is a martial art that requires a lot of accessories to make your training comfortable. Even in terms of customary training apparel, you need many more pieces than just your Gi. As years go by and you become a true BJJ addict, your Jiu-Jitsu gear is going to slowly grow bigger. This is due to the nature of the sport and the fact that your experience teaches you what you really need on the mats. Actually, it extends beyond the mats and includes pre and post-training items as well as an “emergency situations kit”. Let’s take a good look at the Jiu-Jitsu gear essentials you absolutely need to have in your BJJ Gi Bag with you every time you go to class!

So you’re all serious about Brazilian Jiu-Jitsu. You got your Gi and you’re all ready to conquer the grappling world! You even have your specialized BJJ Gi Bag all packed up. Hold your horses there, cowboy, as you still have a boatload of taps to go before you even realize what it is you’ve gotten yourself into. That said, once you accept the BJJ lifestyle you’ll soon find out that a Gi just won’t cut it. You are going to need a bit more Jiu-Jitsu gear than that, along with a suitable bag to place it all in.

Just like with any other sport, grappling requires specific JIu-JItsu gear to make training possible. As such, some things are absolutely essential for training Brazilian Jiu-Jitsu. For example, the aforementioned Gi. And a belt, never forget the belt! On top of that, you have the essential accessories you’ll need to get through training. And there’s also the gear that is not crucial but helps make you BJJ experience more pleasant. Especially once all those pesky little injuries start.

The Complete Jiu-JItsu Gear Guide

First of all, you need a good BJJ Gi bag or backpack. Here is a list of our choice of the Best BJJ Backpacks For 2021. Pick your favorite and let’s go train!

So, time to go to the gym. Grab your favorite BJJ Gi bag or backpack, throw the Gi in and go. Proceed to fume when you arrive there and discover that your belt is still on the drying rack. Furthermore, you left your mouthpiece on the sink. Now you got to get through class beltless (if your instructor allows it) and hope your teeth survive all rounds of rolling.

BJJ Gi Bag Essential Jiu-JItsu Gear Granted, I’m being a bit dramatic but it’s nothing you haven’t experienced so far at least once. The better approach is to have everything organized so that you’re sure that you at least have the minimum required Jiu-Jitsu gear on you at all times. This requires just a little bit of pre-planning on your part, and perhaps 20 minutes in a week to do an inventory. So, pick up your bag, turn it upside down until everything comes out (pinch your nose if you have to) and get ready to start packing. This is what you’ll need:

  • GI(s)

There’s really no point in mentioning this but stick with me. You need a Gi in order to train BJJ (unless you’re training at an exclusively No-gi gym). That means having both Gi pants and a jacket, preferably of the same variety packed in your BJJ Gi bag. Another very obvious point (yet somehow easily ignored by many) is to pack a clean Gi for every training session. If you’re new, wash your Gi regularly. If you’ve been training for a while, you already have at least a couple of Gis to rotate.

Make sure you have a good folding system for your Gi so that it doesn’t take up unnecessary space. Best case scenario, especially for those that train multiple times a day, is to pack a second backup Gi. Yes, it can be a logistical nightmare, so if you do not have space in your bag, you don’t need it. But if you can keep it there, by all means, have a backup!

  • Belt(s) 

Packing your BJJ Gi Bag: Jiu-JItsu Gear essentials This is probably the one piece of essential gear that people forget more than anything. In all honesty, it is quite easy to misplace a belt after washing it. There’s an easy fix for this through – a separate pocket in your BJJ Gi bag. Designate one pocket of your gym bag to carry nothing but your belt(s). Before you train, when you pack your Gi in, sneak a peek into the pocket. It’ll turn into a habit very soon and you’ll never forget a belt at home again!

Once again, you can get a backup belt and keep it in your bag. Same pocket or a different one, regardless, this is the one certain way to never be without a belt on the mats.

Best BJJ Belts

  • No-Gi Gear

Now, this falls under the essentials even if you do not train without the Gi ever! As you should already know by now, you need to have a rashguard underneath your Gi, preferably both top and bottom. A rashguard and a pair of spats can do wonders in terms of protecting both your health and making your Gi last longer. Of course, a rashguard and spats need to be clean for every training session, so make it a habit to pack them with your Gi(s).

Secondly, if you have at least one No-Gi session per week, make sure you’re ready beforehand. Use your “inventory” time to pack a pair of shorts into your BJJ Gi bag. There’s no need to get them out until you use them, and you never know when you might need them. They do not take up a lot of space anyway.

The best BJJ Rashguards
The Best MMA Rashguards
Cheap BJJ Rashguards
Best BJJ Spats
Best BJJ Shorts

  • Protective Gear

This is the last crucial piece of Jiu-Jitsu gear you need to keep in your bag at all times. And, by personal protection, I mean a mouthguard. Along with the belt, this is another piece of equipment really easy to misplace. So, to avoid hiccups, assign it a permanent place in your bag. After training, get it out, wash it and leave it to dry where you can see it. Pack it back into the bag the moment it’s dry enough.

The Best Mouthguard
BJJ Mouthguards, How to boil it, mold & Why You Should Wear It
The Best Grappling Socks

  • The Injury Kit

When you start training, this is not going to be a priority. As the years go by, you’re going to need yet another whole compartment of your BJJ Gi bag to fit this kit into. The one mandatory thing is athletic tape, and, if you need them, scissors.

Next, you have all your supportive gear. Knee pads, ankle wraps, elbow braces and all the rest fall into this category. Of course, you favorite pain-relief product (most likely in some sort of balm form) should also be a permanent feature of your gear.

The Best BJJ Knee Brace
The Best BJJ Finger Tapes
The Best BJJ Elbow Pads

  • Personal Hygiene Products

I can’t stress this point enough. While you do not need it per se, a basic personal hygiene kit is really a must. For your own health, and for that of others, look to have an antibacterial soap with you. This is going to ensure you stay clear of stuff like ringworm, staph, and other pests that might lurk in a gym. Since you’re already showering, a small towel and a bottle of deodorant are also not hard to carry. Particularly when you have a specialized BJJ Gi bag.

A very important point is to never forget flip-flops, along with something to store them in. A basic supermarket bag will do, as long as they do not come in touch with anything else in your bag. Use flip flops to get around the gym (apart from the mats, of course).

And, all you ladies out there, have a feminine product or two, ready, in case of surprises.

The Best BJJ Soaps

  • Bottle / Shaker

This goes without saying but still, when you pack plan some space for at least your water bottle. If you’re like most grapplers out there you’ll probably need a shaker bottle as well. Whether you fill it up with state-of-the-art supplements or a Gracie diet smoothie, you’ll need to fit it in the bag.

The Best BJJ Shakers

  • Leisure Items

BJJ Gi Bag Essential Jiu-JItsu Gear Packing Finally, if you have the opportunity, have small pocket designated for everyday items. This is where you can keep your headphones, a phone charger, sunglasses, car keys, etc. This will work in reverse of all the other pockets in your bag. This is the pocket that’ll help you bring everything you need home from the gym instead of the other way around.

Best Training Bags
Best BJJ Backpacks

Wrapping Up

If you can make sure you get al lof the items above to fit in your BJJ Gi Bag, you’re truly ready for anything! In all honesty, though, you probably do not need every single item at any given time. However, make sure you at least have all your essentials packed neatly, and make it a point to keep everything clean. To that extent, never leave sweaty Jiu-JItsu gear in your bag any longer than absolutely necessary!

Related Articles:

The Ultimate 6 Ingredient Post-Workout Shake For BJJ
What Is The Best BJJ Finger Tape, How To Use It & Why
Why Wearing A Rashguards Under The Gi in BJJ Is Important

The Best Guillotine Choke Escape Options And Counters

Guillotine Choke Escape. Defense, Counters

Getting submitted is not an easy thing to get over. The whole “there’s no ego in BJJ’ thing aside, nobody likes to get submitted. Whether you’re a beginner or a fairly experienced grappler, submission is the one thing everyone hates. As it should be, of course. A submission is the ultimate form of surrender and nobody likes to lose. As far as submissions go, probably the scariest category is choked. That familiar feeling of going through the tunnel is not something people like to experience. And there’s one tight choke out there that can make this unpleasant experience to a whole other level – the guillotine choke. So, let’s focus on understanding it and discover a guillotine choke escape that’ll get you out of this dreaded submission.

The guillotine choke is one of the “basic” techniques in BJJ. people learn it fairly early in their journey, especially if they train mostly No-Gi. The trouble with the guillotine choke is that it is both efficient and painful, due to its mechanics. namely, it follows all BJJ principles: strong position, a high degree of control, and plenty of variations and follow-ups. For those that know it, it’s an almost certain way of finishing a match. To put it short, getting caught in a guillotine spells trouble. Luckily there is more than one guillotine choke escape, and there are also counter submissions to consider.

Escaping the guillotine is not an easy task precisely because of all the variations of the choke. Getting out of a Marcelotine is not the same as escaping an arm-in guillotine choke. And there’s the standing guillotine as well… All this variety means that you need to primarily understand how the choke works before you look to escape. Once you know how the choke works, you can do the needed adjustments that are going to get you out of danger

Learn further ways of escaping the Guillotine as well as any other submission you can think of! Tom DeBlass has the pedigree of an un-submittable grappler and shares all his knowledge in detail through his “Submission Escapes” DVD. Check it out and never worry about being in a bad spot again! 

Understanding The Guillotine Choke

The guillotine choke is a tricky one. It can double as a blood choke and as an air choke, which makes it very difficult to defend against. Furthermore, these two variations are easily interchangeable back and forth, constantly tightening the choke. For that, you need to identify three main areas and systematically work to block each from working if you want a guillotine choke to escape to work.

The first threat during a guillotine choke is the opponent’s arms. Regardless of the type of guillotine, the grip under your chin is crucial, as it provides the connection needed to complete the choke. Break this connection, and there’s no leverage to finish a choke.

Secondly, body positioning. The guillotine requires your opponent to be in front of you, which leaves your hips more or less open for movement. Not many people can finish the submission like that, so control over the hips and your posture is crucial. Your opponent is going to look to utilize their legs in order to keep your hips from moving. If they know what they’re doing, they’ll place the legs so that they make counters really difficult as well. This is a second thing you need to address because if you can’t get out of the position, an opponent can re-grip and still finish.

Finally, you need to understand direction. There are some directions in which you simply cannot move unless you want to tap or nap. So, you need to familiarize yourself with the execution of the guillotine, so that you can understand where its weak spots are. Moving the wrong way is going to ensure you’ll tap out. Also, be wary that your opponent is probably going to try to funnel you in such a direction deliberately.

Dealing With The Guillotine

First things first, the “regular” guillotine. For this, the opponent has a grip established around your neck, gripping underneath the chin. Both your arms are free in this scenario, which you’re going to use to your advantage. Let’s start with a guillotine from the guard.

Guillotine Choke escapeYour first step is relieving pressure on the neck. To do this, you need to pull the opponent’s arms away from your neck. Since their grip is in the way, you’ll only be able to create a little space. To begin with, use the arm that’s on the choke side to hook the palms of your opponent. The goal is to pull your elbow towards your hips, not towards the ground. This is a more powerful configuration of your arms as opposed to pulling downwards. To further relieve pressure, get up on the balls of your feet and push forward.

This brings you to the second step – breaking their positional structure. The fact that your second arm is free is huge here as it’s going to help you establish an even better position. Simply place it around the opponent’s neck (like for side control) and keep your shoulder close to their head. To do this you’ll need to place your head on the mat, which is further going to relieve pressure. You can now release the wrist grip to push on their near side leg and open the guard.

Finally, remember to move towards the opposite side of the choke. Otherwise, you’ll just choke yourself unconscious.

Arm-In Guillotine Choke Escape

This is a guillotine choke variation in which the opponent has your arm stuck in their grip along with your neck. This can make it particularly hard to resist as they’ll be pushing your shoulder into your neck in addition to direct pressure with the arms. So, we follow the three steps we outlined before. For the sake of simplicity, let’s say you’re already in a full-blown arm-in guillotine from the closed guard.

The first step is wrist control. Once again, you’ll look to control the opponent’s wrist with one arm only. This time, it’s the arm that’s free. Once you grab the wrist take your elbow in to have breathing space.

Defending the Arm In Guillotine The second step requires a bit of clever positioning on your part. For starters, you need to try and keep the trapped arm’s elbow as close to your body as possible. This further reduces the choke’s tightness. In order to achieve it, you’ll have to place your arm all the way back, palm on the floor. Next, you need to look away from your opponent as much as possible. Only then can you think about moving.

In order to defeat their structure, you’ll need to shift your body to your side(opposite of the choking side). Remember to constantly stay on the balls for your feet. To break free, you can release the wrist control and push down on their hip which is going to land you straight into side control. That’s where you’re safe from a guillotine.

Standing Guillotine Escape 

The standing guillotine choke is a very nasty move to get caught with. As such, defending it requires a bit of different positioning, since the mechanics are different from the feet. Braulio Estima has a great way of defeating the standing guillotine.

Guillotine Choke counterIn the case of the standing guillotine, you can skip the first step. There’s no need to go for the wrists, as you’ll utilize an angle change to deflect pressure. To achieve this you first need the space to move. The first thing to do when in a standing guillotine is to get your hips back and place your arms on the opponent’s thighs. This will open a V-like shape in front of your head.

Next comes the angle change. In order to beat the guillotine, you’ll need to use this V-like space to thread your head all the way to the other side of the opponent’s body. This renders their guillotine useless. Simply put your hands around their waist and you can get on their back.

The Von Flue Counter

When you end up in top side control after defending a guillotine on the ground you can finish with a counter choke of your own. Although the regular guillotine defense is the easiest way to do it, you can get it from an arm-in guillotine defense as well.

Von Flue Choke Guillotine CounterThe goal is to place your shoulder (that’s already close to their neck) directly on their carotid artery. to achieve it, you need to be on the balls of your feet. Another crucial thing is that an opponent has to keep hold of the guillotine grip. If they let go, you’ll most likely fail to finish. In any case, the Von Flue choke is a powerful submission and if you time it right you can get a tap in a second.

Related Articles:

Guillotine Choke: Basics secrets and Variations 
How To Make The Standing Guillotine Choke Work For You
A Complete Marcelo Garcia Guillotine Choke DVD Review

A Few Crazy BJJ Guillotine Variations To Brighten Your Day

Standing Guillotine Defense Techniques You Must Know

Reverse De La Riva Almanac 2018 – Seph Smith DVD Review

Reverse De La Riva Guard almanac

As far as open guards in BJJ go, not many are used more than De La Riva guard variations. Basically, you can connect De la Riva guard to anything and get a hybrid open guard. De La Spider guard, De La Worm guard, and the likes are quite useful ways of innovating from open guard. Another is simply reversing the control. Reverse De La Riva guard might not be as fancy as other variations, but it is undoubtedly efficient. For those looking to dominate opposition from the guard without complicating things, RDLR is the way to go. The man to teach it to you is Seph Smith and the teaching tool of choice is his Reverse De La Riva Almanac 2018 Edition DVD set.

Ever since the Mendes brothers started spinning left and right from the De La Riva, this old-school guard got a resurgence. Berimbolos suddenly became a craze and spread through the BJJ community like wildfire. Soon everyone was trying to roll around their opponent, looking for back control. This resurgence of the De La Riva saw the guard evolve into a whole family of sub-positions, some more effective than others. In terms of application in both Gi and No-Gi as well as simplicity, hardly any of them is better than the Reverse De La Riva guard.

So, you should probably get down to AOJ and learn the secrets of the De La Riva tradecraft from the Mendes bros, right? Well, not quite. There’s a great resource out there, and a brand new one at that. Even better, the instructor is one hell of a teacher. His name is Joseph Smith and he is an expert when it comes to the Reverse De La Riva. If you truly want to understand the position, and eventually master it, then the “Reverse De La Riva Almanac” DVD is for you.

ON SALE HERE:
Seph Smith – Reverse De La Riva Almanac 2018

Reverse De La Riva Guard
Techniques List

Who Is Seph Smith?

So, you’re probably asking yourself who this Joseph “Seph” Smith is? Let me refresh your memory. Remember Ryan Hall? Sure you do, he is the guy whose DVD instructionals are mandatory learning material for any student of grappling martial arts. IF you haven’t seen anything from him you’re either new to the game or you’re doing something wrong. Now, back to Seph Smith. Remember the guy who is Ryan Hall’s assistant across most of his digital releases? Well, he also happens to be Hall’s first-ever black belt and the main culprit behind the RDLR Almanac DVD.

Seph started his Jiu-Jitsu journey much like many of his contemporaries. In 2001 he only knew he wanted to train martial arts so he did. JKD, Kali, Muay Thai, BJJ, he dabbled in everything. It turned out, however, that grappling was the best fit for him. he shod grat dedications from the beginning, traveling 2 hours in one direction just to train. He met Ryan Hall at Lloyd Irvin’s academy and when the phenom decided to leave, Seph followed.

As Ryan Hall opened 50/509 Jiu-Jitsu in Fall Church, Seph stayed on as a teacher. Ryan awarded him with his black belt and Seph stayed helping him with the academy and his DVD releases. A few years back, Speh decided to open his own academy, Upstream BJJ in Richmond, Virginia where he teaches at present.

Reverse De La Riva Almanac DVD Contents

INtroduction out of the way, it’s on to the meat and potatoes of the DVD. Why this exact DVD? Well, there are a few reasons to go for it, to be honest, even before you know what’s inside.

Reverse De La Riva DVD
Watch Free Techniques

The first reason to go get this DVD is the subject matter. The RDLR got shunned to the side in light of all the le lock madness in the past few years. This was due mainly to the fact that the regular Reverse De la Riva opened up leg attacks for the top person. Well, this might’ve been true a few years ago, but not anymore. The RDLR evolved, just like everything else that works in BJJ and is now past that particular problem. This means that you have a very potent guard that is not complicated to learn and works against opponents of all sizes. With Seph Smith’s help, you’ll also make it un-passable and turn it into an attacking position.

The second reason is, of course, the coach. Any Ryan Hall black belt is a great choice for me, and especially his first one. Seph has a very similar teaching style to Ryan, focused on details and fun to listen to. Just like him, Seph has the ability to point your focus to what truly makes or breaks the position, and has a conceptual approach to BJJ.

Finally, there’s production. The “Reverse De La Riva Almanac” is a two DVD set with a total running time of 215 minutes. That’s nearly four hours of highly detailed RDLR material to make you a true master of the position. Furthermore, the production is clean, the chapters are marked very precisely and there’s zero dead time.

ON SALE HERE:
Seph Smith – Reverse De La Riva Almanac 2018

Reverse De La Riva Guard
Techniques List

DVD 1 – The Half Guard Shell

This RDLR instructional starts slow. In fact, it starts so slow that you have to wait until DVD #2 to actually learn about the Reverse De la Riva. And this is exactly as an instructional should be. Seph kicks things off with a position that is essential for developing a killer RDLR – the half guard shell.

After a short introduction, Seph describes the half guard shell in a precise and extremely detailed manner. He focuses on the things that make this guard work, and how to maintain it with ease as a go-to defensive position. After all, there’s no guard game without a guard recovery strategy!

Reverse De La Riva ShieldWhen the mechanics of the guard are clear, it’s time to move on to more attacking setups. The first in this progression are sweeps, namely a Marcelo Garcia inspired sweep that works like a charm! Following suit are great combinations that include off-balancing, sweeping and submitting your opponent. Very useful chains that make sense and are extremely easy to follow.

The half guard shell is the perfect base to build an RDL game upon, and Seph explores every sweeping option before moving on. Seph uses a BJJ classic – the underhook to open up half a dozen sweeping opportunities that require next to no energy to complete.

DVD 2 – RDLR Almanac

Finally, time to start messing around with the RDLR! The second DVD is noticeably longer than the first, as it goes deep into the world of De La Riva. It picks up right where the previous volume ended.

Seph offers a complete system by connecting the half guard shell directly with the Reverse De la Riva. After some basic configuration notes, Seph goes straight into attacks. There are all your basics sweeps from the RDLR as well as the essential Omoplata setup. However, once the basics are out of the way, Seph opens up brand new horizons.

Namely, he begins with the Jedi mind trick Ryan Hall loves so much and offers unique concepts around the Leg Drag. From there it gets really interesting. Berimbolo back takes, reverse half guard attacks and the awesome Long Hook concept are just some of the features that are going to revolutionize your guard game.

Finally, Smith wraps up this great DVD with a few concepts on pass prevention. The RDLR’s one big weakness, apart from leg locks, was the leg drag pass. Seph offers a great solution to this conundrum along with a footlock for good measure.

Reverse De La Riva Almanac 2018 – Seph Smith DVD Techniques List:

DVD 1:

  1. Introduction
  2. Half Guard Shell
  3. Recovering The Shell
  4. Marcelo Hook Sweep
  5. Arm Drag | Crotch Lock | Rear Naked Choke
  6. Arm Drag | Crotch Lock 2 | Rear Naked Choke
  7. Defending Over Under Pass | Triangle
  8. Twist Sweep
  9. Back Roll Sweep | Kimura
  10. Shaolin Lapel Sweep | Kneebar
  11. Securing The Underhook
  12. Knee Torque Sweep
  13. Butterfly Hook Sweep
  14. Half Guard Breakdown
  15. Leg Shelf | Back Take
  16. Bonus: Drills Part 1

DVD 2:

  1. Half Guard Shell | Reverse De la Riva
  2. RDLR | Back Roll Sweep | Kimura
  3. RDLR | Modified X Guard | Technical Stand Up
  4. RDLR | 2-on-1 Grip | Scissor Sweep
  5. Platform Arm Bar | Omoplata
  6. RDLR | Jedi Mind Trick | Leg Drag
  7. Jedi Mind Trick | Twister Hook | Back Take
  8. Reverse Half Guard Control
  9. Reverse Half Guard | Leg Drag
  10. Reverse De La Riva | Thumb Down Cup Grip
  11. Spinning Under Opponent
  12. Long Hook | Spinning Back Take
  13. Long Hook | Spinning Back Take 2
  14. Long Hook | Armbar
  15. Long Hook | Berimbolo
  16. Quick Low Single
  17. Leg Drag Pass
  18. Leg Drag Pass Counter
  19. Leg Drag Pass Counter | Footlock
  20. RDLR | Twister Hook Back Take
  21. RDLR | Twister Hook Back Take 2
  22. Drills Part 2

ON SALE HERE:
Seph Smith – Reverse De La Riva Almanac 2018

Reverse De La Riva Guard
Techniques List

Are Pre-Workout BJJ Supplements A Good Idea?

BJJ Supplements

Do you have the habit of gulping down a cup of Joe before you go to BJJ class? Maybe you prefer to get your energy from Red Bull type of drinks. or, if you’re really hardcore, perhaps you take pre-workout supplements to get you going for sparring. Whatever your choice is, you should know that some things work, while others do not. So, instead of drinking ruthless marketing, drink the stuff that’s really going to help you train better. For that purpose, today we’ll talk about pre-workout BJJ supplements and their (lack of) effectiveness.

in the modern age of “nutritionists”  and countless supplement manufacturers, it is very easy to go astray. In terms of BJJ supplements, there are things that work like a charm (creatine, others that greatly help with nutrition (whey protein isolate), and those that are pure marketing. Sadly, this last group of supplements makes up about 80 % of the total supplements in your average supplement store.

Recently the trend is to get ready for a workout by ingesting a pre-workout drink of one sort or another. While this is the norm mainly among bodybuilders and meatheads, it is pretty prevalent in the grappling society as well. But are pre-workout BJJ supplements really worth your time?

George Lockhart DietIf there’s one person that can school you what you need to eat/drink before you train Jiu-Jitsu it’s George Lockhart. Even more importantly, he can teach you what not to consume. His “Nutrition And Weight Management System” bundle, which includes A DVD set and a nutrition E-Book contains guidelines and a complete nutritional plan for grapplers.

Do You Really Need Pre-Workout BJJ Supplements?

So, you’re about to go to class.  You know that class is certainly going to end with a few rounds of rolling. You want to really push the pace so you decide to go for maximal effort during rolling. You’re going to tire out your opponent no matter what the cost. The problem is, you yourself are not in great shape so cardio is not on your side. What do you do?

For the sake of argument, let’s say you gulp down the latest and greatest pre-workout supplement available. It contains a bunch of things you can’t pronounce and boatloads of caffeine, beta-alanine, guarana, and the likes. It’s a stimulant bomb that’s supposed to get you into beast mode.

BJJ Supplements The primary effect your body is going to feel is alertness. You are going to be much more focused, we grant you that. But at what cost? The usual effects of a pre-workout supplement include an improved physiological answer to the training stimulus. Increased heart rate, perspiration rate, and muscle work output. The drawback is that this state of alertness is taxing on the organism. So while you might feel great in the first roll, every subsequent roll is going to be tougher and tougher. The side effect is that once you start getting tired, you’ll be much more tired, much faster than before.

All these stimulants release dopamine which is the feel-good neurotransmitter. It tells our brains that we’re doing something right even if our bodies disagree. In this instance, listening to your body is a wise choice.

How Stimulants Affect The Body

So, let’s look at what stimulants actually do to your body. Mind you, you get a huge dose of a few of them per pre-workout dose, so the effects are likely exaggerated.

Stimulants simply make you feel energetic they do not provide you with energy per se. Most of them basically act as blocks to certain neurotransmitters which helps you stay more alert. Physiologically, they do not help you create nor burn energy more efficiently. Another thing to consider is that your metabolism gets used to processing them, even if the doses are unreasonably high to start with.

Meanwhile, inside the brain, stimulants take over some of your endocannabinoid receptors. These are the receptors that help you calm down. It is also how weed acts when you consume it. Stimulants confuse the brain completely by helping the release of feel-good transmitters like dopamine, while at the same time stimulating receptors that slow us down (similar to weed).

The Best Pre-Workout “Supplement”

BJJ Supplements CoffeeIf it is not clear so far, the message is to stay away from commercial pre-workout supplements! Let’s make one point very clear though. One cup of coffee (or a couple, for that matter) before training is not going to come even near a supplement. The dosage of caffeine is so low compared to commonly used BJJ supplements it’s like drinking water. What you get is a small kick to get you going but none of the “feel unstoppable” mojo.

However, even with coffee, you need to exercise moderation. Being awake and alert in training is one thing. However, drinking 4 scoops of who-knows-what and a giant star bucks latte is completely another. So stick to 3, or 4 maximum, cups of coffee a day. Schedule one of those, right before you go to BJJ. Make it the strongest one if you need to. However, stay away from all the pre-workout powdered stuff if you want to live long enough to get your black belt.

Check Also:

George Lockhart Nutrition and Weight System Management E-book
Performance Nutrition For Grapplers
Grappling Mistakes: How Dehydration Makes You Weaker
BJJ and Alcohol

Purple Belt Guide To Developing A Mean Jiu-Jitsu Guard

Purple Belt Guard

Jiu-Jitsu guard, the quintessential BJJ position. It’s one that offers the most variations and positions favored by grapplers of all levels. It’s the experimental laboratory of every purple belt out there. The guard is the spot where grapplers tend to display much of their creativity. To that extent, none are more dedicated to the Jiu-Jitsu guard than purple belts. The purple belt is when people really polish their guard game and choose the direction in which they’re going to “specialize”. But how should the purple belt approach their guard game development? Let’s see the main aspect a purple belt should focus on when looking to find their best guard variation.

In Brazilian Jiu-Jitsu, the purple belt is the time of experimentation. It is the period of BJJ evolution in which grapplers look into the offensive aspects of Jiu-jitsu. to that extent, they tend to look at fighting off their back, to begin with, much like white belts do with the closed guard. The difference now is that purple belts look at any and all guard variations in an attempt to find the best fit. The guard can be a very dangerous position to fight against, and purple belts excel at using it to dominate. It is not uncommon for purple belts to have Jiu-Jitsu guard game that takes even brown and black belts by surprise.

However, it is very easy to get lost in the maze of guard variations in BJJ. Especially when, as a purple belt, you’re not quite the finished product yet. While experimentation is encouraged, jumping from guard to guard trying to master them all is a futile endeavor. Instead, there is a smart way to approach the guard game with the experience of a purple belt. All it takes is to follow a few common principles to give you a solid direction. When you have that you can try whatever guard you like, and you’ll be successful with it!

The Best Guard Retention DVD and Digital Instructionals

The Brazilian Jiu-Jitsu Guard Game

The Guard as a position in BJJ is what originally captivated the martial arts world. As countless times before, I’ll refer to that legendary first UFC event. The skinny, Gi-clad Royce Gracie got into closed guard and everyone thought he was a goner. After all, until that point, ending up on your back in martial arts meant certain defeat. Enter Royce and his submission game and everyone got a massive surprise!

Purple Belt Jiu-JItsu Guard From there on, Brazilian Jiu-Jitsu gained worldwide popularity, MMA kicked off as a sport and the Jiu-Jitsu guard started its relentless evolution. When I’m referring to guards, for the purpose of today’s article, I mean all kinds of guards. This means the closed guard, the half guard, the open guard, and anything in between. The only defining variable is being on your back.

The sheer volume of possible variations and sub-variations means that one can ever truly master the JIu-Jitsu guard game entirely. This, however, doesn’t stop purple belts from giving it their best try. After all the guard offers security, it has a mechanical advantage over someone fighting against gravity and has countless attacking options. These are all markers of an offensive Jiu-Jitsu game, which is the purple belts’ area of operation.

As such, approaching the guard shouldn’t be done with a white belt mentality. Instead,  the goal is constant personal evolution along with the identification of the best positions to suit a grappler’s style, body type, etc. In those terms, there are a few basic principles that purple belts need to pay attention to.

  • The Principle Of Movement

The one thing that purple belts need to remember when working off the back is to address movement. This, however, doesn’t just mean moving on their own. Of course, the deliberate and precise movement is key to the success of any BJJ technique. More about that further along in the article. For now, the first thing to be aware of is constant movement and adjustment off the back. Secondly, and equally as important, you have to prevent and control the movement of your opponent.

In terms of the first point, you need to remember that you need to have an active guard game if you have any hope of being offensive from the bottom. This means you need to take initiative and never let your opponent settle into your guard. Constantly being on the move is a great way to accomplish this. Furthermore, it prevents your opponent from easily pinning you. it also opens up better angles and more attacking opportunities than staying in place.

IN terms of controlling your opponent’s movement, there’s one huge aspect you must master from the guard. That is the art of grip fighting. In both Gi and No-Gi, you need to have superior grips in order to prevent movement and apply your game. Remember that you need to prevent motion as well as constantly moving for a solid guard game, regardless of guard variation.

  • Precision And Timing

This is, arguably, the most crucial aspect of the Jiu-Jitsu guard game for a purple belt. Once again, white and blue belt strategies that focus on strength and power are largely useless at this level. Instead, everything you do needs to be with a clear intention. There should be absolutely no waste of energy in order to maintain attacking pressure for a long time.

Purple Belt Jiu-JItsu Guard To that extent, the best thing to remember is that not every guard is suitable for every situation. For example, there’s no point in playing spider guard if your opponent is too far back where you have no leverage. The stubborn pursuit of one aspect of the guard game is sure to backfire on you. Her, safety first concept should be the focal point. The opponent’s goal is to break the structure of your guard and use their weight against you.

So per our example, when the opponent backs away from your spider guard, look to transition into the seated guard or a De la Riva variation. This is going to make your opponent work from the beginning of during which time you can time an attack. Correct timing is another huge aspect of attacking off your back. Remember to keep your opponent guessing until the one precise moment in which they’re powerless to stop your movement. This is what separates the advanced guard game from that of a beginner.

  • Purple Belt Submission Strategies

Finally, a word or two on submissions. After all, tapping someone out from your back is the ultimate BJJ manner of finishing a match or a roll. In that sense, you need to look at what I wrote above, in terms of timing and precise application. Not all submissions work from all guards and in all situations. There’s also the subject of chaining submissions together.

Purple Belt Jiu-JItsu Guard When you look to apply a submission you need to know if that move is actually applicable from a given guard. Let’s use the spider guard again. When in spider guard, you’re not likely to be able to go for a Kimura with any success. Instead, a triangle or an armbar are your best options. Even then, you need to know when your opponent is close to getting out. There’s no point hanging on if a submission isn’t working as it is supposed to. This is where chaining comes in.

From the aforementioned triangle from the spider guard, you can look at a few follow-up options. For example, you can transition into a straight armbar or an Omoplata. You can even look to set up an Ashi Garami variation and surprise the opponent completely. Whatever you choose to do, remember the principles mentioned above. Keep moving and use the grips you have to adjust and time your transitions. that way nobody will be able to resist your guard game, regardless of which guard you play.

Related Articles:

REVIEW: Neil Melanson DVD – The Ground Marshal Guard
Todays “Modern” BJJ Guards Were Used in Kosen Judo Tournaments in 1952
The Complete Sneaky BJJ Rat Guard System
The Ultimate Open Guard Masterclass For BJJ

Strategies To Win The Battle With BJJ Arthritis

BJJ Arthritis

The one spot on our bodies that grappling really affects in a negative way is joints. Whether it is our knee joints, finger joints, elbow joint, or some other, BJJ is sure to take its toll. For some, the pain comes immediately in the form of injuries. That’s not what we’re going to focus on today. The subject of this article is much sneakier and more difficult to recover from the consequence of the grappling lifestyle. Today, we tackle the problem of BJJ arthritis.

There’s a saying out there that goes something like this: “If you’ve been training BJJ for longer than a year, and you wake up pain-free, it means that you’ve died”. For all intents and purposes, this is a fact of grappling life.  All those nagging little aches and pains we have one thing in common. They’re going to be even more nagging and painful in the future when they reach the level of full-blown BJJ arthritis.

So, how do you approach this worrying issue? First, you need to be aware that it’ll hunt you for sure if you reaming in BJJ for more than a decade. There’s also a genetic and individual competent to it, so not all grapplers will experience arthritis the same. Secondly, you need to understand arthritis so that you know the warning signs. And finally, you need to accept the fact that it’ll inevitably come and you need to prepare accordingly.

Arthritis As A Disease

So, how do we explain BJJ arthritis without turning this article into a medical piece? Let’s take it to step by step and avoid all the medical nomenclature, to begin with. First and foremost arthritis as a word means inflammation of the joints. It may refer to a specific joint in the body or a multitude of them. In some cases, it may even engulf all of the joints in the body, but these conditions are predetermined. That said, the inflammation might be momentary, meaning you get it due to trauma or overuse and it dies down after a while with the right therapy. The more worrying one is chronic arthritis which never really dies down and flares up regularly. Unfortunately, this is the type of arthritis commonly associated with Jiu-Jitsu.

BJJ ArthritisBasically a joint is the connection of two bones in our bodies. Since bone-on bone connections are painful, our joints use cartilage to cushion the interaction. Cartilage both connects and protects the bone ends within the bounds of a joint. Cartilage is expendable, though, and slowly degrades with everyday use. Now add to that the stress of grappling and you’ve got a major factor influencing cartilage health.

As the cartilage in the joints gets smaller and weaker, the more bone-on-bone contact there is. This, as we already concluded, is extremely painful and lead to further inflammation. Constant and repetitive stress leads to the worsening of the condition.

Now, genetic and autoimmune predispositions aside, BJJ arthritis is a chronic form of ailment that can hit any joint in the body. For example, one body part that’s all but certain to develop arthritis is the joints of the fingers.

Dealing With BJJ Arthritis

So, now that we understand arthritis and we’re aware that there’s no getting away from it, what do we do? After all, giving up BJJ is not really an option, otherwise, that would’ve prevented arthritis from even showing up.

In terms of practical solutions that are available to grapplers, there are a few that actually work. Do not expect to cure arthritis altogether. That said, there are ways you can reduce the effects and train as pain-free as possible. These solutions include a few changes to the way you approach training and, more importantly, recovering from it.

BJJ Arthritis
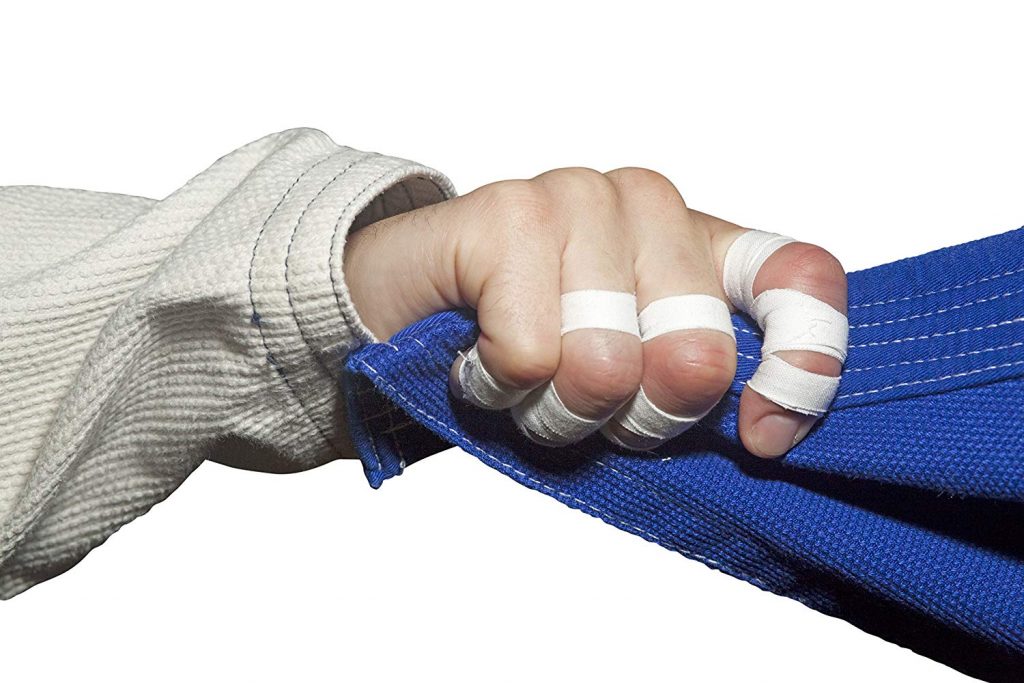
One very important way of dealing with arthritis of the fingers, in particular, is adopting a No-Gi game. This doesn’t necessarily mean dropping the Gi altogether. It means staying away from spider guard and employing more No-Gi grips even when you’re rolling with the Gi. It is going to give your knuckles some much-needed rest.

As far as anatomical strengths go, joints work closely with specific surrounding muscles. This translates to increased joint stability when associated muscles are stronger. IN terms of this, make sure you include some form of strength training outside of the gym, especially with affected joints. Also, make isometric exercises a part of your routine as they help muscles work on stabilization more which gives the joint a rest.

In recovery terms, focus on adding flexibility and mobility work to your daily routine. Even if you’re not training, you need to go for mobility work daily. On days when you train, mobility is absolutely mandatory.

Finally, a huge one is warming up. If you have a specific joint affected by arthritis, make sure you give it proper attention during warm-ups. If you have more than one joint, be ready to warm up significantly longer.

The Nutritional Side Of Resolving Arthritis

There’s one aspect of dealing with BJJ arthritis many people do not really comprehend is the nutritional one. As with many other chronic conditions, nutrition plays a huge part of prevention and control. In terms of arthritis, there are a few strategies and some supplements that you should consider looking into. And remember that as important as what to use is, what to avoid is equally as crucial.

BJJ ArthritisRight from the start, do not expect miracles from anything we mention. That said, some of this stuff has been proven to help so it’s worth giving it a try. Omega 3 fatty acids rank really high on the list of stuff that works. In other words, get your fish oil in and you’ll score one over arthritis. fish oils Now, the best way to get Omega 3 acids is directly from fish. However, it is doubtful that you can get the required amount from food only, so supplements might be a better choice. Krill oil supplements or Omega 3 fatty acids in any form should be sufficient.

Another very underrated product is Curcumin. While many people think that this is based in mumbo –jumbo, there are actually studies out there that support curcumin’s anti-inflammatory properties. Once again, go for a curcumin-rich supplement, as all the powdered curcumin spice in the world won’t really help you deal with arthritis.

On a finishing note, let’s glance over one supplement that doesn’t really do anything. It is down to shrewd marketing that grapplers with arthritis turn to glucosamine and/or chondroitin products for help. These compounds have no effect on joint pain or slowing down arthritis whatsoever. And remember, arthritis is just another opponent that you need to beat. So fight smart!

Dealing With Jiu-Jitsu Injuries: Elbow Joint Hyperextension
What Is The Best BJJ Finger Tape, How To Use It & Why

Sumi Gaeshi – The Perfect Throw For Guard Pullers

Sumi Gaeshi

In Brazilian Jiu-Jitsu, most of the takedowns come from either wrestling or Judo. In that sense, those that practice mostly Gi Jiu-Jitsu, find Judo throws to be more appropriate. However, Judo throws are not all the same, as they tend to belong to certain categories themselves. As such, not all these throws fit Brazilian Jiu-Jitsu equally as well. Some, however, are simply tailor made for the Gentle Art. One of them is the Sumi Gaeshi, AKA the sacrifice throw. Let’s see where exactly the Sumi Gaeshi fits in BJJ and how to get the most out of it.

Jud throws are an extremely useful tool for Brazilian Jiu-Jitsu practitioners. Since Judo also places a heavy emphasis on grip placement, its throws are right there for the taking. the only trouble is that Judo throws do take quite some time to master. Even if you decide to focus on simply one throw, you’re going to need to put in the reps. Judo is all about non-stop drilling, which is something ground fighters cannot focus on completely. So, throws that fit BJJ need to be fairly easy to learn and match the need of the game. Enter Sumi Gaeshi.

As far as the usefulness of Judo throws for Brazilian Jiu-Jitsu goes, there are two points to remember. First, you need to choose the throws that are not going to land you in trouble. An Ippon Seio Nage is a great throw, but it may result in your opponent taking your back. Eliminating risks is the first criteria for choosing a takedown. The second is the learning curve. There’s hardly a point dedicating huge chunks of your time to learning all Judo throws for BJJ purposes. If you can, then, by all means, do so. However, for those pressed for time (which is the case with the majority of grapplers) Sumi Gaeshi fits the bill perfectly. Even better, there’s a great fallback in case you fail – pulling guard.

Takedowns fall under the fundamental BJJ techniques category and students of all levels need to know how to get the match to the ground. Bernardo Faria’s “Foundations of iBrazilian Jiu-Jitsu” DVD set covers every aspect of grappling fundamentals. Takedowns included! 

How The Sumi Gaeshi Works

The Sumi Gaeshi throw is part of the sacrifice of throws family in Judo. It is a throw that Judokas learn early on, and some continue to use it all the way to Olympic glory. In terms of mechanics, the Sumi Gaeshi appears quite easy. You take an opponent and you roll on your back, throwing the opponent over your head. Well, in practice, executing the Sumi Gasehi is not quite that simple.

Sumi Gaeshi For Brazilian Jiu-JitsuThe Sumi Gaeshi depends on a few mechanical principles in order to work ta a high percentage rate. First, you need to have the correct grips in order to even think about going for it. Secondly, you need to have correct foot placement and posture control. Finally, the throw itself needs you to position yourself correctly underneath the opponent.

The Sumi Gaeshi grips are originally on the collar of an opponent and on the back of the belt. Alternatively, for the needs of Brazilian Jiu-Jitsu, you can also use a sleeve and back of the Gi grips. Foot placement, footwork, and posture control are also crucial to the Sumi Gaeshi. Namely, the grips’ purpose is to allow you to break the opponent’s posture. Once you have that, you need to make sure your hips get closer to the opponent, which requires you to step forward. Then, one of your legs (on the side of the belt/back grip) needs to hook the inside of the opposite side leg, similar to a butterfly guard hook.

Finishing the Sumi Gaeshi requires you to aim to place your butt next to the foot you’re standing on. The closer your butt is to your heel, the better. Only then can you think about rolling on your back, maintaining a curved spine and kicking with the hook-in leg.

Brazilian Jiu-Jitsu Applications

For Brazilian Jiu-Jitsu, the advantage of the SumiGaishi is primarily in its easy mechanics. It is a throw that you can master in a short while, compared to more complex moves like the Uchi Mata. It also ties in perfectly to the game of people who pull guard. In BJJ competition, pulling guard does not result in points. So, if you have a solid Sumi Gaeshi ready, you can use it as a first attack. If for some reason, it fails, you can always continue into a closed or open guard pull and still work your game plan. IF it works, however, the Sumi Gaeshi most often lands you into the mount, which along with the throw equals 6 points. that’s quite the advantage to have if you ask me.

Furthermore, the Sumi Gaeshi doesn’t have to be strictly offensive. In sports Judo, grabbing the legs is forbidden so people use the Sumi Gaeshi exclusively as an attack. Since in BJJ there’s no such rule, the Sumi Gaeshi is the perfect single-leg takedown counter. Even better, you can use it as a sweep, without even being up on your feet. This thicks all the BJ Jboxes as you have a high percentage move that you can attack and counter with from different levels in a match.

Sumi Gaeshi Takedowns

Sumi Gaeshi For Brazilian Jiu-JitsuIn terms of takedowns, once you establish grips you can think about the Sumi Gaeshi. Since people start Brazilian Jiu-JItsu matches bent over, establishing proper grips is not as difficult as in Judo. For offense, the sleeve (at triceps height) and back of the Gi grips are sufficient for an effective throw. Remember to Be fast though, as you can’t really maintain the entry position for long without compromising control.

Sumi Gaeshi For Brazilian Jiu-JitsuAs a single-leg counter, the Sumi Gaeshi requires next to no set up. Namely, as your opponent shoots and establishes grips, there’s a clear path to their back. A cool tip to know is that once you get a belt grip you need to force your elbow into their spine, completely controlling their posture. Whether it is collar or sleeve, from there you can get any second grip you want. In terms of leg placement, your foot is already in between the opponent’s legs, all you need is to turn it outwards and hook with it. From there you finish just like before, butt to heel and roll.

Sumi Gaeshi From Guard Positions

Form the bottom, there are countless of positions that you can use to sneak a Sumi Gaeshi from. Whether it is the closed or open guard, all you really need is the hook on the leg and the grip on the belt.

Sumi Gaeshi For Brazilian Jiu-JitsuFrom the closed guard, look to establish double sleeve grips. Once you have them, swing one leg over an opponent’s arm, much like when looking for a lasso guard. Switch the grip you have on their sleeve to your other hand and sneak the hook another leg. Next, sit up and go for the belt grip. Sweeping from there is as easy as lying back and extending the hook-in leg.

Also, any time you find yourself in a butterfly guard, for example, you can think of a Sumi Gaeshi. Since the hook is already there, go for the belt/back grip before you try to sweep. Starting from an overhook butterfly guard makes this really easy to get.

Related Articles:

BJJ Mobility Drills For Flexible Hips
Grappling Without Limits: Wrestling And Judo For BJJ
Balance In Jiu-Jitsu As The Ultimate Sweep Defense
Jiu-Jitsu Techniques For A Complete Competition Gameplan

BJJ Gift Wrap – The Perfect Mount And Back Control Hybrid

BJJ Gift Wrap

If you look at the most dominant positions available in Brazilian Jiu-Jitsu, two are most likely to catch your eye immediately. The mount and back positions are considered the check-mate positions of grappling. In point baed competition they offer the most points and open up great attacking opportunities. Even better, you’re relatively safe when you’re attacking from them. Even switching between the two is possible and, in fact, used by many. However, there’s also a position right between them, offering many of the benefits of both. It is the perfect amount and back hybrid, also known as the BJJ gift wrap.

So, what exactly is this BJJ gift wrap position? We’ll get into the nitty-gritty of it, but for now, let’s paint a simple picture. You know how a person’s arms wrap when put in a straitjacket? Well, getting someone in the BJJ gift wrap is similar to that, only you use your arms to trap theirs instead of a shirt. Positionally speaking, you’re on top of your opponent, similar to mount, but also halfway behind them, like when you’re attacking the back. IT’ll get clearer as you go through this article, I promise.

The BJJ gift wrap opens up a whole new world of opportunities. Why should you use it? Well, mount and back attacks are extremely well known and there are many great counters and defenses to them. Now, if points are what you’re after, you can go into mount or back and stay there until you win. IF you want to go on the attack though, and submit a very defensive and experienced opponent, consider the gift wrap. It’s the ultimate submission hunting position with the only escapes leading to mounting or back control.

Nasty controlling positions and even nastier submissions are available to learn from a grappling expert! Matheus Diniz has a DVD set out named “Position To Submission” and it is nothing short of astonishing. Read our review and be sure to order your copy fast!

The BJJ Gift Wrap Position Clarified

Th BJJ Gift wrap is not a position you’ll encounter often. Many people see it as a transition between the mount and back. This is because many people do not utilize the correct grips that actually make the position. The gift wrap is really easy to get, and perhaps even easier to retain. LKet’s see how it works.

https://bjj-world.com/matheus-diniz-dvd-position-submission-review/For the gift wrap, you need to have the opponent on his side, at least initially. The position of your legs is fairly simple – they should be in combat base more or less.  Since the opponent is on the side, you want them to stay there, so that you can torture them as long as possible. This means preventing them from rolling on their back, which is where the knee comes in. Your knee needs to be on the back of their bottom shoulder, shin parallel to their spine. The other leg is over the opponent, foot on the mat and heel dug into their abdomen/sternum.

BJJ Gift WrapNow, for the grips. This is what really makes the gift wrap a potent controlling position. You want to have one arm around the opponent’s neck, ending up in front of them. This is the arm that’s nearer to the opponent’s head, of course. You simply put your elbow behind their head and your palm in front of their bottom shoulder. The goal is to use your other arm to guide their top arm’s wrist to the arm wrapped behind the head. Once you control their wrist with your hand, pull back your elbow. You’ll wrap their own arm around the front of their neck/face while placing a wedge behind their head (your forearm) at the same time. Perfect control that leaves you with a free hand as a bonus!

Getting To The Gift Wrap

Getting to the gift wrap position is easy from a multitude of positions. Today, we’re just going to focus on getting there from the back and the mount. Remember that the grip is essential for this position. You need to have their own arm wrapped around their head, or there’s no control. Once the arm is wrapped, they won’t be able to move forward or back and you can look to attack.

To get into the BJJ gift wrap from the mount, you need to force your opponent to one side. The easiest way is to simply transition into combat base when an opponent tries to bump you off. Just make sure to have both arms available. A more offensive option is going for an Americana, or simply pulling on an opponent’s T-rexed arm.  Basically, anytime you can get an opponent’s wrist to the mat on the opposite side, you can gift wrap them. Use your same side arm to control their wrist until you successfully use it to your other hand for control.

Form the back, things are even easier. From hooks and seatbelt control, use your top arm to catch the wrist of the opponent’s opposite arm. You might even start off a Kimura grip and work from there. Once you have control of the arm, simply swing your opponent to the desired side. remember to pull the bottom leg out so you can place the shoulder wedge with your knee. You’re now ready to torture your opponent.

Gift Wrapped Submissions 

Form the BJJ gift wrap you have plenty of attacking options. In fact, you can choose whether you like to finish or place crushing pressure n your opponent first. For pressure placement, simply turn your top leg with the foot towards their head. Actually, it is very similar to the S-mount position. The point is to place your weight on the side of their floating ribs. It is unimaginable pain that’ll sometimes get you a tap on its own.

BJJ Gift WrapNext, submissions. Since you’re already in the pressure (S-mount-like) gift wrap, why not get an armbar? It is as easy as threading in your free arm and throwing the bottom leg over their head. When you’re going for the armbar from here, remember to stay really heavy until you swing the leg over the head. The goal is to completely restrict movement before you submit.

BJJ Gift WrapThe triangle choke is also readily available. When you’re in the basic gift wrap, you have the perfect leverage to open up the opponent’s neck. Make sure you control their wrist with your free arm so that they don’t bother you when entering. A triangle is as easy as pulling the trapped arm towards you and guiding your top leg in place. You can finish mounted or from the back, but I prefer staying on top.

BJJ Gift WrapFinally (although not ultimately), there’s an easy and fast choke you can sink in immediately from the gift wrap All it takes is to adjust your grip ever so slightly. The goal is to thread your free arm under the trapped arm and over the opponent’s neck. Your arm should end up sticking above their ear. To finish, pull on the trapped arm while forcing your opposite side forearm into their neck.

Note: Click on GIF videos to go to full technique Videos

Related Articles:

The Paper Cutter BJJ Choke For Gi And No-Gi
Subtle Tricks For Developing World-Class BJJ Chokes
Roll Your Opponents Into Submission With The Anaconda Choke
The Complete Sneaky BJJ Rat Guard System

Watch Matt Serra being Attacked By a Drunk Guy in the Restaurant

According to what we can see in this video Matt Serra, former MMA star and UFC Champion was obviously attacked by a drunk guy in a restaurant. He handled him pretty easily with a smile on his face until the security came. It’s almost the same situation as Ryan Hall’s one with the same outcome.

The most interesting thing in this video is how Matt Serra was laughing when a guy told him that he’ll F*** him up. You gotta be pretty drunk to attack and say something like to a Matt Serra. A guy who was a former UFC champion and the one who managed to take a title from one of the greatest UFC fighters ever, Georges St. Pierre.

Matt Serra published a video below on his Instagram profile with words:

“How do you spend the night before your UFC Hall Of Fame induction? You subdue some drunk asshole that was threatening waiters then tries to swing on you.”

http://instagram.com/p/Bk1wRZKFTQG/

But what’s in the question is what really started this fight? We believe that Matt Serra was attacked by this drunk guy. But Matt Serra also posted a video before this “fight” of him talking about some obviously drunk woman and a guy he subdued talking to that woman.

Here is a video that Matt Serra posted a bit before the fight with a drunk guy happened so it’s possible that something connected with this situation could cause a drunk guy to get into an altercation with Matt Serra.

I guess we’ll find it out a bit later. Till then check out a video of Matt Serra recording and commenting on a situation that happened before he was forced to subdue a guy smisling and having fun with him until security came.

http://instagram.com/p/Bk1q15zljcs/

In a case, you didn’t know there was a similar situation with Ryan Hall being attacked in a restaurant while having dinner with his friends. In a video with Ryan Hall, we can see the full situation going on and Ryan didn’t do a single thing to a guy who attacked him.

Ryan Hall was obviously attacked by a drunk guy who was threatening him for some time before Ryan Hall decided to react and subdue a guy. Just like Matt Serra, Ryan Hall also wasn’t punching the guy or doing any harm to the guy. He was just controlling him and even gave him a jacket after the “fight.

It’s pretty bad that we can’t see a full situation that was going on with Matt Serra and the guy who attacked him. Maybe Serra was recording him to have a backup video if something goes wrong or the guy press charges against him, maybe he was just having fun… too many maybes in this story but we hope we’ll find out the full truth in some time.

Although, all the props to Matt Serra for not hurting the guy and just controlling him. It’s something that champions do and what should anyone do in situations like this especially if you’re trained in martial arts and if it’s pretty clear that someone you’re in an altercation with can’t do anything to you.

Here is a video of Ryan Hall subduing a guy who was threatening and provoking Ryan hall until Hall decided to make a move.