


Conditioning for BJJ is getting as complicated as quantum physics nowadays, if not more. Granted, the conditioning methods available today are light years ahead of those that were modern just a decade ago. A lot of science and experimentation goes into the art of conditioning for combat sports. With the worldwide appeal of MMA, the rise of Jiu-Jitsu, and a bunch of combat sports in the Olympics, it is understandable why this is a huge priority. moreover, very few people have been able to successfully crack the conditioning puzzle so far. So what should a grappler do in this world of intricate and confusing Jiu-Jitsu workouts their inventors swear upon? The answer is to look back. there are certain methods that have worked for centuries. One of them is the simple yet grueling rope climb training.
Rope climb conditioning is as basic as it gets. You get a rope, you hang it somewhere high and you go up. Easy peasy. Well, not exactly. Give it a try and you’ll see what I mean. While the basic idea behind the activity is fairly simple, the execution is anything but. If you like to devise Jiu-Jitsu workouts based on rope climbs, you’ll need to make sure you’re able to do them correctly. Worry not newbies, as we’re going to show you how to start from the very beginning and progress up the rope.
IF you’re wondering about the effects such a simple workout is going to have, just look at gymnasts. All of them are super jacked and able to do wonders with their bodies. Do you know what is one of the most essential skills gymnast master very early on? The rope climb. And yes, they start from the bottom and work their way up through each progression. This is the only way to ensure bot positive adaptation for your body and ultimate safety. Oh, and freakish strength and unbreakable grips as well, not to mention the gas tank.
Rope Climb Benefits For Grapplers
The benefits of a simple activity like the rope climb are truly diverse. They’re exactly what a grappler needs, to be honest. They hit the sweet spot for BJJ competitors and enthusiasts alike. There are plenty of benefits that grapplers usually look to develop through different Jiu-Jitsu workouts. Why not get them all at once, along with some bonus benefits on top?
 To begin with, the most obvious one. Grips. Just hanging on a rope is a brutal task. going up one gets more and more tough on the grips and you go further up. Taking the legs out of the equation takes it to new levels of difficulty. And going back down in this manner just rubs salt to the wounded palms. Grips are a limiting factor in grappling. rope climbs require you to move your weight exclusively with the help of your forearms, Moreover, you need to resist gravity along the way.
Next up is arm and back strength. The most prevalent muscles we use in BJ are the pulling muscles of the upper body. Yes, even when you’re on top your always tugging on something in Jiu-Jitsu. Rope climbs are going to make you incredibly effective at this since all your upper body pulling muscles lear to work in unison.
Another aspect of rope climb training is power. Gymnasts develop extreme explosive power thanks to rope climbs. Grapplers get the same benefit, along with some great conditioning work as well. Getting up and down a rope is going to develop immense strength and power for sure. Doing so at pace is going to make you a machine.
Equipment And Progressions
So, what do you need to start doing your conditioning Jiu-Jitsu workouts with a rope? Surely any rope would do? Well no. Get a thin rope and you’ll palm are going to burn before you make it a few feet up. In terms of equipment, you need to look for a rope at least 2″ in diameter. Also, go for as much length as space allows.
In terms of actual rope climb training, there’s one thing that you have to remember. you need to warm up properly. Warming up is both the best way to prepare and the first progression you need to master. A good warmup includes a lot of forearm work. Wrist circles, finger extensions, wrist rollers, some biceps and triceps work, as well as static rope climbs, are the bare minimum you need to go through before every session
 As far as progressions go, the very basic one is mastering horizontal pulls. This means your feet are on the ground and you’re holding yourself above the ground horizontally. At first, master just going downwards. Then go for pull repetitions, and finally go up and then down.
The next step is to start going vertically. Since you’re already hanging isometrically during the warm-up you’ll skip[ that. To begin with, you’ll use your feet to help you go up. The first method is the step assist method, in which you use one leg to help you create a loop to step in with the other. When you master this, start using just the insides of your feet on both sides of the rope to help you up.
After this, it’ time go arms only. When going up and down like this becomes too easy, you can turn to the weighted vest for help.
Rope Climb Jiu-Jitsu Workouts
Remember that climbing up a rope can be very hard on your shoulder and elbow joints, so make sure you’re well oiled up for training. Warm-up properly and give your joints some extra attention if you’re nursing injuries. Also, pay attention to the length of the rope. Climbing up a 10 and 25-foot rope is a very different thing. It is a progression in itself and one you need to always consider. that said, here are a couple of Jiu-Jitsu workouts based on rope climbs:
-
Beginner Workout
In terms of programming, beginners need to focus on distance. Getting all the way up the rope and back down is the most important goal. From there on, you can focus on how many times you do it. Here’s a sample workout to try:
 Warm-up properly and include isometric hangs. 10-30 seconds is plenty. Try to do it 2-4 times with as much rest as you need in between.
- Work on your pulling strength and grips. Do an eccentric horizontal climb (downwards) with feet on the ground or elevated. Try to cover as much distance as possible and repeat 3 times.
- Go for a vertical rope climb variation. Hit any of the progressions involving the feet that we outlined before. Again, go for a maximal distance no more than three times in a row.
- Finish with some pull-up variations to make your forearms used to working when tired. Gi pullups are a great way to develop grappling-specific strength endurance.
-
Advanced Workout
This is where things get interesting. How do you know that you’re up for advanced Jiu-Jitsu workouts involving rope climbs? Well, if you can go up and down a rope 5 times with arms only, you’re advanced enough.
- Start with arms-only climbs. Go for just one set of full-length climbs. Look to execute it as fast as possible.
 Lead hand climbs. This means that you’re going to keep the hand that’s on top in the same position all the way. Instead of gripping hand over hands, one hand is always going to be on top all the way up and down. repeat on the other side.
- Reverse Grip Climbing. To do this rope climb variation, grip the rope with your pinky fingers towards the ceiling. Now go up and down the length for one set again.
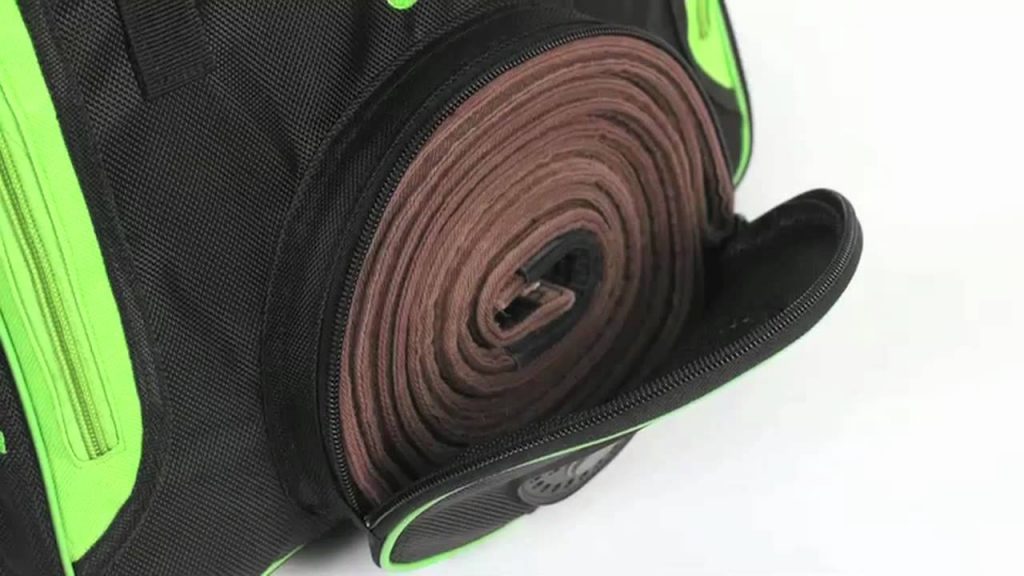
- Introduce weight for your final exercise. A weighted vest works best, but you can also use a loaded backpack. One set as fast as possible is enough.
* Add a set each couple of weeks. Also, once a month do this workout as a race, up against a teammate.
Check Also:
Dealing With Jiu-Jitsu Injuries: Elbow Joint Hyperextension
Wrestling Conditioning Drills For Brazilian Jiu-Jitsu
Quick Jiu-Jitsu Conditioning Workouts For Busy People
The Future of Jiu-Jitsu: Technology and Modern BJJ
The 6 Exercises To Develop Insane BJJ Strength
Use Gymnastics To Become Freakishly Strong For BJJ
The Best Strength & Conditioning DVD and Digital Instructionals

 Another great finishing option is the Kimura. This is the go-to submission after a successful Tornado sweep. The sweep itself actually lands you in the perfect position to get a Kimura. All you need to do is hold the arm you already have trapped tightly until you let go of the ankle and set up in a figure four grip. From there’ finishing is as easy as looking over your shoulder.
 We begin the BJJ stretch routine with the legs up the wall stretch. This one is a simple as the name suggests. Simply lie next to the wall and get your butt a close to the wall ass possible. In the best-case scenario, you should be touching the wall. Straighten your legs up and put them together. Lie flat with your back on the mats and keep the back of your head on the ground as well. Keep the arms bent at the elbows, palms on your belly. Stay there for the minute and try to calm your breath as much as possible
 From the previous position, you’ll simply proceed to widen your legs to each side, as far as comfortable. Remember that stretching shouldn’t feel uncomfortable at any point. Your torso, head, and arms remain as in the first stretch. Your legs should be as wide as possible. heels on the wall. Once you reach your maximum stay there for a few breaths. Use the remainder of the minute to try and go even further. With every exhale attempt to get your legs just a little bit wider. Stop before you feel discomfort.
 The wall butterfly stretches much like the seated butterfly. When you have your legs up the wall, gravity does not play as big of a role in the stretch, meaning you’ll need to work a bit more. Since you’re already there, all it takes is to get your feet next to one another after the wall straddle stretch. Once you have them there, try and get your heels as close to your butt as possible. Keep your head and torso on the ground but place your hands on each knee to help with the depth of the stretch. Once again, use the exhales to go deeper into the stretch and never overdo it. This is a nice relaxation from the wide straddle and an awesome way to increase your hip flexibility for BJJ.
 This is one you’re used to doing regularly. All that changes now is the position of the support leg. For the glute stretch, you need to place the ankle of one leg over the knee of the other. The support leg is going to be placed on the wall, knee bent at 90 degrees. The other leg goes in front of you and on the knee of the first one, also at 90 degrees. Place both your arms on the shin, one at the knee and the other at the ankle. Not unlike adjusting a triangle choke. Make sure you keep your ankle steady and push on the knee as much as possible. Repeat on the other leg for a minute as well.
 Another classic stretch, yet usually not done correctly. As you finish with the wall glute stretch, lay on your side and place one leg on top of the other. Keep the knees bent and the feet on the wall. Get a foam roller, or simply roll up your Gi jacket and put it under your neck. This is a crucial part of the stretch as your spine needs to be in alignment. straighten both arms and place them on top of each other in front of your chest. Now open the top arm and look as far to the other side as possible. Let your top arm open up as much as you can, while still keeping it straight. Again, repeat on the other side once you’re done.
 This one is very simple and to the point. Get in the same position as with the first stretch. Take your belt and fold it in the middle. Now place one foot directly in the loop and hold on to the two straps. The other foot stays up on the wall. Raise the leg that’s in the belt towards you and attempt to straighten your knee as far as you can. If you think you can go further, place your hands further up the belt straps on either side. Repeat on the other leg.
 The hip flexor stretch is a complete core stretch, despite its name suggesting otherwise. For this one, you need to be facing away from the wall. Place one knee on the mat, right up against the wall, so that your shin and instep are on the wall. Have the other leg in front of you, bent at the knee, like at the bottom of a lunge. push in with oy ur hip and raise your arm on the side where your leg is up against the wall. If you can’t get your knee to the wall, use your Gi or whatever’s around to elevate it behind you as much as you can.
 To finish this BJJ stretch routine, you’ll once again turn to the foam roller or rolled-up Gi jacket. Simply place it on the mats and lie over it, so that your upper back is directly over the roller/Gi. Bend backward put the top of your head on the mats and extend both your arms over your head. Stay in the position for the duration of a minute.

 That’s where the spider web position shines. What you basically need to do is switch the arms. Look to insert the arm that’s closer to your opponent’s head into their elbow crease. To enhance control over the arm, you have to grab your opposite side hip with the palm. The goal is to have your elbow control their arm, while your palm holds your hip. The legs stay in the usual manner, over the head and neck. The second arm, though, has a different task. The aim is to lie on your side and use that arm to hook the nearest leg, under the thigh and all the way back up. Now, you’re in the spider web and the fun can begin!
 Secondly, there’s the hook on the leg. Hooking an opponent’s thigh removes the ability of hip movement. This means escaping is not going to work until they get their leg back. In terms of extra control, once you have the leg hooked, the aim is to connect both your hands. A gable grip is a way to go here. Now, you have an opponent deep into an armbar, with their leg trapped and bent, taking away all movement possibilities. Crushing discomfort is just an added benefit.


 When the mechanics of the guard are clear, it’s time to move on to more attacking setups. The first in this progression are sweeps, namely a Marcelo Garcia inspired sweep that works like a charm! Following suit are great combinations that include off-balancing, sweeping and submitting your opponent. Very useful chains that make sense and are extremely easy to follow.