John Danaher DVD Instructional REVIEW – Leglocks: Enter The System

John Danaher DVD / John Danaher Instructional review

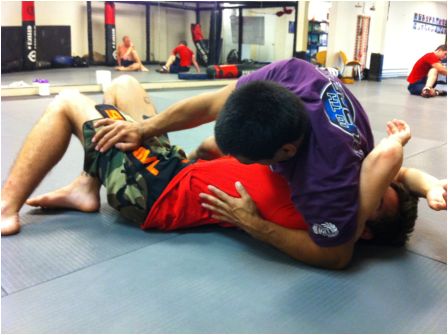
The John Danaher DVD on leglocks is finally here! “Leglocks: Enter The System” is the long-anticipated John Danaher Instructional that the grappling community has been drooling for. Now that it is here, we offer an in-depth review of al lit’s content which spreads out for more than 9 hours! If you hoped for a different kind of instructional, this John Danaher DVD certainly delivers!

If you’re interested in buying John Danaher DVD Instructional you can check it HERE

John Danaher DVD / John Danaher Instructional review
Techniques List

The Yoda of Brazilian Jiu-Jitsu, the enigmatic John Danaher finally succumbed to peer pressure. Not that he has peers or equals but still. After years of demonstrating just how effective his leg lock system is, Danaher now decided to share. In typical Danaher fashion though, the result is a very untypical product. We already know that the system works, the trick is could anybody really strive to become as proficient with it as the Danaher Death Squad? The answer is yes, thanks to the unique style of this John Danaher DVD instructional.

Mr. Danaher is as original as someone gets, and certainly has a different way of approaching Jiu-Jitsu. He is a problem solver rather than a straight shooter, something which is clear throughout the instructional. The basic idea is to make you think, much as he did with Joe Rogan while at the podcast. If you’re looking for a system to copy, this instructional is not for you. If you’re looking to develop a deadly leg locking game to beat any opponent, this is the product for you. It’s long and full of information. It will take time to watch. It will take even more time to understand and apply it. Once you do, though, you’ll be unstoppable. After all, it is a John Danaher DVD – who would expect less?

John Danaher

The most enigmatic and tantalizing coach of all times, John Danaher is certainly a strange one. The New Zealand-born is eccentric, to say the least, but just as brilliant at the same time. Not much is clear about his past, other than what he shared at the JRE Podcast. Born in New Zealand, he was always interested in sports. His first choice was rugby, which is not the gentlest of sports, especially under Australian rules. Danaher always liked martial arts though, but only had access to striking arts.

The most defining characteristic of John Danaher is by far his mind. He actually migrated to the USA in pursuit of a Ph.D. in philosophy, which he was very close to getting. For a while, he was teaching philosophy at Colombia University. At the same time, Danaher was bouncing at nightclubs for extra cash. It wasn’t long before the fast-spreading sport of BJJ reached him. From there on, he did two things that would completely change both his and the world of Jiu-Jitsu.

First, he started training Jiu-Jitsu with a dedication that few can match. Secondly, he chose the legendary Renzo Gracie as his sensei. The rest is modern Jiu-Jitsu history. Danaher started to teach at purple belt and it was at this time that he started spending 10+ hours a day at the academy as well. John Danaher Instructional

The world learned about his existence via Georges St. Pierre, who claimed John was a grappling genius. Nobody paid much attention though until the Danaher Death Squad started collecting legs. Since then everyone attempted to replicate the system but to little success. Finally, there’s a John Danaher Instructional available where the man himself goes deep into the world of leg locks.

Leg Lock Philosophy

The thing that stands out in THE John Danaher DVD is his philosophy of leg locks. While most people see (or at least saw) them as quick fixes, Danaher sees them as dominant control positions. Even more, he sees them as systems that give birth to subsystems spreading in multiple directions. Once again, Danaher’s problem-solving tendencies come to the surface.

The system is based on total control of an opponent’s lower body extremity by using your whole body against it. Danaher’s understanding of biomechanics resulted in the most efficient leg locking system in grappling. Contrary to the popular “position before submission” Danaher preaches “control that leads to submission”. To elaborate, he doesn’t want to pin the opponent but controls them until he decides to submit. In this scenario, the opponent has room to move only in certain directions. This is where the brilliance of the system lies.

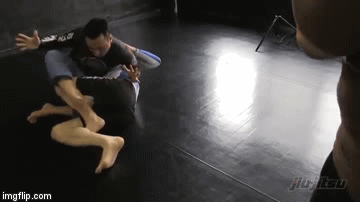
By directing the opponent’s movements into highly restrictive paths, Danaher’s system uses a simple progression of progressively more dominant positions. Danaher likes to use the Japanese term Ashi Garmai for his positions, which translates to “leg entanglement”. The basic philosophy is entering into an Ashi Garami variation and controlling the opponent while guiding them through the hierarchy of positions. Each position is more restrictive than the precious, ending in a no-escape position that offers the highest percentage leg lock there is – the inside heel hook. But, don’t just take my word for it. Get the Leglocks: Enter The System John Danaher DVD and see for yourself. I barely scratched the surface of his leg lock philosophy here. As you’ll see later the John Danaher instructional goes into never-before-seen territories of leg locking. So, good hunting!

The John Danaher Instructional – What To Expect

So here we are at last. The meat and potatoes of the first-ever John Danaher DVD. Trust me when I tell you it is an odd one. Of course, I mean it as the utmost possible compliment. In the build-up to the release, Danaher himself stated that it is going to be an unusual and a bit longer instructional. He did not lie. This mind-blowing set is spread across 8 DVDs! There are more than 9 hours of material on this John Danaher instructional! Trust me, you’re going to need time to just go through all the material once, let alone grasp what he’s talking about.

John Danaher DVD John Danaher Instructional Now, Danaher is as well-spoken and eloquent as anyone. He explains everything calmly and methodically, pointing out the crucial details of every move. And, his moves have details and lots of them. This is probably the most detail-oriented DVD set I’ve ever had the pleasure of watching! It is futile to even mention systematization as Danaher is most likely the godfather of it. Every DVD carries a specific topic, organized in a very logical manner. Just like the leg lock system, the DVDs build one upon the other, culminating in high-control,  high-percentage scenarios.

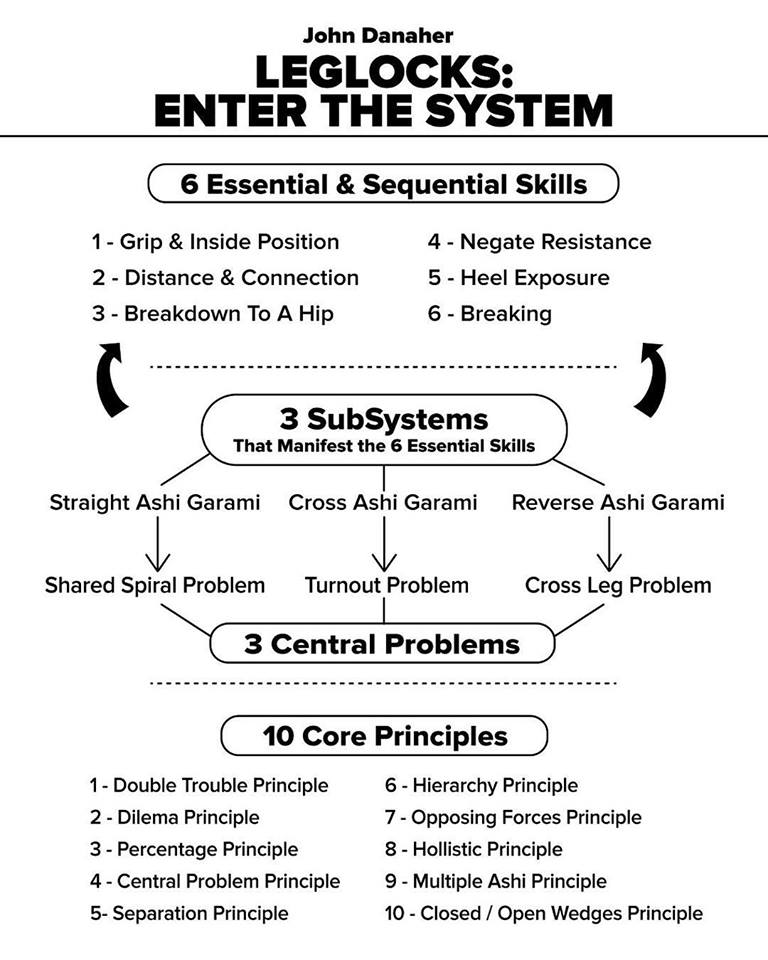
Included in the DVD is a graphic chart, outlining the system in its entirety. He covers essential skills, the 3 Ashi Garami subsystems. Furthermore, he dwells on other common problems each of these subsystems faces regularly. Finally, there are 10 key principles of leg locking.

Jonh Danaher DVD Detailed Review

Let’s now go deep into the John Danaher DVD we’ve all been waiting for. As mentioned, there are 8 total DVDs. Each DVD covers a specific subject of the leg locking system. One thing to note is that this is a John Danaher instructional, which means you simply HAVE to watch it in order. DO not just skip to the final few DVDs looking for a shortcut to the “honey hole”. Be patient and go through all the material carefully. It is going to take you 9+ hours, but if you truly want to be a top-level leg locker, there’s no other way.

Furthermore, make sure you understand the system chart. It is a very valuable tool and not just there for the sake of it. It is a guide to the complete leg locking system, and you need to make sure you identify its content in the appropriate DVDs. This is the only way to understand the system so that when you use it, it works for you specifically. Not everything is going to work for everyone, but no one is going to be left empty-handed, I can promise you that.

DVD 1- Introduction To The System

This is perhaps the most important John Danaher DVD in the whole set. You must not skip past the introduction as much as you might want to. There is a lot of talk on mechanics and key principles of lever and fulcrum. without this, nothing in the other volumes of this John Danaher instructional is going to make sense. Also a huge part of JIu-Jitsu in general, not just leg locks is the principle of Kuzushi. As a former Judoka, I am familiar with the concept of it, which is essentially off-balancing an opponent. Danaher, however, explains it from a BJJ leg locking specific aspect, and it is revolutionizing, to say the least. Prepare to develop unstoppable sweeps in addition to fierce leg locks. John Danaher Instructional

As the DVD progresses, Danaher focuses on the families of Ashi Garami. There is 3 total, and he deconstructs each so that you know what he talks about later on. Other crucial subjects he covers are gripping. We all know how dominant Eddie Cummings is in the grip fighting department. In No-Gi BJJ, in particular, this is of the utmost importance when you’re looking for leg locks. Danaher shares his basic theory of gripping, followed by practical examples and the purpose of grips. Understand the grips well, because otherwise, you’ll struggle to finish a leg lock.

DVD 2 – Inside Control

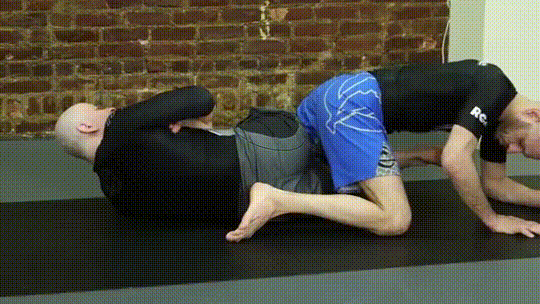
The first essential skill of Danaher’s system is getting inside control. To clarify, this means having both your legs on the inside of the opponent’s legs. This is the precursor to every leg lock in the system and you need to really have it down. Grips once again come into play, since this is how you set up inside control. The pummeling strategies to get your feet on the inside are groundbreaking. Forget what you thought you knew, this is the system that you actually need.

A very important part of this John Danaher DVD is the concept of negating your opponent’s game. Danaher explains how to restrict and impair the opponent’s movement when looking for inside control. Also extremely important for leg locking is the concept of distance and connection. You need to connect in the correct way first, and then properly control distance. Without both these aspects, most leg locks won’t work. Actually, this is why everyone out of the Death Squad often fails when attempting them.

The final part of this volume is what I enjoyed the most. The so-called gravity drills are all about weight distribution. Actually, they’re all about how to escape the pressure of your opponent. There are four main avenues of action to negate the weight and pressure of your opponent, thus gaining access to an Ashi Garami variation.

DVD 3 – Straight Ashi Garami

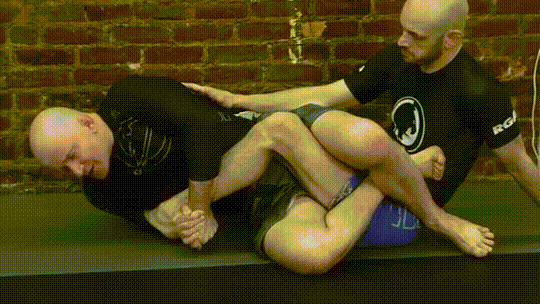
The first of the Ashi Garami families is the straight Ashi Garami. Of course, it all starts with a long and very detailed explanation of the position. The Straight Ashi Garami is the position most people generally associate with leg locks. Once you see Danaher’s take on it, you’ll know why most people are wrong. After the positional details, it’s time for the basic entries into the position. I say basic because all the “special” ways to enter are covered later on.

John Danaher DVD / John Danaher Instructional Danaher begins with how to break an opponent at the hip. This means the way in which you control the hip in order to get into the position. The following are three distinct ways of obtaining the Straight Ashi Garami. There is a single, double leg, and an X guard variation. Suffice to say, every avenue of action is covered.

Once in control, however, you need to finish. Capping things off are details on heel exposure for the heel hook submission. Throughout most of the John Danaher Instructional, a common theme is heel hooks because he deems them to be the highest percentage of leg submission in the sport. Starting at this DVD, Danaher covers how to get, properly grip and finish the heel hook submission, regardless of the opponent’s resistance.

DVD 4 – Breaking Mechanics

If you thought that things go straight into the next family of Ashi Garami you’re wrong. Danaher has lots to say on a very important subject before moving on with the system. That subject is submissions. Now, the John Danaher DVD is not your usual submission instructional. In the fourth volume, Danaher covers all the aspects of how to break someone’s leg.

Danaher has a very interesting theory of what he calls breaking mechanics. It is the way in which the forces you apply can result in a break of the opponent’s limb. A very crucial component of the system, that you have to spend a lot of time on is the concept of tension. Danaher likes to create tension throughout the whole limb, in order to facilitate the break. This is arguably the most important part of his leg locking system.

John Danaher DVD / John Danaher Instructional Grips once again play a huge role in setting everything up. John goes over every combination of grips along with all the pros and cons. That way, you’ll learn exactly which grips to use in a given situation. More important,y you’ll discover which grips NOT to use.  Besides the grips, legs also play a crucial role in breaking someone’s leg. This part was very important for me, as leg positioning was never clear from precious instructionals. But this is a John Danaher instructional, so no more confusion!

For a strong finish, one of the major problems that the straight Ashi Garami faces, the shared spiral is decoded. Learn this and no opponent is ever going to escape from your Ashi Grami with ease again!

DVD 5 – Cross Ashi Garami

Time to move on through the hierarchy of leg locking positions. The fifth John Danaher DVD is all about the Cross Ashi Garami. To make things clearer this includes the famed “honey hole” position. Do not expect a jump straight into an inside heel hook though. The first topic is where we left off in the precious volume – Straight Aashi Garami. Danaher primarily connects the two positions before moving on with the Cross variation.

This is the one DVD where you’re going to spend the majority of your time, trust me. It is long and filled with information to the brink. As a simple guide, understand the primary and secondary leg principles. It is the foundation to build on. Once the position is clear, John moves on to a common problem – the turnout. It is the instinctive way for people to attempt and escape the position. Well, Danaher puts a stop to all their attempts, as witnessed plenty of times in EBI.

Then look to clearly make a distinction between the two strategies outlined in the DVD. The first is how to attack without releasing the secondary leg. This utilizes the double trouble principle for maximal control while looking to submit. Needless to say, Danaher goes in-depth to explain literally everything. The second strategy requires you to release the secondary leg and then attack. Again, everything is systematized to the T and covered in great detail.

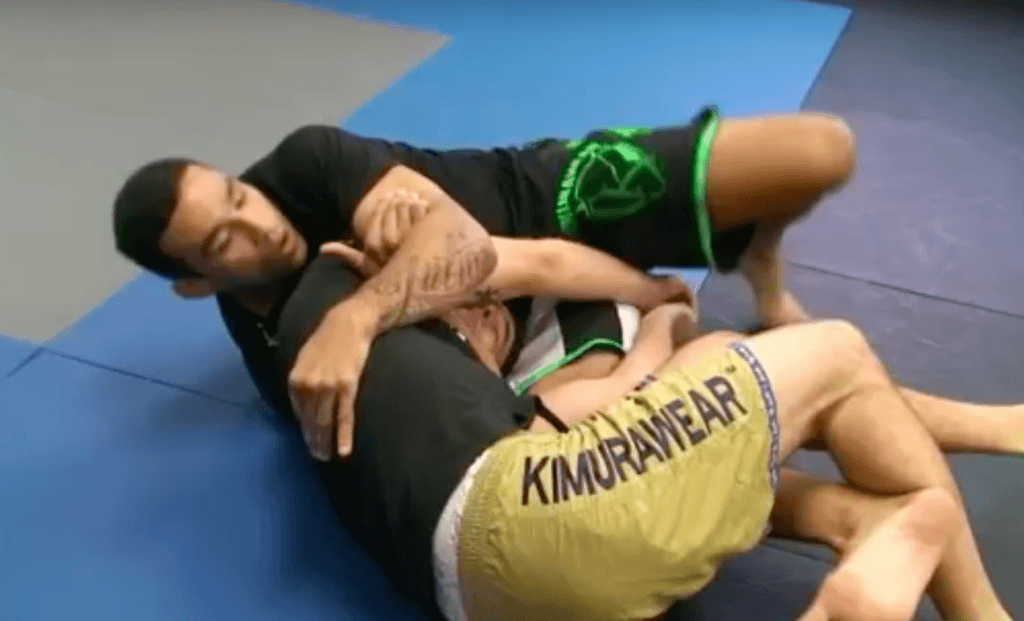
DVD 6 – Reverse Ashi Garami

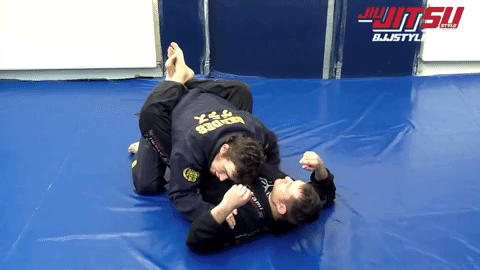
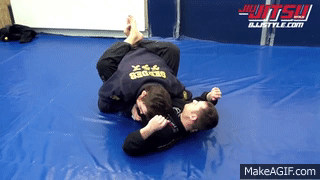
This is the one area of Ashi Garami I am really lacking at. Luckily, the John Danaher Instructional on leg locks is finally here. The Reverse Ashi Garami is the final of the 3 families or subsystems of the Danaher Leg lock system. The Reverse Ashi Garami is a very specific position that you might not think is effective if you’re a beginner in leg locks. INvest in it though, because once you understand them more, you’re going to use them regularly.

The Reverse Ashi Garamistrays into different submission territory to begin with. For example, the main submissions of choice are the kneebar and figure four toe hold. WOrry not, however, as the obligatory heel hook still plays a major role. As you can see, submission options from this position are numerous and spread in many directions.

What really really matters in this particular volume is the transitions between the three subsystems. I love that Danaher has named dilemma theories. He sets things up in a way that the opponent face s dilemma. They’re either going to allow you to work one Ashi Garami position or another. There’s no way out and no third choice. The two dilemmas approach create very successful Ashi Garami chain attacks that flow into each other. It is the cherry of the John Danaher instructional without a doubt!

DVD 7 – Entries Into Ashi Garmi I

finishing this impressive John Danaher DVD are two volumes focused solely on the numerous ways to obtain one of the 3Ashii Garami positions. Ranging from the front headlock to deep half guard, you’re literally going to see every entry possible. Keep in mind that John Danaher favors entries from the bottom, so most guards are featured in this volume. John Danaher Instructional

Although this DVD seems more “traditional” than the others, there’s still a lot of philosophy to it. For once, there’s the holy trinity of elements that are absolutely crucial for creating elevation. Only when you elevate your opponent (remember the Kuzushi principle?) can you think about hunting leg locks. The usual method of the shin to shin entries is a big part of this volume as well, offering up new alternatives to an old entry system.

DVD 8 – Entries Into Ashi Garmi II

I guess this is the volume where Danaher got the license to go full mad scientist on us. Rolling heel hooks from the deep half guard? Check! Reverse De La Riva Entries into Ashi Garami? Check! Whatever position you might consider for a leg lock entry, you’re going to have an explanation for it here. But why stop there?

The complete John Danaher DVD instructional gets a rap with the subject of entry fails. Another issue that is a big one for most people enthusiastic about leg locks. You often see people doing everything they can against members of the Danaher Death squad. What you rarely see is a member of the Squad losing position, despite unsuccessful entry attempts. This is the last piece of the leg lock puzzle and Danaher explains it masterfully to finish with a bang. A true masterpiece of an instructional, pick up your copy of the Leglocks: Enter The System John Danaher DVD today!

If you’re interested in buying John Danaher DVD Instructional you can check it HERE

John Danaher DVD / John Danaher Instructional review
Techniques List

Related Articles:

Danaher Shows Leg Lock Entry and his Wisdom, Gordon Ryan in The Gi
John Danaher DVD Instructional – Leg Locks: Enter The System
REVIEW: Craig Jones DVD – Down Under Leg Attacks
Understanding Coach John Danaher’s Philosophy of Jiu-Jitsu
Leg Locks – The Ultimate Guide to Positions & Submissions
The 9 Best Leg Lock DVD Instructionals For Grapplers
How John Danaher’s Leg Lock System Re-shaped Jiu-Jitsu

10 Best Leg Locks DVDs and Digital Instructionals

Plyometric Training For Explosive BJJ Strength

Plyometric training

Do you wish to emulate the power of Marcel Garcia? How about the explosiveness of Erberth Santos? Add plyometric training to your strength and conditioning routine. Plyometric training for grappling is simple but hard. So, if you’re prepared to really grind, we’re going to give you the perfect training program.

When people think of plyometric training, the image of someone jumping like on cocaine comes to mind. While jumps do play a large part in it, plyometric training is much more than just that. Furthermore, training plyometrics for BJJ is a whole different ballgame. There are certain aspects of grappling that greatly benefit from explosive power. This is exactly what plyometric training for grapplers should develop. Specific explosive strength in the hips and legs is crucial for anyone involved in Brazilian Jiu-Jitsu.

The main problem with plyometric training is usually programming. People might even get the exercises right, but they’ll certainly mess up the intensity. Plyometric training for grapplers needs to be carefully planned so that the athletes don’t burn out. This kind of training has huge nervous system demands. Couple that with the demands of training Jiu-Jitsu and you’ve got a recipe for disaster if you overdo it. So, when should you add in plyometric training for grappling? How much should you do? What are the absolute best exercises? The answers to all these questions are here. Read on.

What Is Plyometric Training?

First of all, let’s get the basics out of the way. Plyometric training involves quick and powerful movement that is intended to develop explosive power. They involve multiple muscle groups or the whole body and require the nervous system to involve a lot more than strength training. In short, plyometric training is explosive training that leads to the development of power.

Plyometric training can be done in plenty of different ways. When it comes to grappling, though, most of them play a minor role and are not a good fit. To explode in grappling you need to have powerful hips. It is as simple as that. That said, you also need explosive power in your legs, since they work closely with the hips. These are the areas that are most important for BJJ in terms of plyometric training. In terms of exercise selection for top grappling performance, it is simple. Just focus on jumps.

Jumps are the cornerstone of plyometric training in general. Jumping boosts muscle fiber recruitment, increases neural drive, and improves the efficiency of your nervous system. All this allows you to activate and train more muscles during your workouts. And, when you activate more muscle fibers, you increase the number of muscle fibers you can fatigue to maximize muscle growth. Over time, explosive movements make your body extremely efficient and powerful.

Jump Categorization

Speaking of jumps, not all jumps are created equal. You won’t develop any power hopping around like a bunny. You need to make sure you train the right kind of jumps for your goals. Furthermore, you need to train the right jumps in the right way to truly gain explosive power.

Single Jumps – This category includes a single jump that is jump followed by a solid landing. These are the ideal jumps for improving pure explosive power. They’re a lower-stress way for grapplers to improve landing. They also teach valuable take-off mechanics which result in high-performance gains.

Plyometric training Jiu-JitsuSequence Jumps – These are a bit more complex. They’re multiple jumps performed in a sequence that minimizes time on the ground. Jumping over multiple boxes or hurdles is a good example. The focus here is on the stretch-shortening cycle and maximal explosiveness.

Start with single jumps. Get comfortable with them first before you add sequence jumps as your skills improve.

Static jumps – These start in the loaded position and develop static explosiveness and strength. For most BJJ athletes, the static start is ideal for plyometric training. It’s simple and allows perfect landing and takeoff mechanics while building dead-stop explosive power. This quality is essential for grappling martial arts.

Counter Jumps – Plyometric training
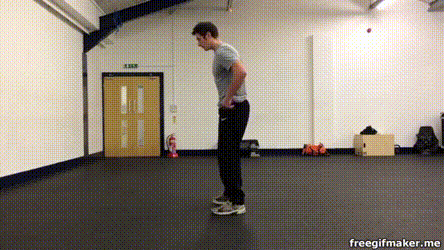
These are explosive transitions from an eccentric (negative) to a concentric (positive or going up) state. As far as jumps are concerned, these are the ultimate way to train plyometrics. You start standing tall, rapidly drop into a squat position, and then jump as high as you can.

How To Train Jumps

Now that you know which jumps to use, make sure you’re jumping the right way. It is easy when you break it down, just like with BJJ moves. There are three key phases in all jumps: load, explode, and land.

LOAD. Set up with feet shoulder-width apart in a square stance. Keep your arms at chest height. Swing the arms while flexing at the hips and knees and load up the legs. For static jumps, start in the loaded, quarter-squat position, arms extending back and ready to swing.

EXPLODE. Immediately after loading, use a swinging motion with the arms to help you jump. For the jump, drive off the legs and push the hips forward. Aim to jump both out and up. Throwing in a vertical component like this reduces shear stress on the knees. from the peak position, bring your arms back in front of you before you land.

LAND. Drop the hips while bending the knees as you land. This absorbs the force in a flat-foot position. If you’re doing single jumps, stick each landing before starting the next jump. If you’re doing sequence jumps, minimize your time on the ground.

  • Box Jumps

Plyometric training
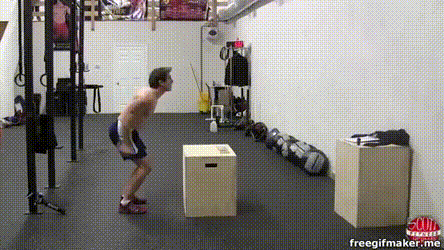
Box jumps work best for learning correct landing mechanics and reducing joint stress. These jumps should only be single jumps. Maximize hip extension and stick each and every landing. Don’t be one of those dudes trying to look for a 50-inch box jump. YOu’ll need lots of practice before even attempting that makes any real sense.

  • Squat Jumps

Plyometric training BJJ These are the classic vertical plyometric drill. You can train jump squats with body weight or add external weight. In both cases, you’ll build explosive power. From simple to complex, squat jumps are extremely versatile and easy to use in a program. Moreover, they’re perfect for grappling plyometric training. All variations become more challenging by adding resistance.

  • Broad Jumps

Plyometric training fro grappling
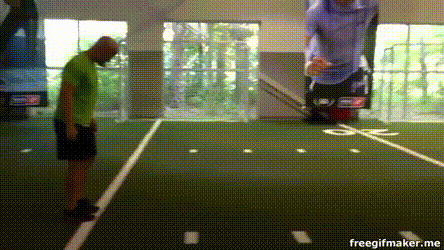
Broad jumps are king when it comes to developing explosive horizontal power. They help in developing faster sprints and longer jumps. They also help grapplers reach a more powerful deadlift. Focus on jumping both up and out on broad jumps to reduce shear stress on the knees. This is the ultimate plyometric drill for BJJ.

Plyometric Training Program For BJJ

It is best to program jumps early in a workout, before the main strength exercises. Doing them before serves as an extended warm-up and ramps up your central nervous system. This is going to result in better muscle fiber recruitment which leads to increases in strength, and power.

IN terms of weekly frequency, limit yourself to twice a week. Jumpin a couple of times in a week before strength training sessions is more than enough for grapplers. Structure these jumps in three to five sets of three to five reps. Give yourself at least 90 seconds of rest between sets. Remember, if you can’t stick each landing position, regress your jump variation.

Related Articles:

Top Training Exercises For Gorilla Grappling Strength
Quick Jiu-Jitsu Conditioning Workouts For Busy People
Rope Jumping Progressions For Brazilian Jiu-Jitsu Conditioning
The Correct Way To Keep Training With A BJJ Injury

The Best Strength & Conditioning DVD and Digital Instructionals

John Danaher LegLocks: Enter The System Intro

John Danaher LegLocks: Enter The System Intro

John Danaher DVD Instructional LegLocks: Enter The System is coming out in a matter of hours so make sure you check if it’s online HERE

Here is an introduction video of John Danaher Leg Locks: Enter the system

John Danaher DVD Instructional ANNOUNCED – Leg Locks: Enter The System

Related Articles:

The 9 Best Leg Lock DVD Instructionals For Grapplers
John Danaher DVD Instructional – Leg Locks: Enter The System
Danaher Shows Leg Lock Entry and his Wisdom, Gordon Ryan in The Gi
John Danaher’s Ashi Garami System Of Leg Locks
Leg Locks – The Ultimate Guide to Positions & Submissions

Pin And Submit At The Same Time From Twister Side Control

Perfect Twister Side Control

Twister side control is the perfect positional variation to attack from a tight pin. Not many traditional side control variations can offer opportunities like the Twister side control. Mount, back and truck transitions, as well as numerous submissions all while staying perfectly safe. It is what Jiu-Jitsu is all about!

In BJJ, the side control position is a very limiting one.  Due to the nature of alignment, you could either focus on completely controlling someone or attacking them. Doing both is not a viable course of action in most cases. Thea reason for this is that side control as an attacking position is very dynamic in nature. You need to be constantly shifting your weight, transitioning between variations and switching weight distribution. Pins (usually for points) from side control, on the other hand, are static in essence. This means the opponent can’t move, but neither can you without giving up total control. It’s a positional catch 22 but we have the perfect solution – twister side control.

Twister side control, as a concept, is another one of the 10th Planet Jiu-Jitsu positions that really work. It is nothing new, nor groundbreaking but it is insanely effective. It does what regular side control can’t – offer control and attacks at the same time. Despite appearing to be an unstable position at first, once you give it a try you’ll never look back. Twister side control is not an easy position to master, though. You’ll need a lot of work to fine tune the tiny details that make it such a dominant position.

What Is Twister Side Control? 

Twister side control is, in essence, a reverse Kesa Gatame variation. It is a great way of isolating your opponent’s head and shoulders from the rest of their body. Furthermore, it offers a way to control the hips via the legs, making it very effective as a pin. The body positioning opens up transitions to the mount without any added effort. Back and truck position transitions require a bit more work but are there for the taking. As are a number of sneaky submissions.

Twister Side Control PositionFor twister side control, you need to remember one cardinal rule. The butt must never touch the floor! Breaking this rule is going to nullify the effectiveness of the position. The goal is to have your ribs high up the opponent’s chest while facing toward their legs. The key to control is keeping their arms above their shoulders (like in mount). To do this, you need on elbow pushing on the far side triceps while your butt pushes off on the opposite side arm.

Remember to stay on your toes at all times. The only instances when the knees touch the ground are during attacks. A key hint is keeping your free arm extended and pushing on their far side knee. This is going to keep the legs down while disrupting any base the opponent might look for. From there, just sit back (butt is still up) and chill. Once you get points, or you’ve tortured your opponent enough, you can look to attack or transition.

What Can You Do From Twister Side Control? 

As already stated, twister side control offers plenty of attacking options. Initially, there are direct submissions ranging from armlocks to chokes. Moreover, there are attacks that include transition into other more dominant positions. Finally, there are transitional options to positions that offer both better control and more competition points. To that extent, we’ll cover two main categories of twister side control attacks: submissions and transitions.

  • Armlocks From Twister Side Control

Twister side control submission
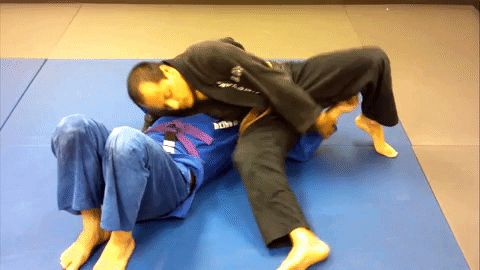
The twister side control offers up one of the most unbelievable arm locks in the game. Eddie Bravo calls it the Baby Arm Submission. When you’re in perfect Twister side, the opponent often times tries to push on your back. Good positioning makes this futile so one of their arms often ends up between your legs. That right there is a gift for you. Control the wrist with your free arm and use your bottom leg as a wedge. Simply pull up on their wrist and sneak your calf under the opponent’s forearm. From there triangle your legs and simply push down extending the arm.

On the far side, you have the opportunity for a less flashy but just as effective submission. If your opponent threads their far arm through, simply pin it to the ground and go for a kimura. You’ll most likely need to switch your hips or go in North-South to finish, but you’ll get the tap.

  • D’arce choke / Arm Triangle

From twister side control, your opponent has two main avenues of movement. They can try to turn towards you, or away from you. In both cases, they’ll end up in a worse spot. When an opponent sneaks their far arm under your armpit and attempts to turn in, it’s D’arce o’clock. Simply let the opponent turn while keeping your butt up and slide your arm inside for the D’arce. If you like, you can go for a Japanese necktie as well.

Twister Side control Choke
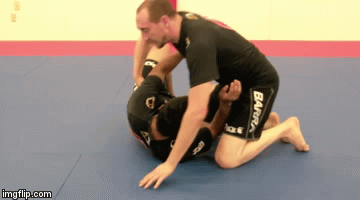
From the same situation, but with the opponent’s arm looking to frame on your head you have a different choke. Their arm on your head means an opening for an arm triangle. use the opponent’s turning motion to set the choke up. Finishing is going to require you to hop to the opposite side.

  • Kneebar

If an opponent is foolish enough to turn away from you have several great options. If you have their arms pinned in place, turning this way won’t do them much good. It is, however, going to expose their near side leg for an attack. Make sure you control the near side leg with your arm and swing your bottom leg in between the opponent’s legs. Finishing the kneebar from there is a textbook.

  • Rolling To Truck

When looking to transition to more dominant attacking positions, you are going to use the opponent’s movement against them once again. Namely, for an opponent to turn into you, they’ll have to switch their hips. This places their top leg in perfect position for a Truck entry. Use your bottom leg to hook their top leg and you’re halfway there. Once you triangle your legs, go for grips on the bottom leg and roll over on your free shoulder. You’re in the Truck with a calf slicer all ready to go!

Twister side control roll

You can get into the Truck without rolling as well. Once the opponent turns int and you trap the leg, simply stay there. The opponent is going to struggle to get to their knees. Allow them to get there, and you’ll be in an arm drag-like position. Instead of thinking back control, go for a grip around the opponent’s crotch. Once you have it lie back and you’re in the truck, this time ready fora banana split submission. A few steps away you could also hit a twister for bonus performance points.

Back And Mount Transitions

Twister side control transition
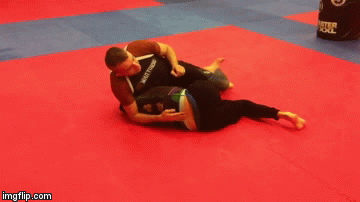
If you’re looking to play a more traditional game, or simply like attacking from the back or mount, both are very easily attainable from Twister side control. The mount is as easy as swinging a leg over. From perfect Twister side control, use your arm on the knee to open up space for your leg. Use your top leg to tip-toe over and switch into mount. Look to keep their arms above shoulder level so you can go for armbars straight away.

You could also take the back from different directions. If an opponent turns away to their knees, you could go for a  regular turtle back take. If they try to turn towards you, go for the twister hook like in the Truck transition. Once again you can allow the opponent to get to the knees and pull them for a back take. Or, you could go for the attractive and roll, just like for a Truck transition. This time, however, extend both your legs after rolling and you’ll end up straight on the back. In most cases, you’ll also have a window to slap on a rear naked choke.

Related Articles:

Effective Attacks From The BJJ Truck Position
Is The Japanese Necktie The Tightest BJJ Choke Ever?
The Nastiest Armlock Submission in BJJ – The Squirrel Lock
Versatile Attacks From The BJJ North-South Position
The Arm Triangle Choke Encyclopedia For Grapplers
Everything about BJJ Chokes – Systematization, Anatomy, Efficiency
Simple Side Control Escape Concepts You Must Know
Here’s Why You Get Stuck In Side Control

A Shortcut to Passing The Guard – The Tozi Guard Pass

The Tozi Guard Pass Style

Passing the guard can be a very difficult task in BJJ. The Tozi guard pass is the ultimate shortcut to passing the closed guard. It is a spine-twisting, gut-wrenching guard pass that’ll make your opponents give up the pass! Here’s how the Tozi guard pass works:

When you first start training BJJ, one of the first lessons is opening the closed guard. Along with opening and passing the guard, you usually get to learn some passing principles. Some of them include having a good base, super posture and keeping your arms in front of you. Well, it is time to break all these principles and still manage to pass the guard. Not only that but pass it with unstoppable pressure. The Tozi guard pass is unlike anything you’ve seen before. It breaks all the principles of guard passing, yet delivers one of the strongest pressures in BJJ.

The Tozi Guard pass is one of those BJJ techniques that lurks in the shadows. It is not a new technique, and for some baffling reason, is not a “mainstream” one either. It is a very efficient move that is on the advanced side of passing. After all, you still need those basic few passing principles. The Tozi guard pass is the next step to passing. It is how you pass the most notorious guard players, Gi or No-Gi.

Who Came Up With The Tozi Guard Pass?

The Tozi pass has more than one name in BJJ circles. You might also know it as the Margarida, Reis, Sao Paolo or Chim guard pass. The position was originally created by Roberto Tozi at the 2003 world championship. In the final of the super-heavyweight division, Tozi lost to Erik Wanderley by a decision. The reason behind this huge loss was Wanderley’s closed guard prowess. Namely, he resorted to an overhook closed guard variation to nullify anything Tozi attempted.

Lesson learned Tozi started practicing from the overhook closed guard once back in training. Experimentation yielded one of the most devastating passing sequences in grappling martial arts. He Immediately tested the newly formed Tozi Pass in competition with complete success. From there on, it became his trademark move. OF course, others soon realized what a gem this move is and adopted it immediately. Even the great Roger Gracie himself uses the Tozi guard pass against dangerous guard players. It even works against some forms of open guard, like the butterfly guard and the Z-guard.

How To Execute The Tozi Guard Pass

The main reason the Tozi is so effective is the abandonment of basic guard passing principles. Broken posture? No problem, it just gets you into passing position. Furthermore, a lot of the times breaking and passing the guard are two very distinct processes, With the Tozi pass, these two are tightly integrated together. You get a guard break and guard pass in one bone-crushing sequence. So, let’s break the guard pass down into 6 distinct key steps:

  1. Tozi Guard pass

    Establish An Underhook. The position that got Tozi in trouble actually helps you in this situation. Whenever an opponent goes for an overhook from the closed guard, you’re in play. If you want to pass against a regular closed guard, you’ll need to get the underhook yourself. Just make sure you watch out for chokes once you break your posture.

  2. Tozi guard PassHip Control. You can’t allow your opponent to have control over their hips. This might end up with you on the wrong end of an overhead sweep. Once you get the underhook it’s time to kill the hips. Just move sideways so that one of the opponent’s legs ends up directly beneath you. This is going to block all hip mobility and pin your opponent for the guars pass.

  3. Tozi guard Pass
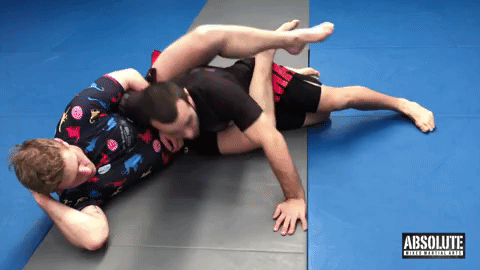
Pressure. This is where things get weird. You’ll need to switch your hips and let your hip fall on the opponent’s bottom leg. Switching the hips is essential for a good base. Once in position, you might feel like you actually have no base, but this is not the case. It is very hard for your opponent to do anything once their hips are blocked. A common occurrence is an opponent pushing your head. However, if you have correct weight distribution, the pressure is going to make this highly unlikely. It’ll take practice to keep constant pressure and maintain your base in this position.

  4. Tozi guard Pass
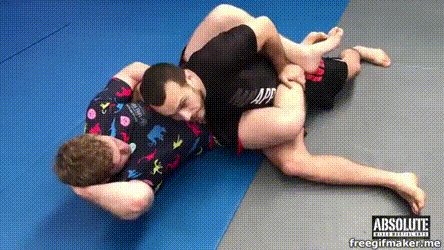
Ankle Grip. To completely take away any movement from your opponent, you’ll need to break yet another passing principle. You’ll need to reach back with your free arm and grip their ankle. This is going to provide you with added control as well as a way to break the guard. Make sure you grip tight though because a flexible opponent can still get a triangle if they release their leg.

  5. Breaking the Guard. Depending on which way your opponent crossed their ankles, you have several options. You can either kick a leg out or use the ankle grip to break the legs open. It takes next to no strength from the correct position.

  6. Tozi guard Pass
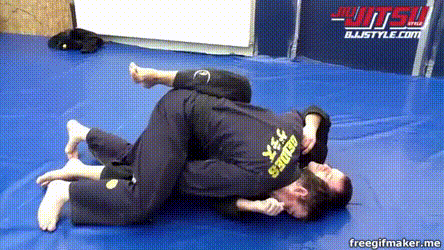
Guard Pass. Finally, once the guard opens you’ll still have ankle control. The goal is to get straight to side control by using your hooks to pin your opponent’s legs. Another hip switch will do the trick. Often times, though, you’ll end up in half guard. Even then, you’re in a great spot since you already have an underhook on the far side.

A Few More Tips And Tricks

Setting up the pass is as much dependent on deception as it is on technique. A great way to get started is to allow your partner to get a collar grip. It’s important that you don’t allow them to get the second hand in though.  To achieve this, simply drop your head and turn it away, placing your ear on their chest. As you drop down, it’s important that your right arm stays extremely tight to your opponent’s ribs and that your elbow drops back.

Tozi guard Pass Ankle lockHere’s a really cool trick for stubborn opponents. If your partner doesn’t allow you to uncross their feet don’t to worry. As you switch your hips, make sure your partner’s ankles are between your legs. Now simply step over with your top leg and triangle your legs. Your just a hip push away from finishing with a very nasty ankle lock. Actually depending on which of the opponent’s legs is on top, you’ll either get an ankle lock or a heel hook. Both are legal though, and very effective!

Related Articles:

Bernardo Faria Over Under Pass And Common Mistakes
The Best DVD and Digital Instructionals For BJJ White Belts
Unleash Unbearable Pressure With The BJJ Cross Face
Invisible Jiu Jitsu – What Is It and 5 Most Effective Techniques
Rickson Gracie Closed Guard Pass with an Arm In Stack Pass – Explained

Roll Your Opponents Into Submission With The Anaconda Choke

Rolling Anaconda Choke

When it comes to attractive BJJ submissions, flying attacks are right at the top. When it comes to attractive submissions with a high rate of finishing, the mantle switches hands. There’s nothing like seeing someone strangled with a snake-like anaconda choke that leaves no space at all.

The Anaconda choke is an air-tight choke that not only submits an opponent but rolls them around while doing it. This leaves opponents is in a state disarray, not knowing whether they’re on top or bottom. At the same time, the choke gets progressively tighter and tighter. It is not rare to see a grappler go to sleep during the roll.  So let’s have a long hard look at how this choke works and how to set it up for the win.

The Anaconda choke is the product of a distinct grappler by the name of Milton Vieira. It is a chore that falls under the arm triangles category. This makes it a blood choke. the positioning makes it very similar to the D’arce choke. Basically, the Anaconda choke is a front headlock submission, which is set up on the opposite side of the D’arce choke. While you can finish the D’arce directly, the Anaconda requires more elaborate positioning. In order to achieve this, a big part of the choke is a very attractive roll, that looks a lot like an alligator rolling with its prey. Unlike flying submissions, though, the Anaconda choke is as efficient as it is attractive. Furthermore, it works in both Gi and No-Gi and is completely legal.

Anaconda Choke Mеchanics

As I said, the Anaconda choke is very similar to the Da’rce choke. To begin with, they’re both arm triangle chokes. That means that you use your arm on one side of their neck, and their own shoulder on the opposite one. To do this you need to trap one arm in the circuit, much like an arm-in guillotine. The mechanic is that of a blood choke, with pressure on both carotid arteries that results in subsequent loss of consciousness.

Anaconda Choke Mechanics

To deconstruct the Anaconda choke we’ll look at the most usual front turtle set up. From the turtle, the goal is to thread one arm around the neck of the opponent. The goal is to reach that arm all the way through the opponent’s opposite side armpit. Once through, everything is held in place with the help of a figure four grip configuration. This requires you to grab the biceps of your free arm with the palm of the arm that’s through the armpit. A final detail of the position is to place the second palm on the opponent’s back.

The position of the choke is such, that you’ll only rarely be able to finish it directly. Instead, you’ll need to roll your opponent over, so that you end up almost on top. Only from that position, you can think about applying the choke effectively.

Breaking Down The Anaconda Roll 

The roll is such an important part of the Anaconda choke mechanism that we’ll cover it in full detail. The aim of the roll is to both get into a superior position as well as to tighten up the choke while in motion. That said, let’s break it down into individual steps so that you can perform it flawlessly.

Step 1. Once you have the choke configuration all set up from the turtle, the most important step is the head position. Make sure you look away from the trapped arm. If you do not, you’ll plant your face on the mats and lose the position when you roll.

Step 2. For the roll, you need to go to the side of the trapped arm. Once your head is looking away, look to put your hips to the side where your arms are locked. This is going to put enormous weight on their neck, tilting them over. Once you put the hips to the ground you mustn’t stop. roll to your back and all the way over to the opposite side shoulder.

Anaconda Choke Roll

Step 3. Once there, two things are crucial to finishing the choke. First, make sure the head of the opponent is on your belly. Your body behind their head acts as a wedge, forcing their head forward and deeper into the choke. While you can get a tap there, you’ll need to secure one of their legs. Use your top leg to hook their near side leg and triangle your own legs.

Step 4. For the finish just squeeze your elbows together and pull their trapped leg towards you. If you do not get a tap (highly unlikely) just move your body further under their head.

When To Go For The Anaconda

As mentioned, one of the top positions for attacking the anaconda is the turtle. More precisely, the front headlock position against a turtled up opponent. Setting up the choke requires you to thread the arm through. A very helpful hint is to pull the arm you’re looking to trap towards you from turtle. This is going to open up enough space for you to thread the arm through and sink in the choke. If you’re having trouble going under the neck, just focus on pulling the opponent’s head forward as well. A chin strap grip is a perfect way to achieve this.

Another very useful application of the Anaconda choke is from top half guard. Once you have an overhook or Whizzer, you’ll probably look for a D’arce. An experienced opponent is not going to allow this, opening up an Anaconda setup. Switch your hips so that you’re lying down and place your far side arm around their neck. once there, release the overhook/Whizzer and figure four your arms. Since you already have one leg in from the half guard, you can finish directly.

If you want to expand your choking game, the Anaconda choke works perfectly in unison with many other chokes. It fits perfectly into a system with the D’arce, Guillotine or any necktie variation. For anyone favoring the Gi, both loop and clock chokes are right there off the anaconda. Furthermore, in a worst-case scenario, the Anaconda offers a transition into mount. Seeing as your opponent was turtled up, this is not a bad trade-off at all.

The Anaconda Choke from Half Guard

Here we have an Anaconda choke from Half Guard by Neil Melanson. He showed this anaconda variation in his Ground Marshal DVD Instructional.

You Might Also Be Interested In:

The Peruvian Necktie For BJJ
Become A Master Of the D’arce Choke
Blue Belt Submits Black Belt with His Guillotine Choke – “Genchitine”
The Highest Percentage No-Gi Jiu-Jitsu Chokes
Top And Bottom Baseball Choke Setups For Jiu-Jitsu
Guillotine Choke – Basics, Secrets and Variations to Make it Perfect
Omoplata Game Essentials & Tips To Make it Really Work

How Many Times A Week Should You Be Training BJJ?

Frequency of training BJJ

How often should you be training BJJ? The answer is not a simple one. There’s a reason you can’t go for it every day, nor train once a week. Read on to find out how to achieve balance and progress with the optimal frequency for training Brazilian Jiu-Jitsu.

When we start training BJJ, most of us are torn. On one side is the fun aspect of training, that pull that BJJ has. On the other is our ego getting a constant battering. The more you train as a beginner the less you seem to be able to resist. Going further, once they have certain experience grapplers tend to either overcommit to training BJJ or slack off completely. As time goes by people tend to find their sweet spot, but is it the best fit for them? What is the best frequency for training BJJ? The answer is a complex one and it is one the same for everyone.

The key is understanding a couple of things. First, you need to be clear about what level you’re at and what your goals are. Secondly, you need to be aware of the optimal training frequency for your level. Training BJJ requires a careful balance. Train too much and you’ll eventually burn out due to diminishing returns and injuries. Train too little, on the other hand, and you’ll be stuck without progress. An exact amount of training frequency varies at an individual level, matching their goals.  If your goal is to be a competitor above all, you have to approach training BJJ as a marathon. You need to keep things sustainable and well-balanced. If you want to learn the art without competing though and have a full-time job, you’ll need a different approach. Let’s take it to step by step.

Optimal Frequency For Training BJJ

Beginner grapplers are always concerned with one question. How often should they train Jiu-Jitsu?  If they come from other mainstream sports like baseball or basketball they’re probably used to daily practices. In grappling martial art, though a beginner training every day is often more than their bodies and minds can handle. A complete beginner, training BJJ 5 or 6 days a week is probably a grappler that won’t be around much longer. The types of neurological adaptations that Jiu-Jitsu requires are very delicate. In those terms, these are the general guidelines for training BJJ:

2 days per week

Enough frequency to maintain your technique. You won’t learn much, and what you learn is going to be extremely slow. Not at all advisable for competitors. This is the minimum time you should consider spending without regressing.

3 days per week 

This is the commonly accepted sweet spot. It is enough to maintain technique and even add sharpness to transitions and movement patterns. Still not really ample to learn at a great pace, but guaranteed progress nonetheless.

4 days per week

This is the recommended weekly frequency for training BJJ. Apart from technical maintenance, this both adds sharpness and builds instincts.  If you’re looking to develop a flowing style of Jiu-Jitsu there are no shortcuts. Four sessions a week is mandatory for anyone with hopes of competing.

There are options to train 5 or more days per week. As you’ll see later this is where your goals need to be in balance with your actual needs. Training more than 4 times a week is not for everyone and can have negative feedback. Careful thought has to be given to rest and recovery as well. In fact the more you train, the more you’ll need to recover. As a final note, if you get down to training more than 3 days per week, try to ensure one of those days is an open mat. The open mat experience can be worth more than two classes, so do not miss it.  This way you can further your learning and build a well-connected and complete game.  Putting everything together is the only way forward, and the open mat is a great place to do it.

Absolute BJJ Beginners

Training BJJWhen you start training BJJ, a good rule of thumb is to train at least 2 days per week. During the first six months, you can get away with training at such a low frequency. Actually, training like this is only going to do you good. You’ll learn the names of positions, which positions are dominant and where you’re in trouble, and build some basic grappling coordination.  During this period there is only a small portion of techniques that actually stays with you. For absolute beginners, the lessons learned in class are rarely applicable live.

As a beginner, training more than 2 days per week just means more material. This translates to more moves that you probably won’t be able to retain. Depending on your coordination, your BJJ knowledge won’t notably improve. Keep things clear and simple until you get at least six months under your belt.

The more consistent you are with your training, the more information will get organized on top of previous information. This means you’ll be able to absorb new knowledge without stressing your system.  Once the body gets used to basic movement patterns, you can move on to more complex positions. When you can successfully string a couple of these basic moves together, you can think about the next step.

One day per week isn’t nearly enough to improve o retain useful information. Each day is going to feel like the first day of class all over again.  Starting over repeatedly is a poor way to go about a journey as long as Jiu-Jitsu. If it is only occasionally, getting to the mat only once per week is acceptable. This, however, has to be viewed as a short-term solution during busy time schedules.

A Year Of Training

After you survive your first year of training BJJ, you can look to add training sessions. 2 to 3 days per week is now the new sweet spot.  You can add the third training session after a certain period of mastering the basic movements of the sport. Don’t delay it too much or you might regret it. Most people are ready to go to 3 x week somewhere around the 6-month mark. This can directly aid in making much faster advancements in your learning curve.

OF course, there are those that cannot make it to BJJ more than two times a week. When life gets in the way, you can pull it off without a third session. It also going to be fairly difficult though and progress is going to take longer. However, everyone’s improvements should be optimal for their own lifestyle and abilities.

Training BJJ
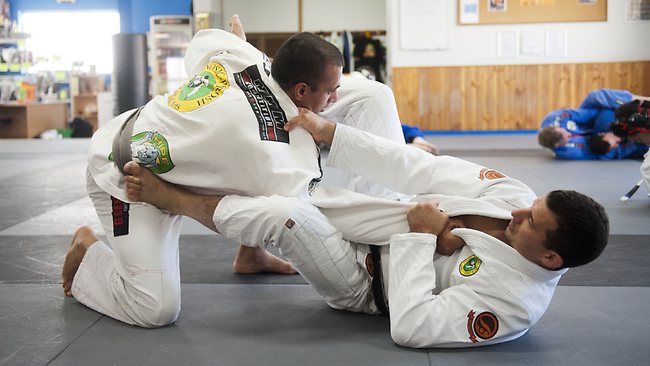
To begin with, there’s a very solid strategy of adding the extra training day. When new grapplers need to gauge potential benefits from an additional day of training, they should do it slowly. Try adding in the 3rd day per week every now and then. This can take up to 6 months and can really help you assess your results. If the gains from an extra day are marginal, and life hits you hard, step back. Maybe now isn’t the best time.  If you feel greater improvements, though, feel free to start adding in a 3rd day more regularly.

Advanced Students

Finally, when you have at least a blue belt, you can really go for it! Training BJJ up to 3 to 5 days per week now is now optimal. This is the frequency where most students typically find their sweet spot for training days. Furthermore, once you know the best for you, you’ll mostly stick to it forever. This doesn’t mean jumping straight to 5-6 days per week. The same holds true as before, burnout and overtraining are always a concern. Use the strategy as before, and gradually add in training days.

Once you go past the 3 days per week mark, remember that recovery starts to be a major part of the puzzle. A grappler must stress the system during training for improvement. Stress results in the body adapting, which in turn brings progress. However, you must also focus on recovery between sessions. The more you train, the more your body is going to need recovery. Individual factors like age come into play here. Never push your body past the bring because recovering from overtraining is a long and tedious process. Once you overexert you’re going to stall your progress. Avoid this by sticking to as many days of training BJJ as you can successfully recover from.

Of course, if you aim to become the next huge name in grappling competition, you’re going to need a bit more dedication. Competition preparation may have you even twice in a day. This, however, should be organized with extreme caution. The best approach here is one of the training camps. Before a competition train hard and specific for 8-12 weeks. You can even train every day, but remember that this is not sustainable. Once your competitive period is over, return to your sweet spot to keep progressing.

Related Articles:

Wrestling Conditioning Drills For Brazilian Jiu-Jitsu
The Strength and Conditioning For BJJ Competitors
How to Get The Most Out Of a BJJ Open Mat With These Strategies
25 Reasons Why You Don’t Progress in Jiu-Jitsu As Fast As You Can
An Unusual Method To Help You Learn BJJ Moves Faster
Old Man Jiu-Jitsu TIPS

The BEst DVD and Digital Instructionals for BJJ White Belts

ACBJJ 13 Results and Videos – Gordon Ryan Loses To Vinny Magalhaes

ACBJJ 13 Results and full Fight Videos

ACBJJ 13 Results and Videos. Acbjj 13 Gathered The most Famous BJJ practitioners and grapplers around the world. There’s a lot of good matches like Gordon Ryan vs Vinny Magalhaes, Marcus Almeida Buchecha vs Joao Gabriel Rocha, Leandro Lo vs Gabriel Arges, Keenan Cornelius vs Yuri Simoes… Here we bring you all the most interesting ACBJJ13 videos and also ACBJJ 13 full event video.

ACBJJ 13 took place on May 05, 2018 in Long Beach, California and it was probably event with the best names and grapplers ever. There is simply no event like this, besides ADCC, that features this many great BJJ practitioners and Competitors. This event brought us some very interesting matches and some results are really surprising.

ACBJJ 13 – Title Matches

Leandro Lo vs Gabriel Arges

Leandro Lo defeated Gabriel Arges on points in the 85 kilos division by winning all 5 rounds. Leandro Lo was able to impose his own style to Gabriel Arges.

In the first round, Arges tried the armbar on Leandro Lo but it was loose. Armbar from Arges didn’t really pose a real threat to Leandro Lo. He was able to escape from it pretty easy.

In the second round, Leandro Lo took Arges down with a single leg takedown. It was 2 points for Lo and that’s how round 2 ended up. Lo was trying to pass Arges’ guard but was unsuccessful while Arges was working on sweeps holding Lo’s Lapel throughout the entire round but with no success. Lo was very stable on his feet and all attempts were Arges easily amplified by Lo.

The third round had a similar start as round 2. Again, Lo was able to take Arges down, even passing Arges guard but Arges got his guard back pretty quick. Arges was again trying different sweeps but with no success.

4th round was a deciding round for Gabriel Arges vs Leandro Lo. He needed a submission victory in the 4th and 5th round because he lost the last 3 rounds by points. Arges immediately pulled guard and was golding Lo’s leg for some time but Lo was able to stop him. After some time Lo passed Arges Guard and went for his back but Arges was able to escape it going up on his feet. Again, Arges pulled guard and that’s how the round finished.

In the 5th and Final Round, Arges continued with his play to play guard. Lo managed to pass it and earn 3 points for it and that was it. Arges didn’t manage to keep the title and the 85 kilos division champion is now Leandro Lo.

Leandro Lo won the match winning all five rounds.
R1 2:0, R2 2:0, R3 4:0, R4 2:0, R5 3:0

Marcus Almeida “Buchecha” vs Joao Gabriel Rocha

This title fight was taken by Buchecha by pretty much dominating Joao Gabriel throughout the entire match.

In the first round, Marcus Almeida was able to take down Joao Gabriel Rocha with a Single Leg Takedown. He wrestled him down but Rocha somehow managed to stand up. Again Buchecha took Rocha down but the fight went off the mats. After that Buchecha pulled guard and Rocha was doing some good guard pass but without success as Buchecha turtled up and that’ the first round ended up.

2nd round was all about to stand up. Both athletes were on their feet and there was no action at all until the last minute. Jao Gabriel pulled a half guard and Buchecha managed to get on his back after the scramble in last 10 seconds but there wasn’t enough time to get the points for it.

The 3rd round brought some more action. Buchecha did a nice Fireman’s Carry takedown attempt but with no success. After that Buchecha tried some Judo takedown but also without success. After few unsuccessful takedown attempts Buchecha pulled guard, Jao Gabriel tried to pass, but Buchecha saved his guard again by turtling up till the end of a round.

The 4th Round brought some stand-up action at the start. Buchecha tried to double leg Rocha ending up off the mats. He continued with his strategy from the last round trying to take his opponent down and if it’s not working he pulls guard. This time Joao Gabriel tried to stay up but Buchecha managed to sweep him and get into the mount position working for an armbar. Rocha managed to escape from it getting on his feet. That round ended up with 9:0 point win by Marcus Almeida.

The 5th and final round started with Almeida trying to take down Rocha with a lot of wrestling and Judo takedowns. After the Single Leg takedown attempt from Almeida, Rocha defended it and mounted him but not long enough to earn points for it. They ended up on their feet with Almeida pulling guard and that’s how the match ended up. Marcus Almeida defeats Joao Gabriel Rocha by Points:  R1 0x0, R2 0x0, R3 0x0, R4 9×0, R5 0x0

You can check the Marcus Almeida Buchecha vs Jao Gabriel Rocha full match video in the full event video at the end of this article on 4:32:00.

Gordon Ryan vs Vinny Magalhaes – Gordon’s ACBJJ Debut

In Gordon Ryan’s ACBJJ debut he was matched against Vinny Magalhaes. Gordon is a huge submission only BJJ and ADCC star but this time he wasn’t able to impose his own game to Vinny. Vinny Magalhaes played this match very good, imposing his own style to Gordon Ryan.

In the 1st Round, Vinny was able to take down Gordon Ryan very fast and pass his guard.

After the lead of 5-0 by Vinny in the first round he was able to maintain control and protect his points lead till the end of the round.

Second round seemed like Gordon changed the tactic. At the start of the second round, he tried to double leg Vinny but unsuccessfully. Vinny managed to stay on his feet and get double underhooks and outwrestle Gordon off the mat. Both athletes were trying to fight on their feet but after some time Gordon decided to pull guard. He was losing the first round and probably figured out he needs to win that round and staying on his feet against Vinny wasn’t didn’t seem to manage it. Vinny’s strong stand up didn’t allow him to do anything.

In the Third Round Gordon Ryan, probably, taught by experience from the previous rounds immediately sat down. In this round, Gordon was trying everything to catch Vinny’s leg but with no success. Inverts, scrambles, and tries from Gordon Ryan didn’t have any effect and at one point Magalhaes was able to catch Gordon’s leg. It’s pretty hard to finish Gordon with a leg lock so he got out, but Vinny Magalhaes was able to win the fight on points against Gordon Ryan.

We can say that Gordon’s gameplay was constantly shut down by Vinny who manages to neutralize all of Ryan’s attacks and tries to impose his own rhythm.

Vinny Magalhaes won vs Gordon by winning the only first round on points:
R1 5×0, R2 0x0, R3 0x0

You can check out Gordon Ryan vs Vinny Magalhaes Full Fight Video below:

Edwin Najmi vs Rodrigo Caporal Full Fight Video

Roberto Cyborg Abreu vs Erberth Santos Full Fight Video

Igor Silva Vs Jackson Sousa Full Fight Video

Keenan Cornelius vs Yuri Simoes Full Fight Video

All Submissions On ACBJJ 13

ACBJJ 13 Full Event Video:

https://youtu.be/TJAKndmPzj8

FULL RESULTS:

Bruno Frazatto def. Nicholas Welker by referee decision
R1 6:6, R2 0:0, R3 0:0
Ary Farias def. João Somalia by kneebar
R1 2:0, R2 26:0, R3 submission
Michael Langhi def. Victor Silverio by referee decision
R1 0:0, R2 0:0, R3 0:0
Pablo Mantovani def. Gabriel Marangoni by points
R1 4:2, R2 2:0, R3 2:0
Edwin Najmi def. Rodrigo Caporal by RNC
R1 submission
Isaac Doederlein def. Augusto Mendes by points
R1 2:2, R2 2:0, R3 0:0
Igor Silva def. Jackson Sousa by flying armbar
R1 submission
Luiz Panza def. Ricardo Evangelista by triangle choke
R1 2:0, R2 0:0, R3 submission
Keenan Cornelius def. Yuri Simões by reverse omoplata
R1 submission
Roberto Cyborg def. Erberth Santos by points
R1 2:0, R2 0:0, R3 5:0
Rômulo Barral def. AJ Sousa by cross choke
R1 submission
Vinny Magalhães de. Gordon Ryan by points
R1 5:0, R2 0:0, R3 0:0

TITLE MATCHES on ACBJJ 13

Leandro Lo def. Gabriel Arges by points
R1 2:0, R2 2:0, R3 4:0, R4 2:0, R5 3:0
Marcus Almeida def. João Gabriel Rocha by points
R1 0:0, R2 0:0, R3 0:0, R4 9:0, R5 0:0

Related Articles:

Keenan Cornelius Reverse Omoplata on Yuri Simoes Breakdown

You Might Be Interested In:

Kenan Corneliues Reverese Omoplata on Yuri Simoes Full Video and BreakDown – ACBJJ 13

Kenan Corneliues Reverese Omoplata on Yuri Simoes Full Video and BreakDown - ACBJJ 13

Kenan Cornelius submitted Yuri Simoes on ACBJJ 13 with a reverse omoplata and here is how he did it.

Keenan Cornelius vs Yuri Simoes Full Fight Video

If you’re interested in OMOPLATA and the best and easiest ways to do it, Bernardo Faria’s Omoplata Everyone DVD Instructional is the way to go. You can Check the Instructional, Techniques list and FREE Videos HERE

ACBJJ 13 Results and Videos – Gordon Ryan Loses To Vinny Magalhaes

Related Articles:

37 Omoplata Setups in just 4 minutes
Omoplata Game Essentials & Tips To Make it Really Work

You Might Also Be Interested in:

The Only BJJ Half Guard Sweep You’ll Ever Need!

The best BJJ half guard sweep

BJJ Half Guard Sweep is a great achievement once you manage to do it. Especially from Half Guard which is considered the underdog position in Jiu-Jitsu.

When we train Brazilian Jiu-Jitsu, sweeps are some of the most basic things we learn. Not only that, but we tend to stick with our choice of a sweep for quite a while. The reason behind this is that sweeps work at every level, as long as we develop them correctly. It is all about adding little details and a sprinkle of your individuality along the way. Of course, not every position is ideal for every sweep, so it is usual for grapplers to have a favorite sweep from most of the bottom positions. However, there’s one position that all but guarantees you’re going to get on top, and in a dominant fashion as well.  Doing a BJJ half guard sweep is something you learn at white belt. Doing the same BJJ half guard sweep at black belt means you are most likely unbeatable once you slap on a half guard.

The half guard is a position that is really easy to play when grappling. Most beginners get there instinctively when trying to prevent a guard pass. Although a lot of them have problems with half guard retention. As though it might look like a last-ditch effort to remain in control, it is often much better than the closed guard. The reason why people prefer to attack from the half guard is that it offers more space. In order to sweep someone, we need to create space, first and foremost. The position of the half guard allows dynamic angling that can result in a whole myriad of sweeps, in every possible direction. Even then, not all sweeps are the same and there’s one BJJ half guard sweep that rules them all!

Sweeping From The Half Guard

The reason most people look for sweeps rather than the submission from the half guard is the angle of alignment. The basic notion of the half guard is not being on your back. In the half guard, there’s no attacking unless you’re on your side. It is as simple as that. You need to be lying on one shoulder, hiding your bottom arm from your opponent. This is going to allow you to move to either the outside or the inside of your opponent. Such maneuvering means you can off-balance your opponent easily and get on top.

The configuration of your legs when in half guard can be set up in a few different ways. The most important determinant is your intention to sweep. For example, if you’re going for a butterfly sweep, your outside leg should go make a butterfly hook. If you’re going for inverted sweeps like the Tornado, the Z-guard is the best bet. And if you’re going for Underhooks, the classic top-over-bottom leg configuration is invincible.

Speaking of underhooks, getting one is very often the crucial factor in both retaining and attacking from the half guard. Namely, once you’re on your side and you control the leg of your opponent with both of yours, you need to secure the upper body. The best way to do this is by propping up on your bottom elbow and sneaking your arm through the opponent’s armpit. The idea of an underhook is to place your arm as deep behind your opponent’s back so that you can completely neutralize one side of their body. Now you have their leg, their arm, and, with proper angling, their posture, and base. Time for the perfect BJJ half-guard sweep.

Lucas Leite and his special Half Guard game and Half Guard Sweep

The coyote half guard dvd instructional by lucas leite and the most powerful half guard sweep
Techniques List

This sweep and it’s combinations are the best explained in the most selling Half Guard instructional ever. Lucas Leite’s Coyote Half Guard DVD Instructional.
Lucas Leite proved his techniques work by intentionally choosing opponents 30+ lbs heavier than him. He will usually say that his techniques work better against heavier opponents. And that’s the exact beauty of this sweep and Lucas Leite’s Coyote Half guard, it works against anyone no matter their size.
While there is really A LOT of techniques and combinations on Lucas Leites DVD Instructional we’ll cover only one situation here. The one that you’ll find yourself in most of the time. So, even if you’re not half guard player once you find yourself in half guard this sweep is something you will go for as it has the highest percentage of success and it works on anyone.

If you wonder will this work for you, the answer is simple. YES, it will because you don’t have to be big, fast, flexible… You just have to follow the instructions and once you’re in the position that’s it. If you find this sweep good for you and you decide to get your half guard game on another level based on Coyote half guard you should go for Lucas Leite’s Coyote Half Guard DVD. There is no instructional which explained this kind of sweeping better than Lucas Leite did. Lucas Leite DVD includes around 50 techniques(you can check them on THIS LINK) from half guard which complement each other.

So, if you’re not a half guard player and you need only one reliable half guard sweep this one is the way to go.

The Most Powerful BJJ Half Guard Sweep

So, what is the one BJJ half guard sweep that nobody can stop, regardless of size, experience, and/or level? Well if you haven’t extrapolated that until now, let me make it clear. Any underhook BJJ half guard sweep is going to ensure a high percentage of finishes. However, none works better, even from there, than the Dogfight sweep.

The Dogfight (or Coyote) position is named in such a manner due to the position of your legs. Let’s say you did everything right in setting up the underhook half guard. you’re on your side, you have the correct leg configuration, and you have established an underhook. From there you’re going to get on your knees. As counterintuitive as it sounds, this is the best spot to control your opponent from. In order to do so, make sure you have your underhooking arm as deep as possible with a strong grip on the opponent’s belt. You then use this grip to help you get your bottom leg out and get on your knees. If it wasn’t for the underhook and leg control, you’d be attacking from the top of the turtle position.

That said, once on your knees, with control over the leg and arm, the goal is pinching your knees as tight as possible. This takes away every escaping option your opponent might have. In order to get a sweep all it takes is to reach with your far sidearm to the far side knee of your opponent. Control either the Gi or behind the knee and pull towards yourself, pushing with your upper body and hooking with your inside leg. The result is an unstoppable BJJ half guard sweep that lands you in sid control.

Half Guard Sweep Combinations

Since Brazilian Jiu-Jitsu is an art that very often has surprises in store for us, in certain instances this sweep is going to be harder to execute than in other. This might be due to a very strong opponent, a very experienced one, an unnaturally flexible one or simply mistakes by yourself. Whatever the reason, there’s no need to completely bail on the sweep. First of all, there are plenty of adjustments that can ensure you reach your goal. The Dogfight position is a very secure one to wok from because it offers total control over half of your opponent’ body.

However, in situations where you’re stuck, the half guard allows you to transition into sweeps that go into completely opposite directions from the originally intended one. Let’s say you’re stuck in the Dogfight position. Now, your opponent posts an arm to base and you can’t finish the sweep as before. Keeping all the same grips you just roll under your opponent. To do so, direct the elbow of the arm that is gripping their knee in between their legs. You’re going to roll your opponent over you and end up on top in strong side control. The best thing about this BJJ half guard sweep is that if at any moment you feel uncomfortable with the roll, you can get back to the first one and finish in the original direction.

If you want to invert all you need is to switch your grip from one leg to the other. Go for the inside of the pants on the near side leg and think about getting your head in between their legs. This’ll land you in the Tornado sweep position and you can now launch them in a third direction.

The Best Half Guard Instructionals:

Half Domination by Tom DeBlass
Lucas Leite’s Coyote Half guard
The Battle Tested Half Guard by Bernardo Faria
The Z-Guard Encyclopedia by Craig Jones
High Precision Half Guard and Reverse Half Guard by Jake Mackenzie
High Precision Half Guard by Jake MacKenzie Vol. 2

Related Articles:

Going Deep – A Study Of The Deep Half Guard In BJJ
The Dual Nature Of The Jiu-Jitsu Half Guard

The Great Half Guard Retention Video
High Precision Half Guard 2.0 – Jake Mackenzie DVD Review

Bernardo Faria DVD: The No-Gi Half Guard REVIEW
REVIEW: Craig Jones DVD – The Z Guard Encyclopedia
REVIEW: Battle Tested Half Guard – Bernardo Faria DVD Review
Tom DeBlass Half Domination DVD Review