How to Escape a Triangle Choke: Two Effective Approaches

How to Escape a Triangle Choke: Two Effective Appraoches

If you practice any grappling art, such as Brazilian Jiu-Jitsu, Judo, Mixed Martial Arts, or Submission Wrestling, you have probably encountered the triangle choke. The triangle choke is one of the most common and effective submissions in grappling, and it can be applied from various positions, such as the guard, the mount position, the side control, or even standing up.

However, being caught in a triangle choke does not mean that you have to give up or tap out. Learning how to escape a triangle choke is an essential skill for any grappler who wants to improve their defense, confidence, and survival skills.

In this article, we will show you how to escape a triangle choke using two approaches: the “traditional one” and a slightly unorthodox one that is bound to become your favorite triangled defense/guard pass combo.

By the end of this article, you will have a complete guide on how to escape a triangle choke from any situation.

BJj triangle choke escapes

Traditional Steps to Defend Triangle Chokes

The triangle choke has been around since the inception of BJJ, and people have developed effective ways of blocking, disrupting, or flat-out escaping it. The “traditional” principle-based approach works against all kinds of variations like the front triangle and side triangle setup, for example.

The answer to the question of how to escape a triangle choke does not have to stop at the traditional approach, though In fact, you don’t even have to see the triangle as something to escape, but rather as an opportunity for you to counterattack the bottom person, with something like a guard pass, for example.

But, before we go into advanced strategies like that, let’s see what the bread and butter methods of escaping a triangle choke are:

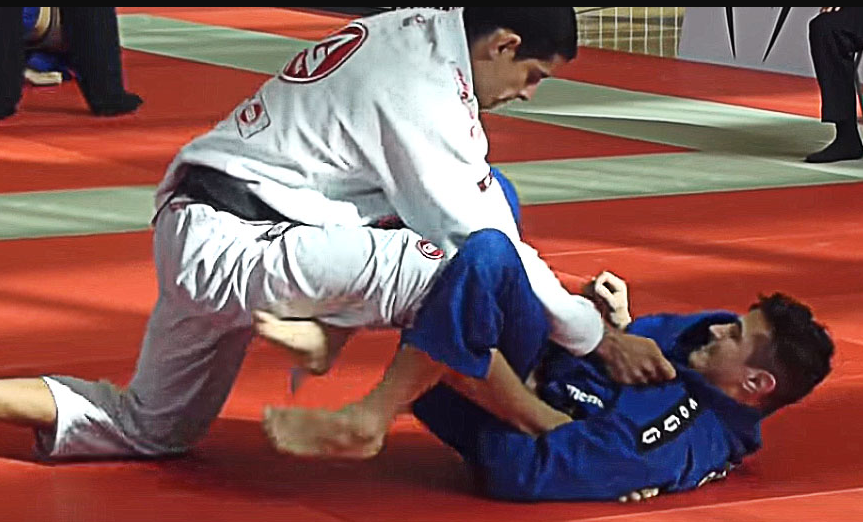
Stage 1: Prevent the Triangle Position

The first stage of escaping a triangle choke is prevention. This means that you want to avoid getting into a situation where your opponent can lock their legs around your neck and one arm in the first place.

This is easier said than done because there are many ways that your opponent can set up a triangle choke from different positions. Some of the common ways that your opponent can set up a triangle choke:

  • closed guard,
  • open guards,
  • top and bottom side control,
  • top mount,
  • back control, and
  • standing.

The versatility of triangle choke setups makes them efficient because they’re unpredictable and available. However, there are also some general tips that you can follow to prevent a triangle choke from happening:

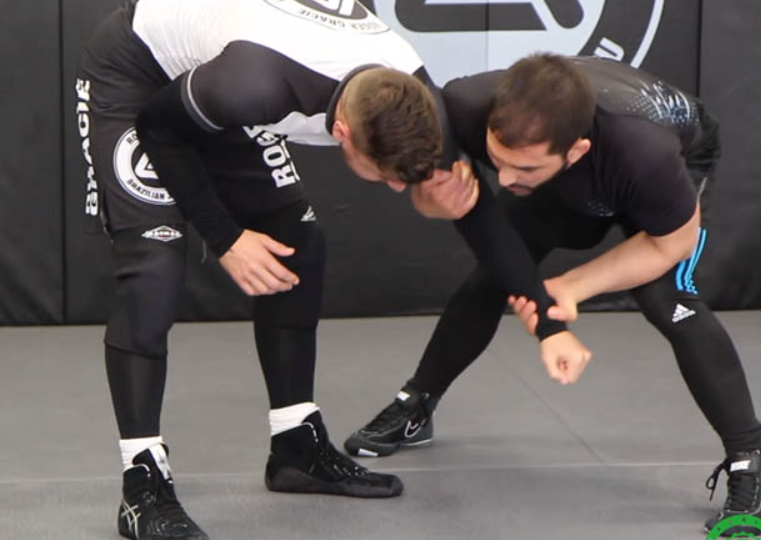
  1. Maintain good posture: Keeping your head up and your back straight will make it harder for your opponent to pull your head down or push your arm across your body. It will also make it easier for you to see what they are doing and react accordingly.
  2. Keep your elbows close to your body: Keeping your elbows close to your body will prevent your opponent from isolating one of your arms and creating space for their legs. It will also protect your arms from other attacks, such as armbars or kimuras.
  3. Control your opponent’s hips and legs: Controlling your opponent’s hips and legs will limit their mobility and ability to create angles and space for their legs. You can use your hands, arms, knees, or feet to control their hips and legs, depending on the position. You can also use your body weight to pin them down and restrict their movement options.
  4. Be aware of your opponent’s movements: Being aware of your opponent’s movements will help you anticipate their attacks and defend accordingly. Stay alert not just to the obvious things but also to the placement of limbs key to triangle chokes. For example, if you avoid placing an arm in between the opponent’s legs, you do not have to worry about how to escape a triangle choke.

By following these tips, you will be able to prevent a triangle choke from happening in most cases. Still, sometimes your opponent will be faster, stronger, or more skilled than you, and they may manage to lock their legs around your neck and one arm.

Triangle escape

In that case, you need to move on to the next stage of escaping a triangle choke: regaining posture.

Stage 2: Posture is Everything!

The second stage of escaping a triangle choke is posture. This means that you want to regain your posture as soon as possible before your opponent can tighten the choke.

If your opponent manages to lock their legs around your neck and one arm, they have already achieved a strong choking position. However, this does not mean that they have finished the choke yet.

There are still some factors that they need to adjust in order to complete the choke, such as:

  • Pulling your head: Pulling your head down will increase the pressure on your neck and make it harder for you to breathe.
  • Pushing your arm across your body: Pushing your arm across your body will cut off the blood flow to your brain with your own shoulder.
  • Angling their hips out: Angling their hips out will tighten the triangle by reducing the space between their legs.

If your opponent manages to do all these things, they have achieved a full triangle choke, and you are in big trouble. You may only have a few seconds before you pass out or tap out. Therefore, you need to act fast and regain your posture before you can tighten the choke.

There are some common ways that your opponent can break your posture, such as:

  • Pulling your torso down with their legs.
  • Pulling your head down with their arms.
  • Pushing your arm across your body with their legs/arms.

If your opponent manages to break your posture in any of these ways, you need to regain your posture as soon as possible.

This is how to escape a triangle choke in the mid-stage by focusing on your posture:

  1. Use smart frames: Framing off your opponent’s hips (or sometimes chest) will create some space between you and them and allow you to lift your head up. You can use your hands, arms, elbows, or forearms to create a frame against their hips or chest, depending on the position.
  2. Pushing their knee down: Pushing their knee down will open up their legs and reduce the pressure on your neck. This is (or was) known as the Roger Gracie defense. You can use your hand or arm to push their knee down, depending on the position, or use your head or shoulder.
  3. Stacking them up: Stacking will compress the opponent’s chest and make it harder for them to breathe. It will also make it harder for them to angle their hips out or pull your head down. You can use your body weight and momentum to stack them up by driving forward with your legs and shoulders.

Even if you do all of the above perfectly, some people will still manage to have a tight triangle choke sinched in. When you are in this particular predicament, you need to move on to the next (final) stage of defending a triangle choke: a very, very late escape.

Stage 3: Late Triangle Escapes

The third stage of escaping a triangle choke is late escape (a.k.a. a Hail Mary). This means that you want to use some specific techniques to escape the triangle choke before you pass out or tap out.

The finishing mechanics of a traingle choke are specific and if you are wondering how to escape a traingle choke that is fully locked in, you’ll need to reverse engineer the finishing mechanics in order to prevent the pressure from forcing you to submit:

  • Squeezing the legs together: Squeezing their legs together will increase the pressure on your neck and make it harder for you to breathe. It will also prevent you from creating any space between their legs.
  • Pulling the head down: Pulling your head down will increase the pressure on your neck and make it harder for you to breathe. It will also prevent you from lifting your head up and regaining your posture.
  • Lifting the hips: Lifting their hips up will tighten the triangle by reducing the space between their legs. It will also align their legs with your carotid arteries and increase the effectiveness of the choke.

If your opponent manages to do all these things, they have finished the choke, and you are likely to pass out or tap out in seconds. Therefore, you need to act fast and use some specific techniques to escape the triangle choke before they can finish the choke.

Some specific techniques that you can use to escape a triangle choke include:

  • Elbow down: The elbow down escape is a great go-to as soon as you realize your posture has been compromised. For starters, your opponent will have a much easier time choking you if your arm is across your body, thus cutting off your carotid artery with your own shoulder. If the elbow of your trapped arm is pointed out and downward, you will be considerably harder to choke.As soon as your opponent locks in the triangle, even if they have a figure four configuration with their legs, open your elbow out and bring your chest forward. Be sure to protect your arm (the arm that’s inside the triangle), as this is likely to be a secondary attack for your opponent. Slowly walk your shoulders and feet in the direction of your opponent’s ankles until they come open.Remember: even if the ankles don’t open up, you’re still surviving, likely for far longer than you otherwise might!
  • Knee pin: The knee pin escape is a good option if you are caught in a super deep triangle, and not only does your opponent have the figure four with their legs, but they’ve also managed to get your arm across your body so that your own shoulder is completing the choke across your carotid artery.In this situation, you need to create some space between their legs and relieve some pressure on your neck. To do this, you can use your free arm to grab their knee and pin it to the ground. This will prevent them from squeezing their legs together or lifting their hips up.Then, you can use your head or shoulder to push their other leg down and create more space. Once there is enough space, you can slide your trapped arm out or your other arm back into the guard.
  • Shoulder walk: The shoulder walk escape is a simple but effective way to escape a triangle choke by using your legs and shoulders to create distance and open up their legs.To do this, you need to place both of your hands on their hips and push them away from you. Then, you need to walk your shoulders back and away from them as well. This will create some space between you and them and make it harder for them to tighten the triangle.Once their legs come loose, you can slide your trapped arm out or your other arm back into the guard.
  • Leg over: The leg over escape is a risky but rewarding way to escape a triangle choke by using your leg to break their grip and pass their guard.To do this, you need to lift your free leg over their head and hook it under their chin. Then, you need to pull the opponents head back with your leg and push their leg up with your arm. This will break their grip and open up their legs.Then, you can slide your trapped arm out and pass their guard to side control or mount.

These are some of the specific techniques that you can use to escape a triangle choke from different positions. They will work for different triangles universally, like an inverted triangle or rear triangle choke. Still, how to escape a triangle choke is an art, and you don’t have to stop at the escape.

How to Escape a Triangle Choke Using Wim Deputter’s King’s Gambit

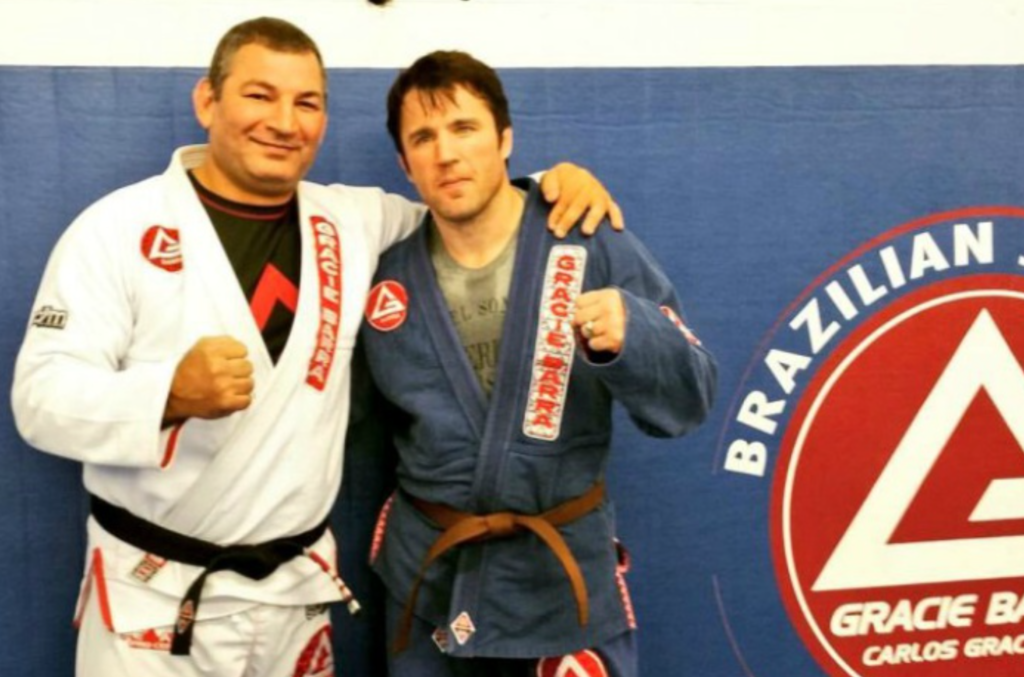
Wim Deputter is a Brazilian Jiu-Jitsu black belt from Belgium who has competed more than 600 times in BJJ, grappling, and MMA. He is also a renowned instructor who has produced many instructional videos and courses on various aspects of grappling.

Wim Deputter uses the “King’s Gambit” approach to defend the triangle choke and takes it further to pass the guard with it. A gambit is a chess move where you sacrifice a piece in order to gain tactical, positional, or other advantage. In other words, Deputter deliberately gives up his arm or his posture in order to create an opening for his escape or his pass when his opponent goes for a triangle.

Wim Deputter’s gambit triangle defense is based on three main principles:

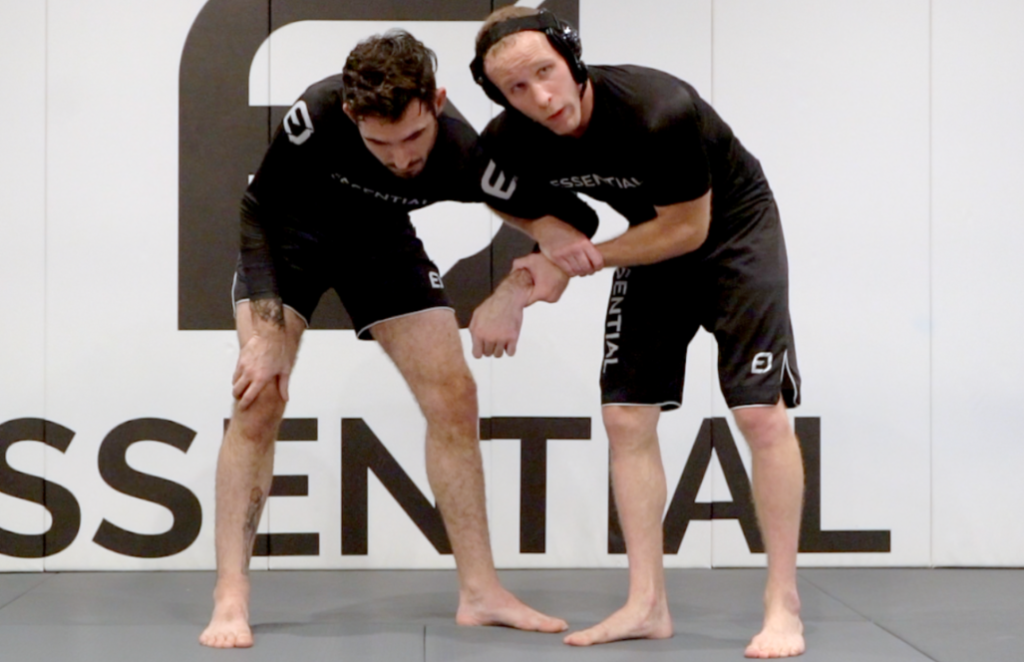
  1. Pushing the knee down with both hands: This technique is similar to the knee pin escape, but instead of using one hand to pin the knee down, Wim Deputter uses both hands to push the knee down with force.This creates a lot of space between his opponent’s legs and relieves a lot of pressure on his neck. It also exposes his opponent’s back or side for him to pass.
  2. Grabbing both ankles and lifting them up: This technique is similar to the shoulder walk escape, but instead of using his hands on his opponent’s hips, Wim Deputter uses his hands to grab both of his opponent’s ankles and lift them up.By doing this he creates a lot of space between him and his opponent and makes it harder for them to tighten the triangle. It also exposes their legs or hips for him to pass.
  3. Grabbing one ankle and driving forward: For this, Deputter uses his hand to grab one of his opponent’s ankles and drive forward. This breaks his opponent’s leg grip and opens up their legs. It also exposes their back or side for him to pass.

These are some of the gambit defense techniques that Wim Deputter uses to defend the triangle choke and use it to pass the guard. They are risky but rewarding, and they require a lot of practice and timing to execute.

Conclusion

In this article, we have shown you how to escape a triangle choke in the traditional way, using the three-stage method: prevention, posture, and escape.

We have also shown you some of the common mistakes to avoid when defending a triangle choke, and some of the best tips and techniques to escape a triangle choke from different positions.

Finally, we introduced you to some of the triangle defense concepts from Wim Deputter, more precisely, his gambit approach to defend the triangle choke and use it to pass the guard.

Learning how to escape a triangle choke is an essential skill for any grappler who wants to improve their defense, confidence, and survival skills. However, learning how to escape a triangle choke is not enough. You also need to practice these techniques regularly with a partner and seek feedback from your coach or instructor. Only then will you be able to master these techniques and apply them in real situations.

Brazilian Jiu-Jitsu Symbols And The Triangle Meaning

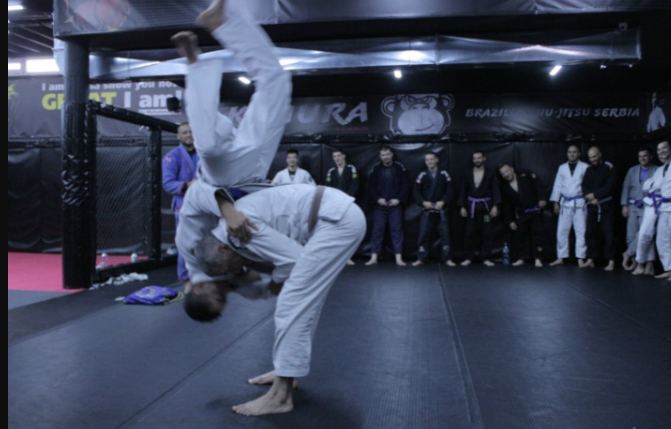
Amazing Flying Triangle At UFC Vegas 17 by BJJ Black Belt Jimmy Flick

Different Triangle Chokes For Different Folkes


How to Master the Russian Tie for Brazilian Jiu-Jitsu

How to Master the Russian Tie for Brazilian Jiu-Jitsu

If you are looking for a powerful and versatile grip that can help you dominate your opponent on the feet and set up various takedowns and submissions, you need to learn the Russian tie.

The Russian tie is a position that every BJJ practitioner should master, as it can give you an edge over your competitors in both Gi and No-Gi grappling. In this article, we will explain what the Russian tie is, how to set it up and execute it in different scenarios, and some common mistakes to avoid.

What is the Russian Tie?

The Russian tie, also known as the Russian 2-on-1, is a control position where you grab your opponent’s wrist with one hand and their shoulder or elbow with the other hand. By doing this, you isolate their arm and prevent them from attacking you with it. You also create leverage and angles to manipulate their balance and posture, opening up opportunities for takedowns and submissions.

The Russian tie can be used in both Gi and No-Gi grappling, but the grips and details may vary slightly depending on the scenario. In No-Gi, you typically stand side-by-side with your opponent, facing in the same direction. You grab their wrist with your near hand and reach over their shoulder with your far hand. You then twist your body and pull their arm across your chest, securing the Russian tie position by lifting their wrist and dropping your shoulder on top of theirs.

In Gi Jiu-Jitsu, you usually stand in front of your opponent and establish a cross grip on their sleeve. Your right hand goes to their right wrist/sleeve, and your left hand goes over their shoulder and grabs the back of their collar. You then pull their arm across your body and tuck your elbow close to your torso, while using the collar grip to control their head.

Russian tie Position

How to Use the Russian Tie for Takedowns

Once you have established the Russian tie, you have several options for taking your opponent down. Some of the most common and effective takedowns from the Russian tie are:

  • Russian Tie Throw(s)

This is a spectacular and explosive takedown that involves rolling under your opponent with your head between their legs. You use the momentum of the roll to flip them over your body and land in side control.

To perform this takedown, you need to lower your level and place your head in front of their lead leg. You then dive under them while keeping a tight grip on their arm via a slightly modified Russian tie. Namely, you want to establish a Kimura grip (figure four grip) so that you stay attached and in complete control as you roll under.

  • Russian Tie Trip

This is a simple and quick takedown that involves pulling your opponent’s arm across your body to get them off balance.

You then step behind their leg and trip them down or take their back.

To perform this takedown, you need to pull their arm across your chest while stepping to the side with your near leg. You then put all your weight behind the Russian tie control, pressing your chest to the triceps. As the opponents try to posture up, you use their momentum to trip them, either by hooking the near leg with your leg, or tripping them by placing your instep behind their back leg.

  • Russian Tie Single Leg Takedown

This is a classic wrestling takedown that involves grabbing your opponent’s leg and driving them down. You can set single leg takedowns from the Russian tie by creating an optimal angle and clearing their arm.

To perform this takedown, you need to step to the side with your near leg while pulling their arm across your body. You then release their wrist (or sleeve) and grab their near side leg behind the knee with your near hand. You then drive forward while lifting their leg and pushing them down with your other grip or finish with any variation of the single leg that you prefer.

How to Use the Russian Tie for Submissions

The Russian tie can also be used to set up various submissions. BJJ might be the king of ground fighting martial arts, but you still need moes like the Russian Tie to get to the ground. That said, you can follow up on your 2-on-1 efforts with some very effective submissions from the like:

  • D’arce Choke

The D’arce choke involves wrapping your arm around your opponent’s neck and shoulder from a front headlock position and locking it with your other arm behind the opponent’s neck. You then squeeze and twist to finish the choke.

To get the D’arce off you need to transition from the Russian tie to a front headlock position if you haven’t landed in top side control after finishing a throw or takedown.

From the front headlock, you’ll need to switch the arm controlling their wrist to a collar tie to ensure you tilt them to their side (most often by utilizing a Nelson variation). Once the opponent is on their side, with their top arm trapped by your weight, you can slide the arm controlling the upper arm across their neck to get the D’arce position.

  • Kimura

This is a variation of the kimura lock that involves twisting your opponent’s arm behind their back and applying pressure on their shoulder. You can perform this submission on the feet or on the ground.

To finish the Kimura, you need to transition from the Russian tie to a figure four grip by switching the hand you’re using to hold their wrist. Trapping their upper arm gives you more than enough time to achieve this. after you have the grip, you can finish the Kimura any way you want.

  • Armbar

This is a variation of the armbar that involves trapping your opponent’s arm between your legs and extending it to hyperextend their elbow.

The transition from the Russian tie to an armbar position needs to be fast as you; ‘re moving your weight away from the opponent in order to get to an armbar position. Think of Mighty Mouse’s legendary suplex armbar in the UFc – that’s the kind of transitioning speed ou need to pull this one off.

Common Mistakes to Avoid

The Russian tie is a powerful and versatile position, but it also requires some skill and attention to detail. Here are some common mistakes to avoid when using the Russian tie for the purposes of BJJ:

  • Not controlling the posture: The head is the key to controlling your opponent’s posture and balance. If you let them lift their head up, they can escape or counter your attacks. While you’re not gripping the head directly, you’re still affecting posture via the shoulder of the arm you’re controlling with the 2-on-1. Remember to keep their posture broken (folded) at all times.
  • Missing angles: The Russian tie works best when you create angles and move around your opponent. If you stay in front of them, they can defend or attack more easily. You need to use your footwork and body movement to create angles and openings for your attacks.
  • Not being aggressive: The Russian tie is a position that requires aggression and pressure. If you are passive or hesitant, you will lose the advantage and give your opponent time to recover or counter. You need to be aggressive and decisive with your attacks, using speed and explosiveness to catch them off guard.

Russian tie throw

Conclusion

The Russian tie is a position that every Brazilian Jiu-Jitsu practitioner should learn and master. It can help you control your opponent, set up takedowns and submissions, and dominate the stand-up game. Whether you practice BJJ in Gi or No-Gi, or any grappling martial arts for that matter, the Russian tie can give you an edge over your competitors. Try it out and see for yourself how effective it is.

Also, make sure to check out this previous article we have on single leg takedowns:

How to Make the Single Leg Takedown Work For BJJ, MMA and Wrestling Athletes

Russian Tie Throw – A Gi Variation For Brazilian Jiu-Jitsu

How to Hip Toss Like a Pro: A Step-by-Step Guide For Grapplers

How to Hip Toss Like a Pro: A Step-by-Step Guide For Grapplers

Do you want to learn how to throw your opponent in style? What do BJJ, MMA, and wrestling have in common? They all use hip toss variations to take down their opponents, especially as high-effective follow-ups to failed takedowns and throws.

A hip toss is a versatile set of moves based on the premise of loading an opponent onto one’s hip and then taking them down by a variety of different maneuvers. Hip tosses can improve your balance, timing, leverage, and control, as well as give you an advantage in positioning and scoring.

In this article, you will learn the basic principles, the common variations, and the tips and tricks for executing and finishing hip tosses.


Basic Principles of Hip Tosses

The main principle behind the setup of a hip toss is to make the opponent’s hips go back while they are leaning forwards. This allows you to plant your hips underneath your opponent and pull them into the hip toss while pulling them up and over your body onto the mat.

To do this, you need to break their balance (kuzushi) by pulling, pushing, or feinting with your arms and body.

The footwork of a hip toss involves planting your feet just slightly in front of the opponent’s hips. At first, the footwork takes some practice to get used to because you end up crossing your feet.

Crossing your feet puts you out of position in wrestling so when you plant your feet in the correct position, you need to execute the throw right away. You can also use a back step or a pivot to create more momentum and angle for the throw.

The arm position for a hip toss depends on the type of grip you have on your opponent. Most people use an underhook to do the hip toss, but it’s possible to perform a hip toss with an overhook too.

The other arm typically has wrist control but bicep or inside control works too. You’ll get more leverage with the inside control since you’re grabbing closer to their center of gravity. You can also use different grips such as lapel, collar, or sleeve if you are wearing a Gi.

The key to using your hips as a fulcrum for a hip toss is to make sure they are lower than your opponent’s hips and aligned with their center of gravity. It should feel as if your opponent is falling up and over you.

You can also use a subtle trick of pulling your opponent up from the mat so that they are light on their toes. This makes it much easier to execute the hip toss than if your opponent’s feet are still heavily planted on the ground.

Wrestling headlock toss

Exploring Common Hip Toss Variations

There are many variations of hip tosses that are used in different martial arts, such as judo, wrestling, and BJJ. They differ from each other in terms of grip, angle, direction, and setups.

Judo Hip Tosses

Judo has 10 official hip tosses (koshi-waza) that are classified according to their direction, grip, and leg action. Some examples are:

  • O Goshi: a large hip throw that involves putting one hand behind the opponent’s back and lifting them over your hip. This is often the first throw taught to beginners as it is simple and effective.
  • Uki Goshi: a floating hip throw that involves sliding your hip under the opponent’s waist and tilting them over your hip. This is a variation of o goshi that requires less lifting and more timing.
  • Harai Goshi: a sweeping hip throw that involves sweeping one leg across the opponent’s legs and throwing them over your hip. This is a powerful throw that can be used when the opponent tries to escape o goshi by jumping forward.
  • Hane Goshi: a spring hip throw that involves lifting one leg between the opponent’s legs and throwing them over your hip. This is a dynamic throw that can be used when the opponent tries to resist harai goshi by blocking your leg.
  • Utsuri Goshi: a changing hip throw that involves switching your hips with the opponent’s hips and throwing them over your shoulder. This is a counter throw that can be used when the opponent tries to lift you up for their own hip toss.

Hip Toss Wrestling Variations

Wrestling has several variations of hip tosses that are based on different grips, head positions, and entries:

  • Headlock toss a move that involves locking your arm around the opponent’s head and throwing them over your hip. This is a simple and effective throw that can be used from various clinch positions.

  • Arm Drag Reverse Hip Toss: a move that involves grabbing the opponent’s arm and flipping them over your hip by planting one of your legs in between theirs. This is a quick and sneaky throw that can be used when the opponent reaches for your collar or neck.

  • Single Leg to Hip Toss: Olympic gold medalist wrestler Henry Cejudo has a really slick hip toss wrestling variation that is perfect for grapplers of all levels.He sets it up with an inside tie and looks to shoot for a single leg takedown. If the shot fails, the backup option is a very effective hip throw. You then step in just like for a Judo hip throw with an over-under control over his shoulders.

Best Possible Hip Toss Variation for BJJ and Grappling

BJJ has adapted some of the wrestling hip tosses for its No-Gi grappling context, Judo throws for Gi situations, as well as developed some of its own variations based on different scenarios and positions.

How do you choose the best possible variation of hip toss for Brazilian Jiu-Jitsu and grappling? It depends on factors such as your body type, your opponent’s stance, your grip options, your level of skill, and your preferred position after landing.

Here are some general guidelines:

  • If you are taller than your opponent, you can use variations that involve lifting them up with your hips, such as o goshi.
  • If you are shorter than your opponent, focus on variations that involve sweeping their legs with yours, such as harai goshi or hane goshi.
  • If you have strong grips or are wearing a Gi, you can use variations that involve pulling their sleeves or lapels, such as sode tsurikomi goshi or harai goshi.
  • If you have weaker grips or are not wearing a Gi, you can use variations that involve underhooks or overhooks, such as the headlock, arm drag, and single leg setups from wrestling.

BJJ Hip throw variation

Conclusion

Hip tosses are powerful and versatile takedowns that can be used in BJJ, MMA, and wrestling. They are based on the principle of using your hips as a fulcrum to throw your opponent over your body. You can execute them from different grips, angles, and directions depending on the situation and your preference. They can also be combined with other techniques such as feints, fakes, shots, or combinations to set them up more effectively.

The Best BJJ Gi Throws and Takedowns DVDs

Judo Throws For BJJ: Shoulder Throw Variations

The Thrilling Brown Belt Jiu-Jitsu Journey and Its Rewards

The Thrilling Brown Belt Jiu-Jitsu Journey and Its Rewards

As a dedicated Jiu-Jitsu enthusiast, the aspiration of achieving a black belt rank likely resides in your mind. However, you must first face the demanding and fulfilling brown belt Jiu-Jitsu level, a pivotal point of your path, before reaching your destination.

The brown belt denotes the ultimate stage of proficiency, expertise, and commitment in the Brazilian Jiu-Jitsu hierarchical structure and is the last of the colored belts.
The belt known for its challenging nature in BJJ is widely acknowledged to be the one that readies practitioners for their ascent to the coveted black belt.

That said, what are some of the requirements, expectations, and responsibilities of this rank? How can you make the most of your time as a brown belt and enjoy the journey? And how can you prepare yourself for the final step to the black belt?

Brown belt BJJ rank

Understanding the Brown Belt in Jiu-Jitsu

Before we dive into the details of how to become a brown belt and what to do as one, let’s first define what this rank means and how it fits into the jiu-jitsu belt system.

What is the Brown Belt Jiu-Jitsu rank?

A brown belt in Jiu-Jitsu is the fourth level in the ranking system, representing a significant achievement. It is acquired after the white, blue, and purple belts and before the black belt in the hierarchy of belts.

A brown belt signifies that you have mastered the fundamentals of Jiu-Jitsu and have developed a solid and diverse game. You are able to execute techniques with precision, efficiency, and creativity, and able to adapt to different situations and opponents, imposing your game plan along the way.

The brown belt Jiu-Jitsu rank also implies that you have a deep understanding of the underlying concepts and principles of grappling. At this point, you are able to explain and teach techniques to lower belts and can analyze and improve your own performance. You also possess an understanding of both your strong suits and areas for improvement and have a well-defined idea of your objectives.

Being a brown belt also reflects that you have a strong commitment and passion for Jiu-Jitsu. You have trained consistently for several years, overcoming challenges, injuries, and plateaus.

How Does the Brown Belt Rank in the Jiu-Jitsu Belt System?

The brown belt is the last of the colored belts in the BJJ belt system, which consists of five main belts: white, blue, purple, brown, and black. Each belt has a different meaning and requirements, depending on the age and experience of the practitioner.

  • White belt is the beginner level, where you learn the basics of jiu-jitsu and develop a foundation for your game.
  • Blue belt is the intermediate level, where you expand your repertoire of techniques and start to develop your own style.
  • Purple belt represents the advanced level, where you refine your skills and deepen your understanding of jiu-jitsu.
  • Brown belt is the expert level, where you polish your game and prepare yourself for the black belt.
  • Black belt means you’ve achieved the master’s level, where you demonstrate a high degree of proficiency and knowledge in Jiu-Jitsu.

The black belt also has different degrees, from 1st to 9th, which indicate the seniority and recognition of the practitioner.

The jiu-jitsu belt hierarchy also includes exclusive belts like the coral belt (red-and-white) and grandmaster belt (red) that are awarded to highly respected black belts for their exceptional dedication and valuable contributions to Brazilian Jiu-Jitsu.

Brown Belt Jiu-Jitsu Rank Journey

The Journey to the Brown Belt Jiu-Jitsu Rank

Now that we have a clear understanding of what a brown belt is and how it ranks in the jiu-jitsu belt system, let’s explore how one can achieve this rank and what it entails.

How Long Does It Take to Get a Brown Belt in Jiu-Jitsu?

While there is no definitive answer to this question, there is a selection of different factors that can influence the time it takes to get a BJJ brown belt. Some of these factors include:

  • The frequency and intensity of your training.
  • The quality and quantity of your instruction.
  • The level and diversity of your training partners.
  • Whether or not you’re competing and the difficulty of the tournaments.
  • The personal and professional obligations you have outside of Jiu-Jitsu.
  • The physical and mental challenges you face along the way.
  • The individual criteria and expectations of your instructor.

However, based on some general estimates and averages, one can expect to spend at least 6-8 years of consistent training to reach the brown belt level. This means training at least 3 times a week for about 2 hours per session.

Of course, this is just a rough approximation, as some people may take longer or shorter than that, depending on their circumstances and abilities. Some exceptional cases may even achieve the brown belt in less than 5 years, such as Gordon Ryan, who got his brown belt in 4 years and 8 months.

Challenges and Obstacles Brown Belts Face

The journey to the brown belt Jiu-Jitsu rank is not a smooth or easy one. You will likely encounter some difficulties and setbacks along the way, which may test your resolve and commitment. Some of these challenges and obstacles may include:

  • Injuries: Jiu-Jitsu is a physical sport that involves a lot of contact, pressure, and movement. As such, it carries a risk of injury, especially if you train hard or compete frequently
  • Plateaus: Grappling requires constant adaptation and improvement. At certain intervals, you’re likely to encounter periods of stagnation, during which you perceive yourself as not making any advancement or acquiring fresh knowledge.
  • Frustration: Jiu-jitsu is a competitive and challenging martial art that exposes your weaknesses and mistakes. It is understandable and expected to feel frustrated, especially if you face opponents who are better or stronger than you, or if you fail to achieve your goals or expectations.
  • Boredom: BJJ is rarely seen as a repetitive activity, but do anything for longer than 5 years and you’ll find something to be bored with, whether it is drills or warm-ups.
  • Pressure: Jiu-jitsu is a demanding and rewarding sport that requires a lot of dedication and passion. Pressure is something you place on yourself, especially if you have high standards and expectations of yourself.

How Can You Overcome These Challenges and Obstacles?

Some resources and strategies that can help you overcome these challenges and obstacles, and make the most of your time as a brown belt include:

  • Recovery: BJJ is a taxing activity that demands a lot of your body and mind. Ensuring your health and wellness demands a focus on essentials such as adequate rest, proper nourishment, hydration, regular stretching, and similar self-care measures.
  • Variety: Spicing up your training and keeping it fun and interesting is always a good idea. Trying out new techniques, attending different classes, visiting other gyms, training with different partners, competing in different events, and cross-training in other grappling martial arts are grat ways to break your routine.
  • Feedback: Jiu-Jitsu is a collaborative environment involving much communication and interaction. Seek and receive feedback and guidance as much as possible. Ask questions, listen to advice, watch videos, read books, and learn from anyone who can help you improve.
  • Mindset: Try to cultivate a positive and constructive mindset, by setting realistic and achievable goals, celebrating your achievements, embracing your challenges, and enjoying the process.

JIu-JItsu brown belt

Skills and Mindset of a Brown Belt

Now that we have explored how to get to the brown belt Jiu-Jitsu rank and what to do as one, let’s examine what skills and mindset you should have as a brown belt, and how to develop them.

Physical Skills of a Brown Belt

A brown belt Jiu-Jitsu practitioner should have a high level of physical skills, which include:

  • Technical knowledge: A brown belt should be able to execute techniques with precision, efficiency, and creativity. They should have a solid foundation of fundamentals, but also be able to adapt and improvise according to the situation. At this stage, having a broad range of jiu-jitsu skills including takedowns, guard passing, sweeps, submissions, escapes, transitions, and more, is a highly justifiable expectation.
  • Timing: As a brown belt you should be able to apply techniques with the right timing and precision. That means knowing when to initiate, maintain, or abandon a technique.
  • Control: Controlling the opponent with pressure, leverage, and positioning are all brown belt Jiu-Jitsu traits. Control, however, extends beyond just pinning the other person. Brown belts need to be able to control themselves with balance, posture, and breathing. They should also be able to set the pace and direction of a match or roll and impose their game plan.

Mental Skills of a Brown Belt

A person holding a brown belt in Jiu-Jitsu should possess specific mental abilities, including a profound comprehension of the fundamental concepts and principles of Brazilian Jiu-Jitsu. They should be able to explain and teach the biomechanics of different grappling techniques to lower belts and to analyze and improve their own performance.

  • Confidence: Grapplers who have reached a brown belt are expected to believe in themselves and their game plan, and trust their instincts and decisions.
  • Humility: Humility in attitude and behavior is an important characteristic of brown belts. They have to respect themselves and others, regardless of rank or skill level, be humble enough to admit their mistakes and limitations and to seek feedback and guidance from others.
  • Resilience: Coping with stress, pressure, injuries, and the like is normal when you’re an expert in grappling. Expect to overcome lots of challenges and setbacks as a BJJ brown belt.

Competing brown belts BJJ

The Meaning and Significance of the Brown Belt Jiu-Jitsu Rank

Having achieved the brown belt rank in Jiu-Jitsu, you possess not only a particular set of abilities and perspectives, but also a degree of acknowledgment and deference. The brown belt has a meaning and significance that goes beyond the technical and tactical aspects of BJJ, and that reflects your personal growth and character development.

What Does the Brown Belt Symbolize?

The brown belt symbolizes different things in Jiu-Jitsu, depending on the perspective and interpretation of the practitioner. However, some common themes that emerge are:

  • Maturity: You have a clear sense of who you are and what you want in grappling. You have developed a mature attitude towards your training, your goals, your challenges, and your achievements.
  • Excellence: Achieveing a high standard of performance and quality in your Jiu-Jitsu game, as well as in your attitude and behavior, showing professionalism, integrity, and ethics.
  • Dedication: Dedication to your team and your instructor, and all the time and effort put into achieving the brown belt Jiu-Jitsu rank does not go unnoticed.
  • Passion: The brown belt symbolizes passion, which means you have a strong love and enthusiasm for Jiu-Jitsu, which you also share with others, inspiring them and teaching them.

These themes are not exclusive to the brown belt level, as lower belts may also embody some of them to a certain degree. However, a brown belt should have fully embraced these characteristics and should be able to express them consistently and confidently.

What Is the Responsibility and Role of a Brown Belt in Jiu-Jitsu?

Having the rank of brown belt comes with a responsibility and role that goes beyond the technical and tactical aspects of jiu-jitsu, and that reflects your contribution and influence in the Jiu-Jitsu community.

As a brown belt, you have a responsibility and role to:

  1. Be a role model: As a brown belt, you are a role model for lower belts, who look up to you and admire you. You should set an example of excellence and professionalism in your training and your behavior.
  2. Be a mentor: Apart from being a role model you’ll directly mentor lower belts, who seek your guidance and advice. Make sure to help them learn and improve their Jiu-Jitsu skills and mindset. and encourage them to overcome their challenges and achieve their goals.
  3. Be a leader: A leader for your team, for your students, the right hand of your black belt instructors, always ready to jump in.
  4. Stay a student: Remember that even though you are a brown belt Jiu-Jitsu pracitioner, you are still a student who has more to learn and improve. Keep an open mind and a curious attitude toward new techniques and concepts.

Brown to black belt promotion BJJ

Preparing for the Black Belt

The black belt represents a high degree of mastery and knowledge in BJJ, as well as a lifetime commitment and passion for the art.

However, the black belt is not just a matter of time or rank. It is also a matter of skill and mindset. The distinction between a brown belt and a black belt extends beyond their belt color and can be felt quite strongly.

As a brown belt, you should prepare yourself for the black belt by bridging the gap between the two belts.

Aim to refine your strengths, address your weaknesses, expand your repertoire, and develop your own style. Keep training hard, competing regularly, learning constantly, and sharing generously.

Conclusion

The brown belt level is a highly demanding and fulfilling phase of your Jiu-Jitsu expedition. It is a stage where you have mastered the fundamentals of Jiu-Jitsu, and have developed a solid and diverse game. It is also a stage where you have a deep understanding of the concepts and principles of jiu-jitsu, and have developed a confident and humble mindset.

Watch BJJ Brown Belt Ashton Kutcher Sparring With Craig Jones

BJJ Brown Belt Requirements And Curriculum

Best BJJ Belts For 2024 – Reviews and Guide

2 Worst Belts For BJJ Imposter Syndrome (And Dealing With It)

Why BJJ Belt Promotions Don’t Matter… Except For Black Belt

The Threat Is Real: Megadeath’s Dave Mustaine Gets Brown Belt

How to Make the Single Leg Takedown Work For BJJ, MMA and Wrestling Athletes

How to Make the Single Leg Takedown Work For You

Do you want to learn one of the most effective and versatile takedowns in grappling? Whether you are a Brazilian Jiu-Jitsu, mixed martial arts, or wrestling athlete, mastering the single leg takedown will improve your game and confidence on the mat. In this article, you will learn the benefits of the single leg takedown, the different variations and setups, the common mistakes and counters, and some drills and tips to improve your single leg takedown game.

The Power Of Single Leg Takedowns

One of the most effective and commonly used takedowns in any grappling sport (that allows it) is the single leg takedown. This is mainly because there are many different variations and technical nuances of the single leg takedown. If you’re trying to learn the single leg takedown but you’re not sure where to start, let me break it down for you and show you how you might approach learning the single leg.

The single leg takedown is a technique that involves grabbing one of your opponent’s legs, usually with both hands and using your position to force them to the ground. It is useful against tall and heavy opponents, as well as opponents who have a strong sprawl or guard. For over a decade, it has been the first choice for grapplers and combat athletes who like to compete.

Here are some of the advantages of using the single leg takedown over other takedowns:

  • It is easier to execute than a double leg takedown, since you only need to isolate one leg.
  • It offers more finishing options and transitions, such as switching to a double leg, a high crotch, a trip, or a sweep.
  • It works well in both Gi and No-Gi grappling, as well as in an MMA fight with strikes.
  • It can be applied from various distances and angles, depending on your opponent’s stance and reaction.

Takedown

Variations and Setups of the Single Leg Takedown

There are different types of single leg takedowns that you can use depending on your preference and situation. The main single leg variation categories are high single, low single, and mid-level single. For each type, we will explain how to perform single leg takedown effective variations step by step.

For future reference, virtually nobody in wrestling says “mid-level singles”. They’ll typically just refer to the three main types as high singles, single legs, and low singles.

High Single

The high single is the most common and basic form of single leg takedown . It is very easy to teach to beginners and involves grabbing your opponent around their knee.

High singles are easiest to learn since you don’t need to get into the complexities of the penetration step (which is where most beginners make their mistakes).

This variation is great if your opponent stands up in a very high stance or if you don’t want to drop to your knees with a single leg (due to a knee injury, for example).

To perform a high single leg takedown, you need to do the following steps:

  1. Step towards your opponent’s leg.
  2. Put your forehead to their chest, and grab the back of their knee with your arms.
  3. Lift your opponent’s leg and squeeze it between your thighs.
  4. Push your body down to force your opponent to bend their knee.


Mid-Level Single

The mid-level single is a hybrid between a high single and a low single. It involves grabbing your opponent’s shin or calf instead of their knees or ankles. It has more power than a low single but more speed than a high single. It is the best single leg takedown variation for Brazilian Jiu-Jitsu in particular..

To perform a mid-level single leg takedown, you need to do the following steps:

  1. Go for a collar tie on your opponent’s neck with your dominant hand.
  2. Use your collar tie to snap the opponent’s head down and create an opening for your attack.
  3. Step inside with your foot that’s on the same side as your collar tie.
  4. Shoot for their shin or calf with your other arm.

Low Single

The low single is another variation of single leg takedown that involves grabbing your opponent’s ankle or foot. It is more difficult to perform than a high single but it has more precision and less risk of getting sprawled on.

Low singles are generally the favorite for fast and technical wrestlers since the attack focuses on precision and leverage (though there are exceptions to every rule). Setups are somewhat limited because you’ll tend to shoot a low single from a slightly farther distance.

Done wrong, a failed low single also puts you in a bad position where you’re extended and your opponent can put their weight on top of you like a sprawl, so there is more room for error than the other two variations. The plus side is that with the additional technical mastery, it’s also potentially the least energy-consuming of the single legs, which is why it tends to be the energy-efficient attack of choice for quick and technical wrestlers that can pull it off.

To perform a low single leg takedown, you need to do the following steps:

  1. Establish an underhook on your opponent’s arm that’s opposite to the leg you want to attack.
  2. Use your underhook to pull your opponent towards you and lower their level.
  3. Step outside with your foot that’s on the same side as your underhook.
  4. Shoot for their ankle or foot with your other arm.

Common Mistakes and Counters of the Single Leg Takedown

As with all takedown techniques, there are some common mistakes that people make when attempting or defending the single leg takedown. Here are some along with ways how to correct them:

Mistakes When Attacking

  • Looking down at your opponent’s leg instead of keeping your head up and facing their chest. This makes you vulnerable to guillotine chokes, headlocks, or sprawls.
  • Shooting too far away from your opponent or too close to them. This makes you lose balance or power in your attack.
  • Not changing levels before shooting for their leg. This makes you telegraph your attack and gives them time to react.
  • Not driving forward after grabbing their leg. This makes you lose momentum and control in your position.

Mistakes When Defending

  • Not sprawling when your opponent shoots for your leg. This makes you lose leverage and stability in your defense.
  • Not using a whizzer when your opponent grabs your leg. A whizzer is an overhook on your opponent’s arm that’s holding your leg. It helps you push their head down and away from you while freeing yourself from their grip.
  • Not using underhooks when your opponent lifts your leg. Underhooks are hooks under your opponent’s arms that help you control their upper body while preventing them from finishing their takedown.
  • Not using hooks when your opponent tries to trip or sweep you. Hooks are hooks behind or inside your opponent’s legs that help you balance yourself while disrupting their movement.

There are also some effective ways to counter or escape the single leg takedown if you find yourself in trouble. Some of them are:

  1. Using a guillotine choke when they shoot for your lead leg
  2. Using a kimura lock when they grab your rear leg
  3. Using a knee strike when they lift your leg
  4. Using a hip toss when they push you down
  5. Using a sprawl when they try to switch sides
  6. Using a sit out when they try to spin behind you

For each counter or escape, you need to act quickly and decisively before they secure their position.

Drills and Tips to Improve Your Single Leg Takedown Game

Practice makes perfect, especially when it comes to grappling techniques like the single leg takedown. Here are some training exercises or drills that can help you practice and improve your skills:

Double-Leg Drill

The double-leg drill is a simple drill that involves shooting for a double-leg takedown on your partner but instead of finishing it, you switch to a single-leg takedown on either side. This drill will help you develop speed, timing, accuracy, and transitions for your single-leg takedowns.

To perform this drill, you need to do the following steps:

  1. Start in front of your partner in a standing position with enough distance between you.
  2. Shoot for a double-leg takedown by changing levels and driving forward with both arms around their legs.
  3. As soon as you reach their legs but before they sprawl or defend themselves switch one arm from one leg to another while keeping hold of one leg with another arm.
  4. Finish the single-leg takedown by lifting their leg up or tripping them down depending on which variation you choose.
  5. Repeat this drill on both sides alternating between high singles low singles mid-level singles etc.

Shadow Wrestling Drill

The shadow wrestling drill is another simple drill that involves practicing different types of single leg takedowns without a partner. This drill will help you improve your footwork, balance, coordination, and muscle memory for your single-leg takedowns.

To perform this drill, you need to do the following steps:

  1. Start in a standing position with a good wrestling stance (feet apart).
  2. Imagine an imaginary opponent in front of you and visualize how you would set up and execute a single leg takedown on them.
  3. Perform the single leg takedown as if you were doing it on a real opponent but without touching the ground or losing your balance.
  4. Repeat this drill with different types of single leg takedowns and from different angles and distances.

Partner Resistance Drill (Scrimmage)

The partner resistance drill is a more advanced drill that involves practicing single leg takedowns with a partner who offers different levels of resistance. This drill will help you test your skills, adapt to different situations, and overcome challenges for your single-leg takedowns.

To perform this drill, you need to do the following steps:

  1. Start in front of your partner in a standing position with enough distance between you.
  2. Agree on a level of resistance that your partner will offer when you try to take them down. For example, they can offer no resistance, light resistance, moderate resistance, or full resistance.
  3. Shoot for a single leg takedown on your partner using any variation or setup that you want.
  4. Try to finish the single leg takedown by taking them down or transitioning to another position.
  5. Repeat this drill with different types of single leg throws and different levels of resistance.


Single Leg Takedown Mastery Tips:

In addition to these drills, here are some general tips or advice that can help you master the single leg takedown technique:

  • Always keep your head up and facing your opponent’s chest when shooting for their leg. This will help you avoid getting choked or sprawled on.
  • Use feints or fakes to make your opponent react and create openings for your attack. For example, you can fake a jab to their face or a double leg takedown before going for their leg.
  • Mix up your levels and angles when shooting for their leg. For example, you can shoot high or low, inside or outside, straight or diagonal depending on your opponent’s stance and reaction.
  • Don’t be afraid to switch sides or change directions if you encounter resistance or sprawls. For example, you can switch from a high single to a low single or from an inside single to an outside single if your opponent defends well.
  • Practice with different partners who have different styles and sizes. This will help you learn how to deal with various opponents and scenarios.

How Do I Work on my Single Leg?

Choose your leg attack variation, learn the key finishing positions in that variation, and then master the setups. This sequence is unorthodox but there is a reason for the madness.

At the beginner levels, you can get a lot of mileage out of a mediocre setup but your inability to finish will put you in all kinds of trouble. You may also develop bad positional habits down the road if you’re used to getting extended as well.

Of course, I don’t mean have zero knowledge of how to set up an attack. Learn the basics there, but sharpen them after you feel confident in your finishes. Wrestlers tend to hesitate for their attacks due to their inability to finish their takedowns, so we want to mitigate this as much as possible by focusing on finishes first.

The single leg takedown is one of the most popular takedowns in wrestling. When you are controlling one of your opponent’s legs, your ability to score a takedown is far greater than your opponent’s ability to score a takedown. You can also personalize a single leg based on your body type, which makes it even more favorable. There seems to be endless variations and nuances of single leg takedowns.

Single Leg takedown BJJ

Conclusion

The single-leg takedown is one of the most effective and versatile techniques in grappling that can give you an edge over your opponents. Whether you are a BJJ, MMA, or a wrestler, mastering this technique will improve your game and confidence on the mat. So what are you waiting for? Try out these tips and drills today and let us know how they work for you!

Written By:
Che Chengsupanimit
is a former collegiate wrestler, member of Thailand’s national freestyle wrestling team, and current combat sports enthusiast. He writes about how to improve your takedowns and achieve higher performance both physically and mentally. You can learn more about Che and his work
at his blog. (link: https://chayoot.blog/hello/)

How to Make the Single Leg Takedown Work For You

DVD and DIGITAL Instructionals Related to Single Leg Takedowns :

  1. Finishing The Single Leg Takedown: The Art of Chain Wrestling by Cain Velasquez

  2. The Single Leg Takedown by Jimmy Sheptock

  3. The Head Inside Single Leg Takedown by Tyler Caldwell

Eddie Bravo: The Man Who Revolutionized Jiu-Jitsu

Eddie Bravo: The man who revolutionized Jiu-jitsu

When you mix Brazilian jiu-jitsu, rock music, humor, and conspiracies, what is the end result?

Eddie Bravo is a highly influential and controversial figure within the martial arts community. Founder of 10th Planet Jiu-Jitsu and the EBI grappling competition, he is an accomplished American instructor in martial arts, an extremely technical fighter, a comedian, a podcaster, and a musician.

His claim to fame stems from his remarkable triumph against the legendary Royler Gracie at the ADCC Championship in 2003, wherein he skillfully deployed his unique rubber guard technique to overpower the iconic Brazilian Jiu-Jitsu titan.

Eddie Bravo’s identity as a martial artist and the origins of his unique jiu-jitsu technique have yet to be explored. What impact has he had on MMA and grappling in general? And why is he so controversial among his fans and critics?

Eddie Bravo

Background

Eddie Bravo was born Edgar Cano in Santa Ana, California in 1970. He later changed his surname to Bravo, the name of his stepfather. Both of his biological parents are Mexican.

Growing up, Bravo took to music and started to play the drums and guitar. He formed several bands with aspirations of becoming a famous musician. He also developed an interest in athletics, playing football and joining his high school’s wrestling team.

In 1991, Bravo moved to Hollywood, where he looked to succeed in the music industry. He formed a band called Blackened Kill Symphony and got a gym membership to stay in shape. However, he only visited the gym twice and soon became interested in martial arts.

Introduction to Brazilian Jiu-Jitsu

After watching Royce Gracie win the first UFC event in 1993, Bravo was amazed by the effectiveness of the martial art of Brazilian Jiu-Jitsu. He started taking karate classes and then joined a Jeet Kune Do academy, where he learned various aspects of striking and grappling.

In 1996, he began training in Brazilian Jiu-Jitsu under Jean Jacques Machado, one of the legendary Machado brothers who are cousins of the Gracie family. He quit Jeet Kune Do in 1998 to focus solely on jiu-jitsu.

He received his blue belt and started developing his own techniques, such as the twister, a spinal lock that he adapted from an old wrestling position.

Around 1999, Bravo earned his purple belt and began working on his variation of the open guard, which he later called the rubber guard. His idea was to control the opponent’s posture and prevent strikes from the bottom position, which he thought was more functional in mixed martial arts or No-Gi situations.

In 2003, Bravo entered the ADCC Championship, the most prestigious submission grappling tournament in the world, as a brown belt after winning the ADCC North American trials. He faced Gustavo Dantas in the first round and submitted him with a rear naked choke in what was considered an upset.

He then faced Royler Gracie in the quarter-finals, a four-time world champion and three-time ADCC champion.

Bravo traded comfortably top positions with Gracie throughout the match before deploying his advanced rubber guard and catching him in a triangle choke. The submission shocked the No-Gi world and made Bravo an instant star.

He then lost to Leo Vieira in the semi-finals, who was the eventual tournament champion. Eddie Bravo’s competitive work earned him his black belt from Jean Jacques Machado shortly after the event.

What Is The 10th Planet Jiu-Jitsu Style?

Eddie Bravo’s style of Jiu-Jitsu is different from the traditional Brazilian Jiu-Jitsu in many ways. Bravo decided to develop his own system of No-Gi Jiu-Jitsu, which focuses on positions and submissions that are more effective in MMA or No-Gi situations and not reliant on Gi grips.

Being the creative genius he is, he also coined his own terminology for his fighting style as well as created notable techniques, such as the rubber guard, the twister, the lockdown, the electric chair, and many more.

Rubber Guard

The rubber guard is a way of controlling the opponent’s posture and preventing strikes from the bottom position. It involves using the legs and arms to trap the opponent’s head and arm, while creating angles and openings for attacks.

Rubber guard mastering is no easy task, as it has many moving parts and unique transitions, such as: mission control, the zombie, the new york, the chill dog, the invisible collar, the crackhead control, the jiu claw, the gogo clinch, the gogo plata, the omoplata, and others.

Eddie Bravo Rubber Guard

Twister

The twister is a spinal lock that can cause severe pain and damage to the neck and spine. It involves isolating the opponent’s head and arm from one side while hooking the opponent’s leg from the other side.

You can set the Twister up from various positions, such as the back mount, the side control, the half guard, the Twister side control (reverse Kesa Gatame), and others.

Lockdown Half Guard

The lockdown is a way of trapping the opponent’s leg and creating leverage for sweeps and submissions. It involves crossing one leg over the other and hooking the opponent’s leg with both feet. The lockdown can be used from various positions, such as the half guard, the butterfly guard, and others.

The electric chair is a sweep that can also transition into a groin stretch submission. It involves using the lockdown to elevate the opponent’s hips and then sliding under them to grab their far leg. The electric chair can be used to sweep the opponent to either side or to submit them by stretching their groin.

Metamoris Royler vs. Bravo 2 lockdown half guard

Eddie Bravo’s style of Jiu-Jitsu has some benefits and drawbacks. Some benefits are that it allows for more creativity, flexibility, and unpredictability in grappling compared to more traditional methods. It also gives an advantage to smaller and weaker practitioners who can use leverage and angles to overcome stronger opponents.

The drawbacks of his creative positions are that they can be difficult to learn and master, especially for beginners. It can also be risky to use against skilled opponents who can counter or escape from the unconventional positions.

Impact

Eddie Bravo’s style of BJJ has influenced MMA, grappling, and combat sports in general in many ways.

He has provided effective training and guidance to numerous MMA fighters, including but not limited to his black belts Alan Belcher, Matt Horwich, Vinny Magalhaes, Tony Ferguson, and Ben Saunders, who have all found success utilizing his techniques during MMA bouts.

In 2003, Bravo founded 10th Planet Jiu-Jitsu, a worldwide collaborative system of institutions and partners that educate his unique style of Jiu-Jitsu for a No-Gi situation. Eddie has produced many high-level grapplers who have competed and won in prestigious tournaments, such as Geo Martinez, Richie Martinez, Nathan Orchard, Grace Gundrum, and others.

Eddie Bravo Invitational

He also created the Eddie Bravo Invitational (EBI) in 2014, a submission-only grappling competition that features some of the best competitors in the grappling world and uses a unique ruleset that encourages action and finishes. The EBI has become one of the most popular and respected events in the grappling scene, attracting fans and competitors alike.

Later in 2017, Bravo announced the transformation of the EBI into a combat Jiu-Jitsu promotion, moving it away from the format of submission grappling competitions.

EBI

Controversies

Eddie Bravo is not without controversies and criticisms, both inside and outside the martial arts community. He has faced backlash from the BJJ traditionalists, who accuse him of disrespecting the art and its origins by changing the techniques and the names. He has had various conflicts and disputes with well-known names in the field of Jiu-Jitsu like Renzo Gracie, Royler Gracie, and a quite few other individuals, mostly from the Gracie clan.

His personal life is also amusing, to say the least. Bravo holds several contentious perspectives and beliefs encompassing different subjects including conspiracies, governance, faith, and wellness.

Bravo fervently advocates for a range of conspiracy theories, such as the belief that the earth has a flat surface, the moon landing was staged, and that 9/11 was orchestrated from within the country.

He holds a critical view towards conventional media, governmental institutions, and organized religion. He advocates for alternative medicine, cannabis legalization, veganism, and other lifestyle choices.

Bravo’s bold statements have caused controversy and debate among his fans and critics. He has been involved in heated discussions and debates with his friend and podcast host Joe Rogan, who often challenges his claims and arguments.

Many attack Bravo for his conspiracy theories and political views but he has also received praise and support from others who share his views or respect his freedom of expression.

Conspiracy theories with 10th Planet Jiu-Jitsu founder Eddie Bravo

The Legacy Of Eddie Bravo

He has inspired countless practitioners to follow their own path and explore their own creativity in grappling. He has also challenged the status quo and pushed the boundaries of what is possible in jiu-jitsu.

He has contributed to the evolution and innovation of jiu-jitsu techniques, especially for the No-Gi world and MMA. He has developed a system that is unique, effective, and adaptable to different scenarios and opponents.

He has also shared his knowledge and wisdom with his students and followers through his books, videos, podcasts, seminars, and online platforms.

Bravo’s efforts have created a global community of loyal fans and supporters who share his passion and vision for jiu-jitsu. He has also built an empire of schools and affiliates that teach his 10th Planet Jiu-Jitsu system around the world.

He has also changed the BJJ world forever by introducing his unique ruleset at the EBI, which many argue is the best in competitive grappling.

He has also influenced the culture and lifestyle of Jiu-Jitsu practitioners. He has combined his love for music, comedy, and conspiracy theories with his love for Jiu-Jitsu. He has also advocated for causes that he believes in, such as cannabis legalization, veganism, and alternative medicine.

Master Eddie Bravo is a pioneer who has revolutionized Jiu-Jitsu with his own style of No-Gi grappling. He is a leader who has created a movement and a community of 10th Planet Jiu-Jitsu.

Conclusion

Eddie Bravo is a martial arts pioneer who has changed Jiu-Jitsu history with his own style of No-Gi grappling. He has achieved remarkable feats in his career, such as submitting Royler Gracie at the ADCC Championship, founding 10th Planet Jiu-Jitsu and the EBI, as well as training and coaching many MMA fighters and grapplers.

He is also a controversial figure who has stirred up debates and controversies with his views and opinions on various topics.

Let’s wrap up with a selection of his best quotes about Jiu-Jitsu:

15 Eddie Bravo Quotes To Make Your Day

The Best Rubber Guard DVD And Digital Instructionals


The Caio Terra Ankle Lock: De La Riva Guard Game Changer

If you are looking for a powerful and unexpected submission from the de la riva guard, you need to learn the Caio Terra ankle lock. This technique is named after Caio Terra, one of the most accomplished Brazilian Jiu-Jitsu competitors and world champions in history.

In this article, we will show you how to set up, finish, sweep, and defend the Caio Terra ankle lock from the De la Riva position. The move is unexpected and highly effective, legal at all levels, and offers a different way of finishing ankle locks compared to the standard Ashi Garami game. By the end of this article, you will be able to easily add this technique to your game and catch your opponents off guard.

Caio Terra

Who Is Caio Terra?

Born in 1986 in Rio de Janeiro, Brazil, Caio Terra started training BJJ in 2003 at his mother’s behest, as he was physically smaller than his peers and needed to learn self-defense. He fell in love with the sport after winning silver in his first-ever competition as a blue belt, representing Rodrigo Medeiros’ famous Fight Zone Academy in Copacabana (which he later substituted with the Strauch Academy).

Terra earned his black belt in 2006, flying through the colored belts in only three years of dedicated training, from coaches Reyson Gracie and Paulo Strauch. This was one of the quickest promotions to black belt ever recorded in BJJ history.

From there, he went on to become a record times world champion and one of the greatest of all time, especially in the lower-weight divisions, famous in the community for his passion and bravery.

Caio Terra is known for his maxim “Technique Conquers All”, which he has proven by winning numerous titles in different weight divisions and even in the open weight division. He won the IBJJF World No-Gi Championship ten times (the only grappler to do so) and also has two IBJJF World Championship titles with the Gi. In addition to his main achievements, he has also won several IBJJF Pan American championship, European and American National championships titles.

Cesar Gracie gave Terra the chance to start teaching in the US, which Caio grabbed, eventually building a BJJ empire of his own.

Professor Caio Terra now teaches at his own Caio Terra academy, which is the headquarters for a worldwide network of Jiu-Jitsu schools associated with the program, his one team philosophy and BJJ curriculum through his Caio Terra Association (CTA).

Caio Terra developed his signature ankle lock from the De la Riva guard, which he used to surprise and submit many opponents in high-level competitions. He also created several transitions and variations from this position, making it a versatile and effective weapon in his arsenal.

Cao Terra Ankle Lock

Setting up the Caio Terra Ankle Lock

The first step to master the Caio Terra ankle lock is to develop a solid De la Riva guard. Then, you can focus on learning how to enter the position from the guard.

The De la Riva guard is a common open guard in BJJ, where you wrap one of your legs around your opponent’s leg and hook your foot behind their knee. You also control their near ankle with your hand and place your other foot on their far hip. The guard is one of the fundamentals in terms of outside guards (since none of your legs end up in between the opponent’s legs) which is usually not associated with leg-locking success.

De La Riva Ankle Locks

However, Terra’s ankle lock proves that the inside position does not always matter in the pursuit of ankle locks. To set up the Caio Terra ankle lock from here, you should follow these steps:

  1. Turn to face your opponent directly. This may seem counterintuitive, as you usually want to be at an angle when playing De la Riva guard. However, this is necessary to get closer to their ankle and create the right leverage for the submission.
  2. Scoot closer to their ankle with your hips. You want to be as close as possible to your foot with your butt, so you can reach it with your arm without extending too much.
  3. Get a standard ankle lock grip with your arm. This means wrapping your arm around their foot, with your wrist bone on their Achilles tendon. You also want to grab your own forearm with your other hand and keep your elbow tight to your body.
  4. Switch your De la Riva hook (outside leg) to their far leg. Instead of hooking behind their knee with your leg, you want to hook behind their ankle or calf. This will help you control their leg and prevent them from stepping out of your guard.
  5. Bring your other leg over their knee. You want to place your shin across their thigh, just above their knee. This will create a wedge that will stop them from moving forward or backward.

Finishing the Caio Terra ankle lock

Once you have entered the position correctly, you are ready to finish the Caio Terra ankle lock at will. To do so, you need to apply pressure to the ankle joint by extending your hips, arching your back and curling your wrist.

Let’s break it down in steps :

  1. Extend your hips forward. You want to drive your hips towards their foot, creating a strong base and leverage for the submission.
  2. Arch your back slightly. You want to lift your chest up a bit, creating more space for your arm and wrist to move.
  3. Curl your wrist down. You want to twist your wrist towards their toes, creating more pressure on their Achilles tendon.
  4. Squeeze everything together. You want to keep everything tight and compact, squeezing your knees together, tucking your chin down and pulling their foot towards you.

And here is a video that demonstrates how to finish the Caio Terra ankle lock from the De la Riva guard:

Sweeping from the Caio Terra Ankle Lock Position

Sometimes, your opponent may defend or resist the Caio Terra ankle lock by trying to stand up or balance themselves on their free leg. In this case, you can progress toward using the position as a sweep instead of a submission, since getting the right angle for a leg lock can be very difficult.

There are two ways you can sweep them from here:

  • Use your De la Riva hook to elevate their leg and roll them over. You can use your hook behind their far ankle or calf to lift their leg up in the air, making them lose their balance. Then you can roll them over towards their lifted leg side, landing on top of them in side control or mount.
  • Switch to a single leg X or X guard position and sweep them to the mat from there. You can also use your hook behind their far ankle or calf to pull their leg towards you, making them step forward with their free leg. Then you can switch your grip from their foot to their knee or thigh, and bring both of your legs inside theirs. From there, you can enter a single leg X or X guard position, where you have many options to sweep them.

Both methods work perfectly and they also connect with each other, offering a closed system revolving around the original ankle locks attack.

Defending the Caio Terra Ankle Lock

Of course, if you want to master the Caio Terra ankle lock, you also need to know how to defend it just in case someone tries it on you, or more importantly to prevent people from escaping and cancel their defensive efforts.

Here are some of the common ways that your opponent can try to escape or counter the position, and how you can prevent or counter them:

  • Stuffing your leg: Your opponent may try to push down on your leg that is over their knee, trying to free their leg from your wedge. To prevent this, you need to keep your shin tight against their thigh, using your foot as a hook behind their hip or butt.
  • Peeling your grip: Your opponent may try to peel off your grip on their foot by grabbing your fingers or wrist with their hands. To prevent this, you need to keep your elbow close to your body and tuck your chin down over your hands.
  • Spinning out: Your opponent may try to spin out of your guard by turning away from you and rolling over their shoulder. To prevent this, you need to keep control of their far leg with your de la riva hook or switch it back behind their knee if they manage to free it.
  • Attacking your legs: Your opponent may try to attack one of your legs with a heel hook or toe hold by grabbing it with their free hand or using their free leg as a lever. To prevent this, you need to keep both of your feet active and mobile, using them as hooks or frames against their body.

Conclusion

The Caio Terra ankle lock is a powerful and unexpected submission from the de la riva guard that can surprise and submit many opponents in high-level competitions. It was developed by Caio Terra, one of the most accomplished Brazilian Jiu-Jitsu competitors and world champions in history.

The goal to day was to provide instruction on how to set up, finish, sweep and defend the Caio Terra ankle lock from the De la Riva position.

If you want to train the Caio Terra ankle lock in the gym during class, make sure you practice it with a partner/student who knows how to tap and give them time to do so, as the submission comes on quickly without a warning sign since the setup is very unexpected.

We hope you enjoyed this article and learned something new from it. If you want to learn more from Caio Terra, you can check out his online academy or watch some of his matches and isntructinals on YouTube, where he showcases his amazing skills and techniques.

Lachlan Giles Demonstrates the Effectiveness of Musumeci’s Modified Straight Foot Lock

Mikey Musumeci BJJ DVD: Foundations Of Guard Attacks REVIEW

Dean Lister’s Most Lethal Legal Straight Ankle Lock Explained

https://bjj-world.com/achilles-hold-straight-ankle-lock-counters/


The Black Belt in Jiu-Jitsu: Answering ALL Your Burning Questions

Answering Your Burning Questions about Achieving a Black Belt in Jiu-Jitsu

As a combat sports athlete or martial arts practitioner, you may have pondered the requirements needed to obtain a Jiu-Jitsu black belt. The answer is, there are a lot of them.

If you have just started with grappling or already have some experience in it, you may have a curiosity to know more about the path toward achieving a black belt in Jiu-Jitsu. This includes the requirements and expectations for each belt rank, as well as the benefits and challenges of reaching this prestigious status.

By the end of this article, you will have a deeper understanding and appreciation for this impressive martial art and its special system for recognizing individual achievements.

The BJJ Belt System: From White to Black

The BJJ ranking system is a strict and rigorous way of measuring progress and achievement in Brazilian Jiu-Jitsu. In fact, the adult system consists of five main colored belts: white, blue, purple, brown and black. Each belt has its own characteristics and expectations, such as the average time spent, the techniques learned, the skills developed and the challenges faced.

The table below summarizes the main features of each belt level:

Belt Average Time Techniques Skills Challenges
White 1-2 years Basic positions, escapes, submissions Relaxation, ego control, fundamentals Getting used to BJJ, dealing with frustration, overcoming fear
Blue 2-3 years Guard passing, sweeps, transitions Defence, strategy, timing Improving consistency, avoiding injuries, finding your game
Purple 4-5 years Advanced positions, combinations, variations Offence, creativity, adaptability Facing higher belts, refining your game, teaching others
Brown 5-6 years Mastering positions, submissions and escapes Pressure, control, confidence Preparing for black belt, competing at high level, leading by example
Black 10+ years Developing your own style and philosophy Wisdom, leadership, excellence Maintaining motivation, staying updated, giving back to BJJ

As you can see, the BJJ belt system is not linear; you will spend weeks or months on plateaus before being rewarded with a jump in ability. Sometimes it will even seem as if you are getting worse instead of better. But the plateau is actually your friend and is itself an indicator of progress. It is those who have the mental strength to keep going when they find themselves on a plateau that break-through to a higher level of ability.

The BJJ belt system also reflects the traditional values and principles of Jiu-Jitsu, such as loyalty, respect and humility. Each belt color conveys increased knowledge about the art and techniques used for self-defense.

How long does it take to get a black belt in Jiu-Jitsu?

The Journey to Black Belt: Requirements and Expectations

To attain the highly regarded level of mastery known as a black belt in Jiu-Jitsu, all practitioners must fulfill certain pre-established standards and anticipations.

Some of these requirements and expectations are:

  • The minimum age of 19 years old. The IBJJF rules require that one must attain the age of 19 in order to be eligible for a Jiu-Jitsu black belt.
  • The promotion by a black belt instructor with a minimum of 2 degrees. You can only be promoted to black belt by a black belt instructor who has at least two degrees on his or her own black belt.
  • The demonstration of technical proficiency and knowledge in all aspects of BJJ. You must be able to perform all the positions, submissions and escapes with mastery and efficiency. An extensive comprehension of the fundamental concepts, principles and tactics of Jiu-Jitsu is also imperative.
  • The adherence to the ethical principles and values of BJJ. You must respect your instructors, peers and opponents. You must also follow the rules and etiquette of Jiu-Jitsu, such as wearing a clean gi, bowing before entering or leaving the mat, and tapping when caught in a submission.
  • The contribution to the development and promotion of BJJ. You must share your knowledge and experience with others, especially with lower belts, as well as visit seminars, competitions and social events.

These requirements and expectations are assessed and verified by instructors and peers who observe your performance and behavior on and off the mat.

Numerous variables can impact the duration of achieving the black belt rank in Jiu-Jitsu including:

  • Frequency and quality of training. More time on the mats equals more progress which you can achieve in a lot less time compared to training scarcely. However, you should also train smartly and avoid overtraining or injuring yourself.
  • Personal goals and motivations. The higher your level of passion and affection towards Jiu-Jitsu, the greater the probability of persisting through difficulties and achieving success.
  • Physical and mental attributes. Having good health and fitness levels will simplify the process of acquiring new skills and mastering existing ones. Additionally, you should also work on your mental strength and resilience, which are essential for dealing with pressure and challenges.
  • The availability and support of mentors and partners. The greater your access to proficient mentors and encouraging peers for training, the better it will be for enhancing your learning and progress. However, you should also be independent and responsible for your own progress.

BJJ black belt Gi

How long does it take to get a black belt in Jiu-Jitsu?

On average, getting a black belt takes around 8 to 12 years of consistent training to achieve a black belt. It is crucial to understand that the duration mentioned is flexible and contingent on several factors such as personal commitment, frequency of instruction, innate abilities, and the specific requirements of the Jiu-Jitsu school or academy.

What is a black belt in Jiu-Jitsu?

A black belt in Jiu-Jitsu is the highest attainable rank within the belt system. A black belt holder has demonstrated proficiency in fundamental techniques, and advanced strategies, and possesses a deep understanding of the principles and philosophies of Jiu-Jitsu. It symbolizes the practitioner’s journey towards mastery and serves as a foundation for further growth and development in the martial art.

What percentage of people get a black belt in BJJ?

Obtaining a black belt in BJJ requires around ten years of dedicated training, and not everyone who starts the Jiu-Jitsu journey reaches this pinnacle. The percentage of individuals who achieve a black belt in BJJ is relatively low compared to those who start training BJJ.

While specific statistics may vary, it is estimated that very few people, approximately 1% to 2% of BJJ students, eventually earn a black belt. This reflects the demanding nature of the art and the significant commitment required to reach this level of proficiency.

How hard is it to get a black belt in Jiu-Jitsu?

Earning a black belt in Jiu-Jitsu is considered a significant accomplishment that requires a deep understanding of techniques, strategy, and the ability to apply them effectively under pressure (during live grappling with a resisting opponent). The difficulty level varies for each individual, depending on various factors such as previous experience, natural aptitude, training environment, and personal commitment.

Can you get a black belt in BJJ without competing?

Yes, it is possible to achieve a black belt in BJJ without competing in tournaments. While competition can provide valuable learning experiences and growth opportunities, it is not a mandatory requirement for belt progression.

The focus in Jiu-Jitsu is primarily on technical proficiency, knowledge, and practical application of techniques.

Many practitioners choose to prioritize their training and development without participating in formal competitions. Progression is often determined by the instructor’s evaluation of the practitioner’s skill level, knowledge, and overall growth.

Black Belt Brazilian Jiu-Jitsu Competitor Leandro Lo

Why does BJJ black belt take so long?

The time it takes to earn a BJJ black belt is primarily influenced by the complex nature of the art and the emphasis on practical proficiency. Jiu-Jitsu requires a deep understanding of leverage, body mechanics, timing, and strategy. Mastery of these elements takes time and consistent practice. The extensive curriculum, which includes a wide range of techniques and positions, contributes to the longer journey towards a black belt.

Additionally, the belt progression in Jiu-Jitsu is designed to ensure practitioners have a strong foundation at each level before advancing further, which further extends the time required.

Can you get a black belt in BJJ in 3 years?

It is possible, but it is far from probable for the regular BJJ pracitioner. The timeframe for earning a black belt is typically longer, and most BJJ students will require several additional years of dedicated training to reach this level. Three years may be sufficient for achieving a lower belt rank, such as blue or purple belt, depending on an individual’s commitment, talent, and training frequency.

It’s important to remember that earning a black belt in Jiu-Jitsu is a result of sustained dedication.

Do BJJ black belts make money?

While some BJJ black belts may generate income through teaching, coaching, and competing professionally, it is important to note that not all black belts make a significant amount of money solely from their rank in Jiu-Jitsu.

The ability to monetize one’s black belt level largely depends on factors such as entrepreneurial skills, teaching opportunities, affiliation with reputable schools or academies, and personal branding within the martial arts community.

Many black belts supplement their income through other means, such as running their own academies, providing seminars, or pursuing related ventures.

How many years for each Jiu-Jitsu belt?

On average, the timeframes for each belt in the BJJ belt ranking system are as follows:

  • White Belt: The introductory belt, typically held for 1 to 2 years.
  • Blue Belt: The first major belt promotion, achieved after around 2 to 4 years of consistent training.
  • Purple Belt: An intermediate belt, generally earned after 4 to 6 years of Jiu-Jitsu training.
  • Brown Belt: A high-level belt attained after approximately 6 to 8 years of dedicated practice.
  • Black Belt: The highest attainable rank, usually acquired after 8 to 12 years or more of consistent training and demonstrating exceptional proficiency in Jiu-Jitsu.

These timeframes are not fixed and may vary based on individual progression and the specific criteria set by the Jiu-Jitsu school or organization.

What is the hardest belt to get in BJJ?

According to the majority opinion in the Jiu-Jitsu community, obtaining a black belt in BJJ is considered the most challenging accomplishment. It represents the pinnacle of mastery and requires extensive knowledge, technical proficiency, and a deep understanding of the art.

The path to the black belt requires dedication, perseverance, and growth through physical and mental challenges. While each belt presents its unique difficulties, the black belt symbolizes the highest level of skill and expertise in Jiu-Jitsu.

Hardest BJJ Belt

How many hours does it take to become a BJJ black belt?

The amount of time it takes to achieve a black belt in BJJ can differ greatly and depends on various elements, such as one’s commitment, training frequency, inherent ability, and promotion philosophy of your academy.

Roughly 1,000 to 1,500 hours of hard, focused training should be enough to earn a black belt in Jiu-Jitsu. This is, however, nothing more than an estimation, and the actual time invested can differ for each practitioner.

The journey towards a black belt is measured not just in hours but in years of dedicated practice and continuous improvement.

What Can I Do to Get a BJJ Black Belt Faster?

While the timeframe to earn a BJJ black belt is a result of consistent training and dedication, there are several strategies you can adopt to potentially expedite your progress:

  1. Train consistently: Regular and frequent training sessions are crucial for skill development and progress.
  2. Seek quality instruction: Train under experienced instructors who can provide proper guidance and technical expertise.
  3. Set specific goals: Define short-term and long-term goals to stay motivated and focused on your journey.
  4. Supplement your training: Attend seminars, workshops, and competitions to gain additional knowledge and experience.
  5. Embrace a growth mindset: Stay open to learning, adapt to new techniques, and embrace challenges as opportunities for growth.
  6. Train with a variety of partners: Expose yourself to different body types, skill levels, and styles to enhance your adaptability and versatility.
  7. Focus on fundamental techniques: Build a solid foundation by mastering fundamental techniques and principles.
  8. Study and review: Supplement your training with studying instructional materials, books, and videos to deepen your understanding.
  9. Take care of your body: Maintain proper nutrition, rest, and recovery to prevent injuries and ensure optimal performance.
  10. Stay committed: Understand that the journey to a black belt requires long-term commitment and perseverance. Stay dedicated and enjoy the process.

What Factors Will Make Me Wait Longer to Get a Black Belt in Jiu-Jitsu?

Several factors can contribute to a longer journey towards earning a black belt in BJJ:

  1. Training frequency: Inconsistent training or limited training opportunities can slow down progress.
  2. Skill level and aptitude: Each individual progresses at their own pace based on their natural abilities and learning curve.
  3. Previous grappling experience: Individuals with prior experience in many other martial arts or grappling (Judo black belt, for example) may progress faster due to transferable skills.
  4. Training environment: Access to quality instruction, training partners, and a supportive community can impact progression.
  5. Competition participation: Engaging in tournaments and testing your skills can enhance growth and progression.
  6. Instructor’s criteria: Each instructor or Jiu-Jitsu school may have specific requirements and expectations for belt promotion.
  7. Injury or time off: Extended breaks due to injuries or other personal commitments can delay progress.
  8. Personal commitment and dedication: Lack of consistent effort, motivation, or focus on skill development can prolong the journey.

It’s important to remember that everyone’s path is unique, and the journey towards a black belt should be embraced at your own pace, focusing on continuous improvement and growth.

Getting a black belt in Jiu-Jitsu

Should You Really Worry About How Long It Takes to Get a Black Belt in BJJ?

The time it takes to achieve a black belt in Brazilian Jiu-Jitsu should not be a primary concern or a source of worry. Instead, focus on the journey, the learning process, and the personal growth that comes with consistent training.

Jiu-Jitsu is a lifelong pursuit, and each belt rank represents a significant milestone in your progress. The black belt is the culmination of years of dedicated practice, perseverance, and skill development. By focusing on the present moment, enjoying the learning process, and embracing the challenges along the way, you will develop the skills and mindset necessary to earn your black belt in due time.

Remember, the belt is a reflection of your journey, not just a destination.

Conclusion

Achieving the status of a BJJ black belt demands a substantial investment of time, energy, and commitment in a challenging yet fulfilling expedition. The undertaking at hand is neither effortless nor uncomplicated, but rather intricate and demanding.

To achieve a BJJ black belt, one must commit to consistent and dedicated training, seek knowledge from instructors and mentors, challenge oneself through competition, conduct diligent research, impart teachings to others, and derive pleasure from the practice of Jiu-Jitsu.

Hawaii 5-0 Star Alex O’Loughlin Earns BJJ Black Belt

Benjamin Kunzle, Temporary Paralyzed Grappler, Gets Black Belt From Cyborg

BJJ Black Belt Actor Sean Patrick Flanery: Go Back To Basics

Blind BJJ Black Belt: I Never Quit, It Took 7 Years For My First Title

The 8 Best Youth Boxing Gloves in 2023

Best YOuth Boxing Gloves

Looking for the best boxing gloves for your children? We have you covered with our comprehensive guide. In this article, we will review a variety of different types of gloves and give the pros and cons of each one.

Additionally, we will answer some frequently asked questions about boxing gloves that parents may have when shopping for their child’s first pair.

If you’re looking to buy a new pair of boxing gloves for your young fighter in 2023, then continue reading!

Best Boxing Gloves for Youth

Cheerwing Kids Boxing Gloves

Cheerwing Youth Boxing Gloves

[amazon fields=”B07CL5H9RB” value=”button”]

General Features

Color

Black, Blue, Pink, Red

Size

9 x 6.3 inch

Weight

6oz

Glove Type

Sparring

Closure Type

Hook and loop

The first one on our list of the best boxing gloves for youth is the Cheerwing Kids Boxing Gloves. The gloves are a great option for kids because they offer the fighter more mobility and flexibility than most other gloves on this list do, which is perfect if your child has smaller hands or wants to be able to do things like write with their fingers while wearing them.

The thing that makes it a better option for younger kids is that these gloves are a lot more lightweight and less rigid than most other options. They offer an extra layer of padding, making them more durable. If your kid hits something harder with their hands while wearing these gloves they won’t get injured.

The downside of these boxing gloves for children is that they’re not the best for those with bigger hands. The gloves are also a little less durable than other options like the Everlast Kid’s Boxing Gloves, which is why these boxing gloves come in at number two on our list of the top five best kids’ boxing gloves.

pros

  • lightweight
  • affordable
  • easy to wear
  • durable and lasts for longer
  • well-padded structure

Cons

  • Tight on larger hands

Final Verdict

The cheering kids’ boxing gloves are considered the best overall choice on our list. It is because of the lightweight, affordability, and ease to wear. The gloves are very well-padded as a structure for good protection of your kid’s hands.

The downside is that they’re not best suited for larger-handed kids or adults due to being tight on those with bigger hands.


Venum Contender Youth Boxing Gloves

Venum Contender Youth Boxing Gloves

[amazon fields=”B01M8JBMF1″ value=”button”]

General Features

Color

Black

Size

4, 6, 8 inches

Weight

4 ounce

Glove Type

Sparring, bag

Closure Type

Hook and loop

Next up, we have the Venum contender kids boxing gloves on our list for you. These are also quite popular due to their lightweight and durable design. The gloves come in a variety of different colors, which is always nice if you’re looking to buy them for your son or daughter’s birthday party!

Another thing that we love the most about these youth boxing gloves and pads is that they are made with some of the best materials on the market. They will last for longer and will let your little champ train like a real fighter. Apart from that, the comfortable fitting of these kids’ boxing gloves makes them stand out from the crowd.

In addition to this, the hook and loop closure system allows them to be taken on and off with ease. The gloves are also very affordable, which was the main reason for their placement in our top ten list

Many parents ask if these boxing gloves come pre-wrapped or not, well they do! That is a big plus point for us as it saves time when teaching your son or daughter to box from the very beginning.

Pros

  • Durable and comfortable gloves
  • Hook and loop system for easy on and off
  • Affordable price

Cons

  • the logo vanishes quickly

Final Verdict

Venum Contender is the best starter boxing glove for youth that come with a lot of features. They are durable and possess a hook and loop closure system for easy on and off. They’re also affordable. This will save time when teaching your son or daughter how to box from the beginning.


Everlast Laceless Gloves

Everlast Laceless Youth Boxing Gloves

[amazon fields=”B07WDKY5YH” value=”button”]

General Features

Color

Red

Size

Small

Weight

6oz

Glove Type

Sparring

Closure Type

Hook and loop

During our research, we also found the Everlast youth boxing gloves an interesting option. It is because of their durability, lightweight structure, and easy-to-wear design.

It will let your kid wear them in just a few seconds without any issue at all. Moreover, these gloves are available in a vibrant color which gives them an edge over other available options.

Apart from that, the Everlast laceless gloves also offer a comfortable fit. The gloves are designed in such a way that they will never lose their shape or cause any discomfort to your son or daughter while boxing, which is one of the most important features we look for when picking up boxing gloves.

These laceless gloves come with an adjustable hook and loop wrist strap so you can customize them according to your needs. The gloves are also relatively cheap so you don’t have to worry about paying a hefty sum of money for them either.

The downside is that they may not be suitable for high-intensity workouts or if the user has long hands as the weights might cause discomfort in such cases.

Pros

  • Affordable gloves for kids
  • soft padded
  • consists of premium synthetic leather
  • rugged and long-lasting

Cons

  • may not be suitable for high-intensity workouts
  • These aren’t the pink youth boxing gloves

Final Verdict

You should go for these gloves if you want a product that’s affordable, easy to use, and provides ample padding. Besides that, their laceless design allows them to be customized according to your needs.

In our opinion, if your child is just starting out then these will make the perfect starter gear.


Wesing Sports Premium 6 OZ Kids Boxing Gloves

Wesing Premium Kids Child Training Gloves

[amazon fields=”B07R6L9N9Y” value=”button”]

General Features

Color

Blue, green, yellow, pink, red

Size

small

Weight

6oz

Glove Type

Bags, sparring, training

Closure Type

Hook and loop

Coming up on number 4 is the using sports premium kids boxing gloves. These are the finest quality gloves available on the market that you can buy in 2023. The thing that makes them different from other options is their promising build quality.

These gloves consist of premium synthetic leather, premium foam padding, and a Velcro strap. The gloves are designed with the best quality materials that ensure they will last long without getting damaged or torn apart from excessive use.

There is plenty of protection given to your child’s hands with these boxing gloves which provide comfort if you’re doing heavy sparring sessions or hitting bags for practice purposes.

Apart from that, their 6 oz weight proves quite helpful when it comes to training because they are not too heavy and cumbersome. The gloves have a well-designed thumb, which means that your child’s hand will be protected from the inside out.

Pros

  • Long-lasting performance
  • Ultra-durable structure
  • highly comfortable for longer sessions

Cons

  • Velcro strap is not the best when it comes to long-term durability

Final Verdict

These gloves are a good choice for children who need protection but don’t want to go the whole way with full-fledged boxing gloves. The manufacturer has done an excellent job by providing them in different colors and sizes, so you will find one that suits your child’s needs best!


Venum Challenger 2.0

Venum Challenger 2.0 kids boxing gloves

[amazon fields=”B079V4N8CL” value=”button”]

General Features

Color

Black, black, and white

Size

Medium

Weight

6oz

Glove Type

bags

Closure Type

Hook and loop

If the first 4 options on our list weren’t quite impressive for you or you want to see something else then we have the venum challenger 2.0 for you. It is one of the best quality gloves available that will fulfill almost all of your kid’s needs.

The Venum Challenger 2.0 features a high-quality design that will last a very long time. They are lightweight and they also provide great protection from all of the damage that may come to your child’s hands throughout their training process.

Apart from that, they are available in 2 different colors: pure black and black & white. It allows you to choose the one that your kid loves the most. Besides that, it comes in different sizes which makes them perfect for both people with small and large hands.

This glove has more ventilation than most gloves on the market, as well as an adjustable wrist strap with a Velcro closure for maximum comfort. The hook-and-loop closure system also provides a perfect fit for your hand and wrist.

Pros

  • Available in 2 different designs
  • fits perfectly
  • easy to wear
  • comfortable for hardcore training sessions

Cons

  • Not suitable for 6 year old

Final Verdict

When it comes to the Venum Challenger 2.0, we found them quite interesting due to their premium build quality. In addition to this, they fit easily on your child’s hands and wrists. It also has more ventilation than most on the market, as well as an adjustable strap with a Velcro closure that provides maximum comfort.


Luniquz Kids Boxing Gloves

Luniquz Kids Boxing Gloves

[amazon fields=”B01NB0XMJT” value=”button”]

General Features

Color

Black, blue, red, green

Weight

4oz

Glove Type

bag

Closure Type

Hook and loop

If you haven’t heard about the unique boxing gloves before, then then you are in for a treat. This is because they offer many good features. For example, they have a low price and a hook-and-loop closure that makes them easy to wear. They also provide padded wrist support to prevent injuries during training sessions.

Luniquz gloves fit perfectly on your child, allowing your kid to focus completely on training. Besides that, we love the eye-catching design printed on the gloves. It will surely make your kid the center of attention in the gym.

However, we understand that a beautiful design won’t be a lot of help if the gloves are not long-lasting in performance. Therefore, we had to do some more research about the durability of these boxing gloves.

After in-depth research, we found out that they are quite durable. All the stitching of these gloves is well intact making them an excellent option. If you are looking for excellent quality kids boxing gloves and pads then this is a decent choice.

Pros

  • The gloves fit perfectly on your child
  • Eye-catching design printed on the boxing gloves
  • Durable and good quality materials used for construction
  • Good price point considering that they are made specifically for kids.

Cons

  • Some kids may experience them as a bit tighter

Final Verdict

Overall, these boxing gloves are an excellent choice for kids because they offer better protection. The design is eye-catching and your kid will love them as a birthday present. Some people may have an issue with the size of these boxing gloves. But this shouldn’t stop you from buying them.


Title Youth Boxing Gloves

TitleBoxingYouthBoxingGloves
Title Boxing Youth Boxing Gloves

[amazon fields=”B07JQ5PLJB” value=”button”]

General Features

Color

Black and grey

Weight

4oz

Glove Type

Sparring

Closure Type

Hook and loop

Title is one of the most well-known brands when it comes to boxing equipment. During our research on the best boxing gloves for youth, we found them quite amazing. The first thing that we like about these gloves is their reliable design. They are comfortable and fit easily, making them an excellent choice for not only for kids under 9 but also for youth.

Apart from that, they are specifically built for beginners. The gloves are lightweight, and they offer excellent protection. They come with padded foam that is not only comfortable but also durable.

The design of these Youth Boxing Gloves by Title looks very appealing to the eye. The bright colors make them look cool and attractive looking for kids who like to be noticed in a group setting.

Some people might have concerns about the quality of these gloves. The good news is that this product has already been tested and approved by many users, including professionals who use them in their classes as well as personal trainers.

These gloves are also known for being machine-washable which makes cleaning much easier if they get dirty or stained during a workout session. They dry quickly too, making it convenient.

Pros

  • Machine Washable
  • Affordable Price
  • Great Eye Appeal

Cons

  • Tight Fit
  • Can Feel Thin and Fragile for Some People

Final Verdict

They offer some of the most benefits that anyone is looking for. The price and eye appeal make them stand out too which makes it an excellent purchase, especially if you’re shopping on a budget!

It’s important to note that this glove has been through rigorous testing by many professionals including our team at Best Boxing Gloves. The design of the gloves is not too flashy but still looks great on any person and will fit most hands with ease.


RDX Kids Boxing Gloves for Training

RDX Kids Boxing Gloves

[amazon fields=”B004X6YWGK” value=”button”]

General Features

Color

Black

Weight

10oz

Glove Type

Title boxing

Closure Type

Hook and loop

Last but not least, we have the RDX kids boxing gloves on our list of the best boxing gloves for youth. We have selected these after hours of research and a short survey on the market.

During our research, we noticed a lot of good features and of course a few shortcomings due to which we have selected these for you. The first thing that we love about these youth boxing gloves is their excellent design.

It consists of lightweight but durable material that makes it last for years without any issue at all. Moreover, each glove possesses a well-padded and thick structure, making it very comfortable for sparring and punching bags.

Apart from that, they resist crack and tear, which makes them good youth boxing gloves. In addition to this, they fit perfectly and will let your kid focus completely on the training. They won’t annoy your young fighter during the session due to their excellent fitting and lightweight design.

Pros

  • Lightweight
  • Durable and long-lasting
  • Thick padding for boxing gloves
  • Fits perfectly
  • Easy to use
  • Protects hands from injuries and discomfort during training sessions

Cons

  • Not breathable and may be too hot
  • Expensive

Final verdict

The best boxing gloves for kids in 2023, with their excellent fitting and lightweight design, are a perfect choice. They will let your little fighter focus completely and will let them develop a strong and powerful punch. The only downside is the price, but they are worth it!


Boxing Gloves Buying Guide

If you are choosing your first pair of boxing gloves then there are a few things you need to keep in mind. Keeping these things in mind will let you choose the right gloves without wasting too much time, money, and effort.

Here are the main features you should look for in boxing gloves for youth.

Price of the Gloves

Price is the most important feature to consider when choosing boxing gloves. The best kids’ gloves are affordable and have a wide range of prices, so you will be able to find something that fits your budget.

The price should reflect the quality and features. More expensive gloves will usually provide more protection than cheaper ones, but it doesn’t mean, but this is not always the case.

Size of the Gloves

The size of the gloves is another important feature. The right fit will provide more comfort and better protection than a glove that fits poorly. It is very difficult to get an accurate measurement for kids’ hands, so manufacturers usually recommend choosing one size larger as they may grow into them over time.

If you are buying smaller gloves then it’s important to remember that the hand will grow quicker than the fingers so it is better for them if there’s some room in the glove.

If your child has a small hand then you should consider buying gloves one size smaller as well.”

Padding of the Gloves

The padding inside the gloves is a hugely important feature. The more protection they offer, the better and safer your child will be when sparring or boxing on heavy bags. The best gloves for kids have removable foam pads which can make them very flexible in their use.”

Frequently Asked Questions

What size boxing gloves are best for kids?

The best boxing gloves for kids in 2023 are generally between 12 to 14 inches. Besides that, the weight of the glove is also important and will depend on your child’s age, size, and strength. Some brands offer a range of weights with their kid’s gloves so that you can pick one depending on what suits them at different ages.

What size boxing gloves should a 12-year-old get?

Many people in the boxing community recommend a 12-year-old to start with 16oz gloves. The weight and size of gloves will be determined by their age, height, gender, build, and hand measurements.

For example, if they are not yet fully developed or have small hands then you may want to go lighter so that there is less chance of injury.

How do kids wear boxing gloves?

There are many different ways to wear boxing gloves. Some people prefer to place the glove on with one hand, while others prefer to place both hands inside. Always make sure they are wearing it the right way with their thumb on top of the wrist strap and an inch away from the end of their fingers.

What age is 6oz boxing gloves for?

6oz boxing gloves are recommended for kids who weigh less than 90 pounds. They are used for training and practice, not sparring or competitions. The best thing about 6oz boxing gloves is that they are lightweight and do not overprotect the hand.

Should I get 12 oz or 14 oz boxing gloves?

12 oz boxing gloves are great for beginner fighters who want to get into the sport but don’t have a lot of experience yet. 12 oz is easy enough on your hands and wrists that you can do an extended training session without feeling too tired or sore.

14 oz gloves, however, are better for intermediate boxers who’ve been doing it for a while and know their limits because they’re heavier than 12oz boxing gloves.

The extra weight allows them to deliver more power in each punch while still providing protection to both the wrist and hand from injury as well.

How do you choose boxing gloves for kids?

There are many different things to consider when choosing boxing gloves for kids. The first thing you need to think about is the size of the glove and how much room your child has in their hands because they can grow quickly, especially before puberty.

Next, you want to make sure that there are no sharp edges or points on the inside of the glove where it wraps around the wrist—this could cause injury if not addressed properly.

Finally, ensure that there’s a sufficient amount of padding so wrists and knuckles don’t get injured during sparring sessions with other children (and adults). Your goal should be finding an affordable pair of gloves that will last them through all stages as they develop into more advanced boxers in later years.

Final Words

If you are looking for a pair of gloves to help your child learn the basics, these three may be good options. The Cheerwing Kids boxing gloves will provide protection while still allowing them to feel what they’re hitting.

The Venum contender youth boxing gloves offer padding and ventilation at an affordable price point that any parent can afford. For those who want their children’s first glove experience to have some style, look no further than Everlast laceless gloves which come in all kinds of colors!

Let us know if we can answer any additional questions about selecting the right pair of kid’s boxing gloves or helping with training programs in your community.

Best MMA Backpacks 2021 Guide With Detailed Reviews

Cool BJJ Gis and Jiu-Jitsu Gis For 2024 – Reviews And Guide

Best Budget Grappling Gear To Get In The Summer Of 2021

The Best Grappling Dummies in 2024

Fighters Who Passed Away In 2022

Jiu-Jitsu for Weight Loss: Can You Burn Calories Doing BJJ?

Jiu-Jitsu for Weight Loss: Can You Burn Calories Doing BJJ?

Have you wondered whether you can use Jiu-JItsu for weight loss and how many calories you can actually burn while grappling? Brazilian Jiu-Jitsu is a martial art that focuses on grappling and ground fighting. BJJ is not only a fun sport and great self-defense skill but also a fantastic way to exercise that can help you burn calories and lose fat.

In this article, we will explore how Jiu-Jitsu can help you achieve your weight loss goals and improve your physical and mental well-being. We will also compare weight loss and fat loss, and explain why they are different concepts. Finally, we will discuss weight loss vs weight cutting in BJJ, and why you should be careful about the latter.

How Brazilian Jiu-Jitsu Helps You Burn Calories

Jiu-Jitsu is perfect for weight loss on account that it is a high-intensity activity that engages the entire body in every training session and requires the use of all three metabolic energy systems. When you train Brazilian Jiu-Jitsu, you are constantly moving, pushing, pulling, twisting, lifting, and resisting your opponent’s force. This requires a lot of strength, stamina, endurance, and coordination. As a result, you burn a lot of calories during your training session.

How many calories does jiu-Jitsu burn? It all depends on different things like your weight, the intensity of your training, your skill level, and the duration of your session.

However, according to some estimates, an average person can burn anywhere from 500 to 1000 calories per hour of jiu-jitsu training. That’s significantly more than jogging or basketball!

Of course, these numbers are only rough estimates and may vary depending on your individual circumstances.

Still, they give you an idea of how effective grappling martial arts like Jiu-Jitsu can be for burning calories and losing weight. To get a more accurate estimate of how many calories you burn during BJJ training, you can use a calorie calculator or a fitness tracker.

Caloreis burned during Jiu-Jitsu

How Jiu-Jitsu Can Help You Lose Fat

Burning calories is not the only way that Jiu-Jitsu can help you lose weight. Training BJJ can also help you lose fat by increasing your muscle mass and improving your metabolism, and hormonal balance.

Muscle mass: Jiu-jitsu is a great way to build lean muscle mass throughout your body. Having more muscle helps you burn more calories by increasing your basal metabolic rate (BMR), even when you’re not doing anything.

Metabolism: BJJ can also boost your metabolism by creating an afterburn effect or excess post-exercise oxygen consumption (EPOC). This means that after a high-intensity workout like Jiu-Jitsu, your body continues to burn calories at a higher rate for several hours or even days. The reason behind this is that your body requires an increased supply of oxygen to recuperate from physical activity and reestablish its typical physiological processes.

Hormonal balance: BJJ effectively addresses hormonal balance by reducing stress hormones like cortisol and increasing growth hormones like testosterone and human growth hormone (HGH). Cortisol is a hormone that promotes fat storage and muscle breakdown when it is elevated for too long. Testosterone and HGH are hormones that promote muscle growth and fat burning when they are optimal.

How Much Fat Can BJJ Training Help You Lose?

Well, that also depends on several factors, such as your calorie intake, body fat percentage and training frequency. However, according to some estimates, an average person can lose about 1-2 pounds of fat per week after they start training Jiu-Jitsu 3-4 times a week and focus on eating a healthy diet.

Of course, these numbers are only rough estimates and may vary depending on your individual circumstances. However, they give you an idea of how effective BJJ for weight loss can be when it comes to stripping off and improving your body composition. To get a more accurate estimate of how much fat you lose with Jiu-Jitsu training, you can use a body fat scale or caliper, or a tape measure.

JIu-JItsu for weight loss

Weight Loss vs Fat Loss: What’s the Difference?

Let’s get one thing straight. Losing weight and losing fat are different things.

Weight loss means reducing the overall weight of your body, which includes muscles, water, bones, and fat.

Fat loss means reducing the amount of body fat relative to your overall weight, as represented by your body fat mass-to-total body mass ratio.

Why does this matter? Because weight loss is not always a good indicator of health or fitness, as it can also include muscle loss, water loss, or bone loss.

Muscle loss can reduce your strength, performance, and metabolism. Furthermore, water loss can cause dehydration, fatigue, and electrolyte imbalance. If your bones become weaker, you have a higher chance of developing osteoporosis, breaking bones, and getting hurt.

Fat loss, on the other hand, is helpful rather than harmful. First, it improves your health, fitness, and appearance. Next, it helps reduce your risk of chronic diseases, enhances your performance, and makes you appear leaner and stronger.

Therefore, when you train Jiu-Jitsu for weight loss, you should focus more on losing fat than losing weight. Jiu-Jitsu burns calories that will result mostly in fat loss, but only if you pair it with a proper weight loss program in terms of a diet that has you at a strategic caloric deficit while you’re actively training grappling.

Brazilianb Jiu-Jitsu fat loss

Weight Loss vs Weight Cutting in Jiu-Jitsu

Another thing we need to clarify is the difference between weight loss and weight cutting in jiu-jitsu.

Weight loss refers to the long-term process of reducing your body fat percentage through exercise and nutrition.

Weight cutting refers to the short-term process of reducing your body weight through dehydration and calorie restriction before a competition.

Why do some Jiu-Jitsu practitioners cut weight before competitions? Because most competitions have weight classes, some practitioners believe that cutting weight can give them an advantage over their opponents by allowing them to compete in a lower weight class where they may be stronger or faster than their opponents.

What are the pros and cons of cutting weight for Jiu-Jitsu competitions? Cutting weight can have some benefits, such as:

  • Making it easier to qualify for a lower-weight class;
  • Giving you a psychological edge over your opponent;
  • Making you feel lighter and more agile.

However, cutting weight can also have some drawbacks, such as:

  • Reducing your strength and endurance;
  • Increasing your risk of injury and illness;
  • Affecting your mood and mental state;
  • Causing dehydration and electrolyte imbalance;
  • Compromising your recovery and performance.

How do weight loss and weight cutting compare in terms of their effects on health, performance, and body composition?

Weight loss can improve your health, performance, and body composition by reducing your body fat percentage, increasing your muscle mass, metabolism, and hormonal balance. It also plays an important role in enhancing your fitness, strength, flexibility, coordination, self-confidence, discipline, and stress management, all important qualities for a Jiu-Jitero.

Weight cutting can impair your health, performance, and body composition by reducing your muscle mass, metabolism, and hormonal balance, and compromising your fitness, strength, flexibility, coordination, self-confidence, discipline, and stress management.

Therefore, weight loss is generally better than weight cutting for improving your health, performance, and body composition in jiu-jitsu. In any case, you should also consult a professional before attempting to cut weight, as they can advise you on how to do it safely and effectively.

Losing Weight with grappling

How to Use Jiu-Jitsu for Consistent Weight Loss

If you want to achieve serious calorie burning as a grappler, you need to set up both your training and your nutrition to support that goal. Here’s the “magic formula”:

You need to eat fewer calories than you burn in a given day in order to shove your metabolism towards fat-burning and inevitable weight loss. The trick is not to restrict calories too much or your body is going to resist the urge to increase metabolism.

You don’t have to follow complicated formulas to calculate your daily calorie needs. Just start by giving up on eating unhealthy foods and focus on eating three meals a day. the measurements are two fist-sized servings of protein, a palm-sized portion of carbs, and a thumb-sized position of fats per meal.

After a couple of weeks of eating like this, reduce the amount of carbs slightly to keep burning fat.

Eating like this won’t affect your athletic performance which means you can get all the workouts that you need at any average BJJ gym. One way you can use a regular BJJ class for sustainable weight loss is to use rolling as your main cardio workout.

Regardless of what belt you are in, focus on rolling hard and going fast, without paying too much attention to strategy or tactics. You’ll still have fun pulling off your favorite BJJ techniques but you’ll have to do it at a higher pace, which will get you better conditioned, improve your Jiu-Jitsu game and help you achieve substantial weight loss over time.

Maintaining a caloric deficit while avoiding fad diets and training purposefully is all you need to use Jiu-Jitsu for weight loss. BJJ is an extremely effective martial art for getting people into shape, regardless of their natural tendency towards athleticism.

BJJ practitioners that have been training for longer than 2 years are usually athletic, carry little body fat, and have great conditioning (and mostly no problem in staying away from junk food).

Conclusion

In conclusion, Jiu-Jitsu is an excellent weight loss plan to help you improve your health without the boredom of running on treadmills or starving yourself.

Jiu-jitsu can help you burn up to 1000 calories per hour and increase your muscle mass, metabolism, and hormonal balance.

Jiu-jitsu can also help you reduce stress and anxiety, which are known to cause weight gain. Jiu-jitsu can also teach you discipline and self-confidence, which can help you adopt a healthy lifestyle and avoid unhealthy habits.

You should also be careful about cutting weight for BJJ competitions, as it can have negative effects on your health and performance. You should consult a professional before attempting to cut weight for jiu-jitsu competitions, as they can advise you on how to do it safely and effectively.

Read more articles on the topic:

The Fighter Diet: What BJJ/MMA Fighters Eat to Lose Weight Quickly (and Safely)

The Best Fat Loss Conditioning Exercises For Jiu-Jitsu

Top Foods To Help With Fat Loss For BJJ

Big Muscles In BJJ: Can You Get Jacked From BJJ?