The Perfect Strength And Conditioning Workout For BJJ

Ultimate Conditioning Workout For BJJ

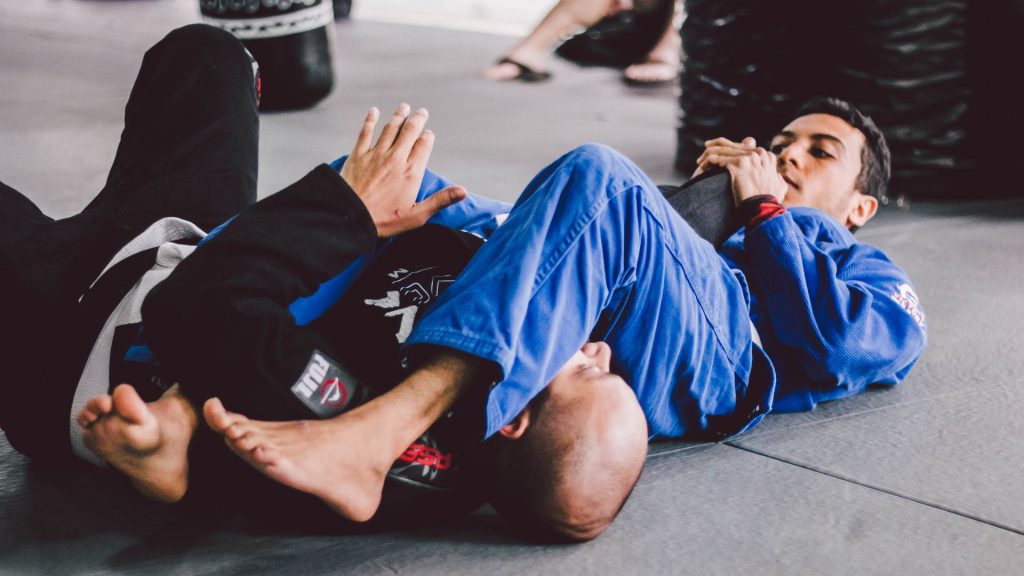
My master always says that doing strength and conditioning is our homework as grapplers. When we go to class we’re attending school, learning everything that requires the presence of a teacher. When we’re at a Jiu-Jitsu academy, we should focus on training Jiu-Jitsu. However, BJJ greatly benefits from improved athletic abilities. It doesn’t matter if you compete or not. Complementary strength and conditioning is great for a better gas tank, injury prevention, and overall health. However, with limited time and the physical demands of grappling, you have to be careful when picking a routine. Luckily for you, we have the perfect workout for BJJ all ready to go. And wait until you hear who the author of it is!

Gordon Ryan Strength and Conditioning

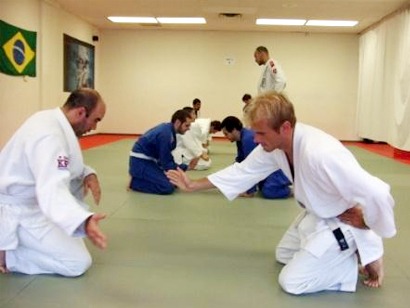
Most (apart from Marcelo Garcia, apparently) competitive grapplers take part in some form of strength and conditioning training. While BJJ guys are not always the picture of perfect fitness, the opposite I true for Judokas. Judo athletes are some of the strongest, well-conditioned, ripped grappling machines out there! So, when a Judo and BJJ black belt develops a highly specific workout for BJJ you do not question it. You just pick a gym and listen to Travis Stevens. You won’t become as good as him just by following his routine. What you’ll get is faster, stronger and better at grappling than you are now. Isn’t that what we’re all looking for?

Travis Stevens’ Workout For BJJ

What Travis Stevens did with this program is amazing. He took all the hard work principles of Judo strength training and adopted them to Jiu-Jitsu. The program is a very simple, yet diverse one. It includes every movement pattern and muscle group that we use in BJJ. Furthermore, it doesn’t take long to complete, nor is it going to leave you destroyed for days after. This is a program that is highly adjustable so that it fits both the recreational and professional grappler alike. Let’s talk a bit about the programming behind this workout for BJJ before we jump to the exercises.

1. Periodization

Most people that train BJJ, do so at least three times a week. Anything less and you’re going to have trouble progressing. Now, if you go to BJJ three days in a row, you have three more left to train. No, I didn’t skip over a day there. At least one day of the week needs to be dedicated to rest and recovery only. And Travis knows this perfectly, which is why his program has a three-day-split structure. Training three days a week leaves ample space for Jiu-Jitsu, as well as some time off. For the more adventurous grapplers that train more often, these workouts are even applicable in a two-a-day manner. Just do not do it more than once a week, unless you’re a full-blown professional.

2. Structure Of The Workouts

In terms of structure, this BJJ workout utilizes a great system – circuit training. Circuit training means you do an exercise, then move to the next without resting, then the next, and so on. After you complete them all, you get a breather and go through it again. Travis Stevens’s circuits are three exercises long. There are three different circuits like this in a day’s workout for BJJ. Before you start complaining that it isn’t enough, give it a try. The choice of exercises covers every muscle that you need to condition for Jiu-Jitsu. The key here is effectiveness, not complete destruction. If you’re looking for workouts that’ll make you puke, go do Crossfit. Just don’t expect your BJJ to improve as a result. Quite the contrary.

3. Volume And Intensity

Travis Stevens is a Judo Olympian and knows a thing or two about intensity. His program does not include any unnecessary elements. In truth, the number of sets is surprisingly low at first sight. When you look into it, however, you’ll notice that he has a combination of dynamic and isometric exercises. Moreover, he sticks to compound exercises that give you the best bang for your buck.

Each circuit is done twice, with a short rest before moving to the next. That brings the total of sets per workout to 6, which is ideal. The number of repetitions of dynamic movements varies between 5 and 8. This is the sweet spot for developing both strength and endurance. If you look to improve your bench press, you’re looking at the wrong program. If you want to win a grappling competition though then this workout for BJJ is a perfect choice.

4. Equipment

In terms of equipment, Travis’ keeps things simple. You’ll be able to do the workout at any commercial gym, or even at home if you prefer. A gym is a better option because you can vary the weight on different exercises. All you need are a pair of kettlebells, a pair of dumbbells, a pull-up bar, an Olympic weight plate, and a TRX suspension trainer (or gymnastic rings). A bench that can go incline is optional, though access to one is going to make things simpler. That’s it.

Quick Workouts For BJJ Globetrotters

The 3 x Week Lifting Program For BJJ Strength and Conditioning

Now, let’s get into the meat and potatoes of this workout for BJJ. Travis’s plan does not include a warm-up, so I’m going to make a point to mention it. Never skip the warm-up, be it a BJJ class or doing fitness homework. As boring as it may be, it is going to keep you safe and help you perform better.

  • Day 1

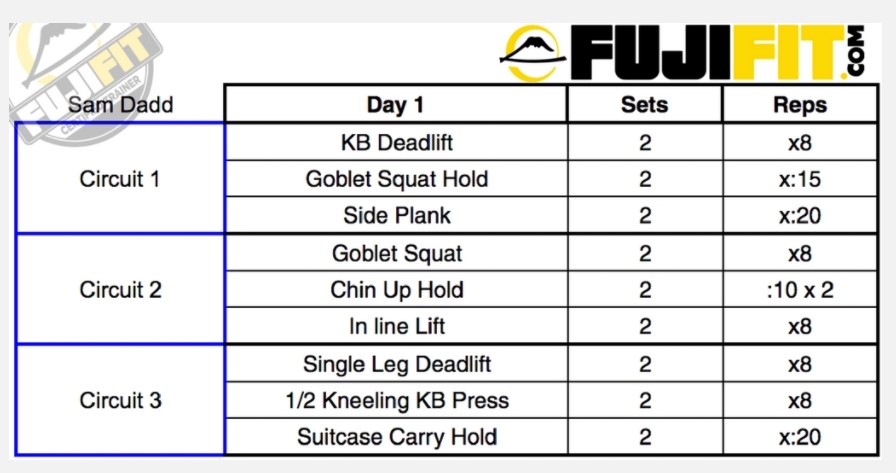
The first day starts with a kettlebell and bodyweight circuit. Remember, you should go through each circuit twice before moving to the next. First, you pump put 8 reps of kettlebell deadlifts, before going for an isometric goblet squat hold for 15 seconds. Immediately after, you’ll hit a side plank for 20 seconds on each side.

The second circuit starts with a goblet squat again and moves on to an isometric chin-up hold. After hanging from the bar for 10 seconds twice in a row, you do an inline lift to complete the circuit.

Finally, it’s single leg deadlifts and single-arm kettlebell presses for 8 reps each and a suitcase carry for the finish. This is how the circuit looks:
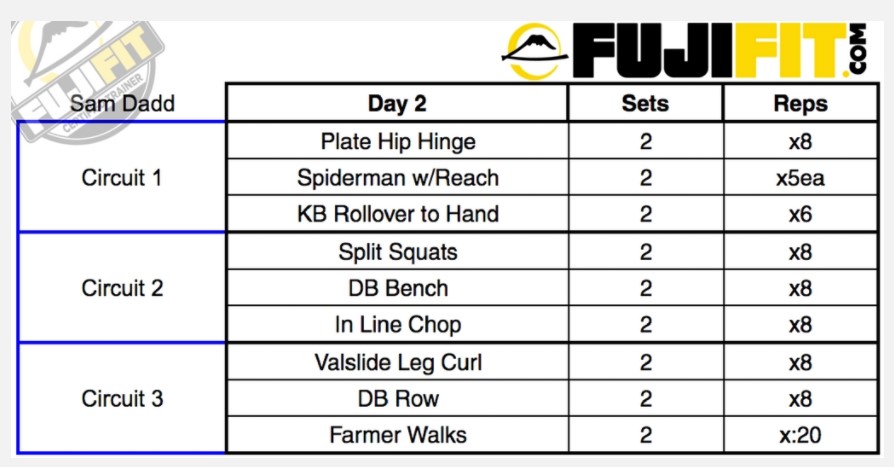
Workout For BJJ Circuits

  • Day 2

For the second session of the workout for BJJ, you start off with plate hip hinges, again for 8 reps. Spidermen with reach are up next, reducing the reps to 5 each. To finish it off, you’ll do a kettlebell rollover for 6 reps.

The next circuit starts with split squats, goes over to a double dumbbell bench press, and ends with an inline chop. 8 reps for every exercise is the norm.

The third and final circuit hits the legs from behind with the Wall slide leg curl. 8 reps of dumbbell rows precede 20 20-second farmer’s walks with as much weight as you can handle. Once again, two sets of each circuit.

Circuit Workout For BJJ

  • Day 3

The final workout day of the week starts with a kettlebell deadlift once again. The next exercises, toe touches to squats are going to test your mobility as well as your endurance.  Both of these exercises go for 8 reps each before holding a plank for 20 seconds.

Going forward, it’s time for lateral squats (4 on each side) followed by an incline dumbbell bench press for 8 reps. A core crushing 10-second holds (2 in a row) of kneeling anti-rotation holds wrap this circuit up.

For the final circuit of the week, go for 8 reps of wall-slide squats. 8 reps of those earn you a transition to the TRX for 8 reps of rows. End the week in a strong fashion with kettlebell overhead carries for 20 seconds each set.

Lifting And Bodyweight Workout For BJJ

There you have it. A complete workout for BJJ that is going to transform you into a better grappler in a very short time. Stick to the programming and you’ll see results straight away, both in the mirror and on the mats.

Quick Jiu-Jitsu Conditioning Workouts For Busy People

Bodyweight Workout for BJJ

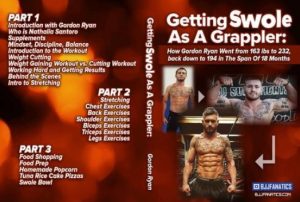
The Best Strength & Conditioning DVD and Digital Instructionals

Want The Jiu-Jitsu Body Of Gordon Ryan? Train Like This To get It!

Teacher Puts a Kid in A leg Lock After Being Knocked Down

Teacher Puts a Kid in A leg Lock After Being Knocked Down

This teacher is probably a practitioner of BJJ or some other grappling martial art.

After one kid punched him in a face knocking him down he managed to entangle him from the ground putting him in a leg lock.

The teacher was trying break the fight between two kids arguing in the school. One kid trying to punch another kid, probably, accidentally punched a teacher knocking him down. A few seconds later teacher managed to take the kid down and put him in a leg lock making the kid unable to move.

https://youtu.be/ZzAtg_qtiIc

Double Leg Takedown – How to Do It & The Most Common Mistakes

How to do Double Leg Takedown and the most common mistakes

Double Leg takedown is one of the most reliable techniques in grappling martial arts in general. It is one of the best and safest ways to take the fight to the ground. When done correctly, it is a low-risk high-return move that lands you in a dominant top position on the ground. It requires very high technical knowledge of the move in order to use it against another trained grapplers so mistakes are very common. And Double Leg Takedown for BJJ is a whole another story.

Have you ever watched a wrestling match? Be it at the gym or in competition, there’s one move you’re going to see most of the wrestlers’ attempt. It is the staple of the takedown game and real wrestling classic. Not only that, but it is a large part of Brazilian Jiu-Jitsu as well. While it is more useful in No-Gi, it can also be brutally effective in the Gi too.

Double leg takedown technique takes years to master, in both wrestling and BJJ. There are a few main aspects that make this move a complex one. While the notion is easy, grab both legs from a lower-level position, getting there, staying safe and finishing takes experience and the ability to adjust. There are plenty of different variations of the move that often times need to be connected while attempting to execute it. All in all, here’s a reason why wrestlers spend countless hours polishing up one of the very basic techniques of the sport. As Jiu-Jitsu practitioners, we shouldn’t take this move for granted. We need to respect the king of takedowns and put the reps in to achieve mastery of the move.

The Wrestling Version Double Leg Takedown

Double leg takedown is as old as the sport of wrestling itself. The move can probably be traced all the way back to the first Olympic games. As effective a move as it is, it is not limited to wrestling, though, Historically, before the change of rules, this technique was also a part of Kodokan Judo as well, where it was known as Morote Gari.

For the DLT, a grappler needs to have both their arms around an opponent’s legs. The basic idea is to lift the opponent off the ground in order to take them down on their back. There are a few very important elements to the traditional wrestling double leg takedown. First and foremost, you have to change your level in order to be able to get to the opponent’s legs.  Going as low as possible without blocking your movement is highly advisable. next, you’ll need to “shoot in” towards the opponent, shortening the distance. The shoot is what gets you in position to put together the structural components of the DLT.

How to Do Double Leg Takedown Effectively

  1. Go below your opponents level.

    Keep your back straight slightly leaning forward. The position is similar to one when you’re doing squat.

  2. Propel yourself forward

    Shoot in with your rear leg pushing your whole body without being concentrated only on fishing for your opponent’s legs with your arms. After you shoot in, simultaneously drop down to your lead knee between your opponent’s legs because it’s the lowest position you can be and still maintain power. Of Course, if you’re doing double leg takedown in a street fight on concrete or any other hard surface don’t drop on your knee.

  3. Wrap your arms around your opponent’s thighs.

    After wrapping your arms try to squeeze your opponent’s legs as much as possible.

  4. Stay tight with your head and shoulders tight against your opponent’s torso.

    By staying tight you’ll be able to avoid guillotine choke and other counters with people pushing their arms between you and them.

  5. Step in pretty deep with your rear leg to the outside of your opponent’s legs and turn the corner.

    If you don’t step in deep with your rear leg you won’t be able to turn the corner to outside destabilizing your opponent. The whole stress will be on your lead leg and you won’t have the power to continue going forward.

  6. Drive Up, Go Forward and Pivot

    You don’t have to pick your opponent on your shoulders. Picking up an opponent in the air is only done when driving forwards gets countered. Once you get in position and turn the corner your opponent will already be destabilized what will allow you to drive them to the ground. So, once you’re in the position with a secured hold drive them to the side by using your legs and “wheeling them your head. You will simultaneously squeeze their legs into the opposite direction.

  7. DO NOT land in guard.

    Even if you land in your opponent’s guard you still have legs control to immobilize his hip movement and get to side control. This is especially important if they have their hands around your neck trying to apply a guillotine. You want to use the control of their legs to get to a position with a guillotine choke on the opposite side of you in side control.

Avoiding The Most Common Mistakes

Learning the double leg takedown is a definite must for anyone involved in grappling martial arts. That said, learning it mistake-free often presents a real challenge. However, if you are aware of the possible mistakes, while you’re learning the move, you have a much better chance of weeding them out before they become a bad habit. So, the most common mistakes when doing DLT are:

  1. Distance management

    We already pointed out the importance of the penetration step. Shooting in too short means that your opponent doesn’t even need to sprawl. They can just lay on top of you, as you won’t be able to reach their legs. A good rule of thumb is being at an arm’s length of your opponent.

  2. Bad posture

    Not only does this put you at risk of guillotines, but it also weakens your takedown efficiency. Good posture means no space and a firm structure to finish the move. You should keep your back straight slightly leaning forward. Just like when you’re starting to deadlift. You want to avoid being full straight because you will lose power once you make a contact. But also you want to avoid being too bent forward because it’s easier to sprawl on you. Once you shoot for Double Leg Takedown make sure your head is not pressuring down, but sideways. If your head is pressuring down it will be easy to manipulate with you, sprawl, push your head and eventually guillotine you.

  3. Fishing for the legs with your arms

    The usual thing that practitioners do is concentrating on grabbing your opponents legs with your arms without worrying about chest and shoulders penetrating into your opponent. Your main focus should be on your chests and shoulders penetration and your arms should be there just to trap your opponent’s legs.

  4. The position of the lead leg

    In terms of the penetration step, the position of the lead leg is where things can go wrong. Thumping down on your knee is only going to take all of the inertia away. You need to make sure that you use your knee to penetrate in, not stop the movement. Always aim to slide the knee in between your opponent’s legs, as opposed to going down on the mat with all your weight.

  5. The Power of shoot

    Unlike other positions in BJJ, takedowns require the component that is power. This means once you shoot, there’s no going back. You need to commit yourself to get it! That said, always look to go through your opponent when you’re driving forward, not just enough so that they fall. The goal is to make them fly back as far and as hard as possible.

  6. Not Committing to the double leg takedown

    Once you decide to go for a takedown make sure you’re “ALL IN”. This rule is important for all kind of takedowns in all sports. If you decide to go, you should fully commit to it without hesitation. This problem occurs when you start thinking too much about your opponent’s sprawling with you finishing in the turtle position. Or when you start thinking too much about any other counter. Don’t think just do it. As we said before, a lot of drilling will make sure you do this takedown without hesitation.

Double Leg Takedown For BJJ

If there’s one thing that BJJ athletes need to do to improve their takedown, it’s drilling. Wrestlers spend countless hours drilling any wrestling technique or its specific elements. In BJJ, people tend to be sloppy with a lot of techniques, diminishing its effectiveness. The first thing that needs focused attention is shortening the distance. The best way is to learn the proper technique behind the penetration step. This is a move that is designed to change the level, bring you in close and offer an opportunity to use inertia to your advantage.

In BJJ, due to the versatility and rules of the sport, DLT is much more important than in wrestling. When doing Jiu-Jitsu, this move can be done from both standings or from a bottom position, given the circumstances. From the top, the penetration step makes all the difference. Furthermore, finishing by going for a lift might be a better option here. When grappling with a Gi, allowing the opponent to establish grips can be very dangerous. The Gi opens up a lot more choking and countering options than just the Guillotine chokes, so you have to finish the move as fast as possible. All the other basics apply, just remember to get in fast and finish powerfully.

Double Leg Takedown from the Bottom in BJJ

DLT in BJJ can also be done from the bottom, in a low-double variation. This takedown is accessible from a wide variety of open guards common to Jiu-Jitsu. Due to its mechanics, the Half Guard is the best position to attack from. A good underhook from the bottom half guard is crucial to transitioning into a low double. Finishing requires you to pick your opponent up or move in a circular motion to complete the takedown.

https://youtu.be/ItgLxy0M1sA

You Might Like:

The Top Throws And Takedowns In BJJ
30 No Gi Takedowns
Throws And Takedowns For BJJ That Really Work
Interesting:
Watch Benson Henderson’s Taking Down AJ Agazarm and the Referee off the stage

Swedish BJJ Cop Takedown to Kimura
Small Guy did Takedown on a Big Bully

Breakdown Of The Best Single Leg X Guard Attacks

BJJ Single Leg X Guard guide

While the closed guard in BJJ is the most secure option from the bottom it is also the most limited one. It is by al lemans very effective but it does not offer plenty of directions to move in. This is due to the fact that when the legs are closed lots of options remain unavailable. The open guard though is far more versatile when you’re looking to attack from the bottom. That said, it is not as secure defensively as the closed guard, depending on which variation you’re using.

There are numerous open guards, each with its own pros and cons. So, when looking to have ultimate control along with plentiful attacking options, open guards that resemble the closed guard are clear winners. One of the most proficient open guards is by far the Single leg X guard, a sort of “hybrid” between the closed and open guards.

The Single leg X guard definitely is a member of the open guard’s category. However, the proximity of the legs means that it can utilize some of the closed guard’s advantages while remaining fairly versatile. The basic principle behind the Single leg X guard is one of the pillars of BJJ – isolation. The configuration of this guard completely isolates one limb, opposed to most other open guard variations. Using the whole body against a single limb is always a winning combination, which is why this guard is so effective. Formerly popular as a top sweeping position, the rise of leg locks have transformed this guard into a very dangerous attacking position as well.

Single Leg X Guard Structure

The single leg X guard is a snake-like guard that focuses on limb isolation. The basic notion is using all of your body’s power against one of your opponent’s legs. In order for the guard to be effective, it is of the utmost importance to be able to control the whole limb, much like with leg locks. To do so, every joint of the leg must be under complete control.

Starting from the top, the hip of the opponent is controlled with the help of our legs. Basically, one leg is placed in and around one of the opponent’s legs, with the heel of the foot ending up on their hip. The other leg is placed with the shin on the inside of the opponent’s thigh, hooking the butt with the foot. To control the hip, The outer foot needs to be deep in the opponent’s hip fold. The most crucial aspect of Single leg X guard control is keeping the hips as high as possible on the opponent’s trapped leg. Furthermore, both knees have to be clamped tightly together. Also, remember that the outer foot must have the fingers pointing out. This is mostly due to the IBJJF knee-reap rule, but in fact, it does offer better control of the position.

Usually, it only takes one arm to successfully control the SIngle leg X guard. this leaves a lot of room to work with the other, which is essential to starting attacking sequences. The near side arm can control the opponent’s leg in two ways. One is with an ankle lock-like grip that goes around the ankle ending up with your palm on the chest. The other option is reinforcing your outer leg by grabbing your own thigh.

Single Leg X Guard Retention

Controlling the Single leg X guard comes from correct weight distribution. The structure of the guard allows for controlling and attacking in multiple directions. In order to do so, though, you must make sure that you can stay in the position successfully. Apart from keeping the hips up and your knees together, you’ll need to utilize both feet as well. The foot on the hip needs to pull instead of pushing. If you use it to push, which is instinctive, you’ll open up space for your opponent’s defense. When you pull, on the other hand, you’re going to block the hip even further because their leg has to carry all your weight.

Correct weight distribution makes all the difference in controlling the Single leg X guard. IN that sense, once you know that you need to pull instead of push, it is all about the correct angle. When controlling the position, you need to make sure you’re putting pressure on the opponent’s inside thigh by pressing your shinbone in and slightly downwards. To achieve this just remember to constantly try and connect your inner leg knee to the shin of your outer leg. This is going to provide you with the right direction while the pulling motion is going to create the right angle.

The Single leg X guard is a close-distance guard that is played with the opponent basically on top of you. Your opponent is either going to remain standing or kneel with their free leg. Whatever your opponent attempts, you need to constantly keep the connection to the hip and the correct weight distribution.

In situations when the opponent manages to take your outer foot off, you can either go to the X guard or transition right back to the Single leg X.

Single Leg  X Guard Sweeps

First and foremost, there is more than one sweep available from this position. However, we’re only going to focus on the twisting sweep for now. This sweep is unstoppable, once you figure out how to maintain complete control from the Single leg X guard. The position of the guard itself is the reason for the sweep’s success.

Namely, the twisting sweep feeds of the guard’s positioning and mechanics. The angle of weight distribution means you can use the Single leg X guard to sweep in every direction. Normally, sweeping to the back, where your opponent has no posting options is the best. In order to execute the twisting sweep you;r going to have to take your hips even further up. This is going to result in even more weight on your opponent’s trapped leg, which in turn causes them to shift weight off their free leg. What this creates is an axis that you can use to take your opponent down. From the basic Single leg X position, lift your hips and do a twisting motion to the outside, while redirecting your weight in the same direction.

In most instances, you’ll complete the sweep without much effort. Against taller, or more experienced opponent’s though, you might need a bit more push. This is where the second arm comes in. Once in full hip extension and torque, if you still need more power, place your free arm on the mat. You then use it to push off the mats until your opponent crumbles to the floor. You’ll end up in a position very similar to the straight Ashi Garami, meaning you can choose your next step. You could either go for a submission or use a technical standup to get on top.

Single Leg X Guard Submissions

Since the Single leg X is so similar to the straight Ashi Garami, the logical attacking options are leg locks. The only factor that determines which attack you’re going to use, are the rules. Under IBJJF rules, where knee reaps are forbidden, attacking options are limited to a straight ankle lock or toe hold. The straight bottom Ashi Garami is the top ankle locking position. For toe holds you’ll need to transition into the top Ashi Garami.

When rules are not so restrictive, you can have more freedom with your attacks. Once again the straight Ashi Garami is a viable option for heel hooks as well as ankle locks. Furthermore, you might go into a full knee-reaping position (Inside Ashi) or attack directly from the bottom.

In terms of directions, you can use the twisting sweep to land into straight Ashi or go a different way. One option is to go for an Omoplata-like movement of the leg, which is, once again, going to land you in straight Ashi. Furthermore, when reaping is allowed you can look to insert your outside leg in between the opponent’s legs, getting to top Inside Ashi. this is especially effective against seated opponents/

Transitionally, the Outside Ashi and the 50/50 are also very close to the Single leg X guard. In both cases, it is a combination of your opponent’s reactions and your attacking direction that determines which one is the better option.

You Might Also Like:

The Most Comprehensive Guide To Leg Locks Ever Put Together
Craig Jones Down Under Leg Attacks DVD Review
The 9 Best Leg Lock DVD Instructionals For Grapplers

10 Best Leg Locks DVDs and Digital Instructionals

BJJ White Belt Survival Kit: 5 Essential Tips For Beginners

BJJ White Belt Survival Kit: 5 Essential Tips For Beginners

Back when I was a BJJ white belt, tips were pretty much hard to come by. What I got was the usual “just keep showing up” encouragement and that was about it. In training, I had no idea what I was doing most of the time and I was getting smashed every training session. Even after a while, when I discovered how to survive here and there, I often did stupid mistakes that most white belts these days do not often commit. Back then, it was harder to have a guide, let alone simple steps to make the BJJ white belt life easier. today, however, things are much different.

First of all, we have the ultimate communication platform via the internet. Secondly, more and more people train Brazilian Jiu-Jitsu as the art spreads to the farthest corners of the world. This means that with every passing year, you have exponentially more experiences being shared online. Combining personal experiences with the most common experiences shared by other fellow grapplers, we’ve come u with the one list of tips that every BJJ white belt needs to read. Even if you decide not to follow all, or any, of our recommendations, you’ll have all the information you need to make your Jiu-Jitsu journey much more pleasurable.

The Struggles Of A BJJ White Belt

The main struggles of a white belt are as much psychological as they are physical. First of all, you’re a first-grader all over again. You’re thrown into a new environment, full of new people who already have strong bonds between themselves. As if that wasn’t enough, you’re there trying to do one of the hardest sports in the world, without any clue to what you’re doing. And yes, this stands true even if you have a background in other grappling martial arts. Furthermore, the nature of the sport means that you’ll be forced to admit defeat multiple times in an hour, let alone a long time period. It is a feeling nobody likes, and as human beings, we’re wired to stay away from it. So, returning to training over and over again, knowing what to expect goes against basic human psychology. At least at first.

Physically, expect to be tested in ways you’ve never been tested before. It doesn’t matter if you’re a Crossfit champion, marathon runner or an experienced kickboxer. Once you try rolling, you’re going to suffer. First of all, you’re going to get gassed, no matter how well conditioned you might be. Muscles that you never knew existed are going to ache, and you’ll soon discover how actually weak you are. But worry not, it gets better.

Rest assured, these obstacles are there for everyone. The thing is, you might have an easier time coping with them, by learning from the experiences of others. Namely, most people have certain aspects of grappling training as beginners that are common for them all. Figuring these out takes time, and while it is always good to learn from your experiences, learning from those of other’s is much painless.

Accept Your Status

Before you even think about attempting Jiu-jitsu, you’re going to need to understand one thing. No matter your martial arts experience, you’ll have to start at the very beginning. This means that you need to accept the fact that you know nothing. You need to become comfortable with the fact that you’ll be lost.

Pretending that you know what’s going on is just going to make it harder to learn. Brazilian Jiu-Jitsu is a very complex grappling martial art that takes years to get good at. Actually, it takes about a decade, on average, to get to black belt. You could finish college in such a time or even develop a small (or large) business. It’ll take patience to learn, but you won’t remain a BJJ white belt forever. However, while you are, learn all the time and never attempt to coach others about what you do not know!

Injury Prevention

No matter how fast and hard you fall in love with Brazilian Jiu-Jitsu, you can’t train injured. Furthermore, you also can’t train alone. Acting like a spaz on the mats is not good for both of them. Let me elaborate.

When you decide that you’re not going to tap to that purple belt that’s destroying everyone, you’re putting yourself in danger. First of all, not tapping is not a good idea in BJJ in general, let alone as a BJJ white belt. Now, the purple belt is probably not going to hurt you, as they’re experienced enough to know when you’ve had enough, No, your worst enemy is yourself. Deciding to tough it out or thrash around uncontrollably is going to get you injured. And you’ll only have yourself to blame. Go back up, read and read the first tip again. You do not know enough! A tap gives you a direct way out and allows you to regroup and reconsider. That is how you learn, injury-free.

An even worse way of stalling your progress through injury is by being the class spaz. What this means is that you’re injuring others while doing uncontrollable and unneeded moves while rolling. I understand that you want to win, but kneeing people in the face by accident is going to make them avoid you. And you can’t train BJJ by yourself, can you?

BJJ White Belt Tap

Respect The Academy

Wherever you decide to train, you’re going to be a part of a school. That means you’ll spend hours upon hours at a certain spot with a certain group of people. Not only that, but you’ll spend most your time in extremely close proximity to other people. This means that you need to be on your best behavior. No matter how you act outside the gym, on the mats you’ll have to respect the academy’s rules.

Among those rules, respect is the first one. Respect your training partners and your instructors when you’re in class. No need for unnecessary talking, teasing or remarks. If you’re thinking about slacking, you’re better off staying at home instead of wasting someone’s time. After all your partner came to learn something new today. Why should he/she have to suffer because of you?

The next big thing every BJJ white belt needs to understand is personal hygiene. Most BJJ academies spend a lot of time trying to keep the premises clean. After all, we are rolling around on the ground. Coming in smelly is going to leave you partnerless before you can say “Omoplata“. Keep yourself and your training gear, whether it is Gi or No-Gi clean and fresh. Moreover, find a way to get all your precious jewelry off. That piercing you’re so proud off can cause a serious injury to someone, or yourself. Finally, going in sick or with a skin condition should be a no-brainer, but I’ll mention it regardless. Stay at home until you heal up. Nobody wants to share your germs.

Dedicate Yourself To BJJ

If you’re really serious about training Jiu-Jitsu and living the lifestyle than dedicate yourself to the gentle art. This doesn’t mean dropping everything else and living in the gym. it means that you need to use every tool you have at your disposal to make you a better grappler. On such a tool is going to open mat sessions. Contrary to popular BJJ white belt belief, open mats are not just sparring sessions. During an open mat, you can do anything that’s appropriate for a BJJ academy. Ask older belts questions, drill with different partners or focus on some conditioning and/or flexibility. You’ll have plenty of time to roll, and you definitely need to do it, but you can learn so much more at an open mat.

Another huge aspect of Jiu-Jitsu is physical preparedness. You do not need to be a world-class athlete, but having a good gas tank and decent strength doesn’t hurt either. Look to improve your fitness by engaging in any kind of physical exercise apart from BJJ. Go for a run, or just bang out a few reps on the monkey bars. Or maybe hit the weights in a gym along with some academy friends. You could even go and just work on your flexibility by doing Yoga. Whatever you choose to do, it’ll help you get better at BJJ.

On a similar note, try to clean up your diet as well. Eating like s#&^ is going to make you bloated, tired and distracted. Make sure you develop some good eating habits. it won’t be hard, as all you need to do is just see what others in the academy are doing. Most grapplers tend to eat healthy(ish) so it won’t be hard to figure it out.BJJ White Belt Survival Tips

Ask And Write

Finally, from a technical perspective, Jiu-Jitsu is going to be confusing like nothing before. It is OK, as this is the same for anyone. What you need to do to ensure you constantly evolve and progress is to ask questions. Ask your instructors, as more experienced training partners, ask on internet forums… People in BJJ know that you only go forward if you ask what you do not understand. As a BJJ white belt, that is everything, So, everyone is going to expect questions from you, especially your instructors. They’re going to be happy to oblige, as long as it doesn’t interfere with the class too much. There are correct times to ask questions and wrong ones. Asking during rolling is not appropriate, but doing so at an open mat is perfectly OK.

 As we’ve already likened BJJ to college, just like in school a good idea is to write things down. Nobody can remember everything, let alone in a martial art that has no end. This is even more pronounced when you’re a BJJ white belt. Even the names of moves are going to be confusing, let alone the sheer volume of information. So get yourself a notebook and start writing things down, Both stuff you learn in class and stuff you ask about all need to go in there. This is going to help you immensely in your quest to turn that BJJ white belt into a blue one, and eventually, a black one.

You Might Also Like:

The Best DVD and Digital Instructionals For BJJ White Belts
Reasons Why You’re Still A White Belt
Unwritten BJJ Rules To Follow In Any Academy
7 Awesome Tips To make You Formidable White Belt

Ezekiel Choke – Gi and No Gi Details and Mechanics

Killer Ezekiel Choke

One of the simplest chokes in Jiu-Jitsu is also one of the most potent attacks you can do without any risk whatsoever! Not many moves in BJJ have these characteristics, so it’s baffling why the Ezekiel Choke doesn’t get more credit.

Gi chokes are a mighty weapon that Brazilian Jiu-Jitsu has taken to a different level. Other Gi-based grappling martial arts like Judo and Sambo tend to use them but not at the level that BJJ does. It is not just about the bow and arrow choke from the back. Gi chokes can be instigated from virtually every BJJ position, and they work exceptionally well. Especially when you hit them from a dominant position and in the simplest way possible.

There are plenty of Gi chokes that fit this description but there’s one that is particularly effective. As such it is so simple that it works most of the time once you get the hang of it. The reason is that many people often underestimate this choke, then turning it into a  brutally effective weapon. That said, how much attention do You pay to the Ezekiel Choke?

The Ezekiel Choke is not an original BJJ product, to be completely honest. The Sode Guruma Jime is a common submission in Judo as well.  The basic idea is to use the sleeve of your own Gi as leverage to choke an opponent. The choke became highly popular in Brazilian Jiu-Jitsu during the 1990s. Back then, it was an innovative move that was safe to apply from the top. Namely, it is one of the few chores that a grappler could safely attempt from inside the closed guard.

Today, attacking from within the BJJ full guard is not advisable, but the choke is still a strong threat from other top positions. The Ezekiel choke has many variations, all of them very common in the highest level competition.

What Is The Ezekiel Choke?

The name of this choke once again demonstrates the strong historical connection Judo and BJJ have. A Brazilian Olympian Judoka decided to tighten up his groundwork (Newaza) ahead of the Seoul Olympics in 1988. In order to do so, Ezequiel Paraguassú started cross-training at the Carlson Gracie Academy. Paraguassú was so good with the choke that he destroyed everyone during rolling. This resulted in the choke being named according to him. The true origins of the choke are unclear and may go well before the creation of Judo. However, as far as grapplers are concerned it is a Judo choke that was perfected at a BJJ academy.

Setting up the Ezekiel Choke takes time, as does g\finsihing it. It is one of those “slow chokes” that take time to set in. As such it not a great fit for Judo competition, where you only get a limited time to work once on the ground. In BJJ however, it is the perfect topside choke, especially from the mount and top half guard.

Since its initial success in Jiu-Jitsu, the Ezekiel Choke has evolved. The arm in Ezekiel is the most popular variation of the choke, still very effective in modern-day BJJ. That said, Ezekiel Choke is not exclusively done with the help of the Gi. There is a really effective  No-Gi variation as well, that uses the wrists for leverage.

How Ezekiel Choke Works

The Ezekiel Choke combines the use of a sleeve and the wrist. The mechanics behind the choke are in the scissoring-like motion that blocks the opponent’s trachea. In certain situations, the Ezekiel Choke can also be utilized as a blood choke.

A great way to really understand how it works is setting it up from the top half guard. Imagine that you are in a position with one arm underhooking your partner’s head. The other arm is going to have an underhook on his opposite side arm. Pretty much the best spot to be in for controlling the top of the half guard. First, you’ll need to use your underhook that’s under the opponent’s arm to control the biceps. To do so, slides the hand down and on top of the opponent’s bicep, pressing against the mat.  The next step is to open up the neck so that you can set the Ezekiel to choke up. Driving the top of your shoulder into their chin is one certain way to really open up the neck. Once the neck is exposed, you’ll need to thread the arm that’s on the biceps on top of the opponent’s neck.

Once you have your arm on their neck, you’ll need to use the arm under the head for leverage. To do so, you need to put four of your fingers (thumb excluded) deep inside the sleeve of the choking arm. Remember to grip really really deep.

There are two finishing arm configurations. One is with a fist that drives into the opponent’s throat. the second is with a “knife hand” open palm that puts pressure on the trachea with the blade of your palm. To apply more pressure, push the arms away from your body.

Attacking Ezekiel Choke From Different Positions

You can attack Ezekiel Choke from these positions:

  • Full Mount
  • Closed Guard (easily countered when done from inside of the closed guard)
  • Back Mount
  • Side Control (usually for transition to mount)
  • Half Guard (not so effective)

When mount attacks are in question, the Ezekiel Choke is an excellent weapon to add to your arsenal. It’s a very simple choke that doesn’t require having great strength or sacrificing position. It also works well as a counter when your opponent gets double underhooks. For the more advanced grapplers, it is a great weapon to open up other attacks, like armbars or Americanas.

A great aspect of the Ezekiel Choke is the opportunity to adjust at will. You can always switch back and forth or simply start another attack. One option involves transitioning into the gift wrap position, and/or taking the back. No matter how you set it up, the fundamental rules are holding the opponent’s head off the mat and staying as tight as possible.

From the closed guard, you can also use the Ezekiel Choke to really surprise your opponents. First, you have to break their posture by bringing them down with your thighs. A cross collar choke is the starting point. While looking to finish the choke, thrust one elbow upwards above their neck. Wrap the other hand around the back of their neck and grab the inside of our sleeve.  Apply pressure downward with your forearm to finish the choke.

No-Gi Ezekiel Choke

 For all the No-Gi die-hards there’s a very useful variation of the Ezekiel Choke. Granted, it doesn’t have the high percentage finishing rate of its Gi counterpart but it is effective nonetheless. For the No-Gi Ezekiel Choke, all the focus is on the wrists. That said, unless you have flexible wrists expect some discomfort while you get the hang of it.

For the No-Gi Ezekiel Choke, it is important to go as deep as possible with your choking hand and utilize the had to help you finish. The bottom arm (under the head) needs to be really deep too so that you can grab your wrist with your own arm. From there, the pressure principles remain the same. In No-Gi I suggest sticking to the first configuration because it has a better chance of finishing. Your head acts as an extra limb here, by limiting the movement of their head and closing down space on the opposite side of the choking arm. This is going to ensure a finish if you’re patient enough, Just count to 10 and in most instances, you’ll get the tap or a nap.

Frequently Asked Questions:

Why is it called Ezekiel Choke?

Ezekiel Choke is named by famous Judoka, Ezequiel Paraguassu, who started cross-training Jiu-Jitsu in Carlson Gracie academy in 1988. In Jiu-Jitsu gym Paraguassu managed to choke everyone with Ezekiel Choke. At the same time, he introduced the choke to MMA. That’s the reason why it’s named after him.

Is Ezekiel Choke Legal?

Yes. It’s legal in every Brazilian Jiu-Jitsu, Grappling, and MMA competition. It’s usually done as an airflow choke, but in some variations, it may be done as a blood choke. Both Blood and Airflow chokes are legal in most competitions.

Related Articles:

Ezekiel Choke From Guard: Reliable Or Just A Fairytale Move?
A Powerful Arm-In Ezekiel Choke Variation
No-Gi Ezekiel Choke From Top And Bottom
Ezekiel Choke Defense with a Wrist Lock as a Counter
Head And Arm Chokes In BJJ: Systematization

Want The Jiu-Jitsu Body Of Gordon Ryan? Train Like This To get It!

Loaded carries For The Perfect Jiu-Jitsu Body

Whenever you take a look at Kron Gracie, Rodolfo Vieira or Gordon Ryan, to name just a few, one thing catches the eye straight away. of course, they’re all very formidable grapplers who have dominated the highest levels of BJJ. Apart from that, what they have in common is an impressive physique.

No wonder most people involved in BJJ would like to look like those grappling monsters. Now, while it is not the main determinant of the outcome of a match physical fitness undoubtedly plays a major role in the success of these world-class grapplers. That said, their goal is usually mat performance and their chiseled physiques are only a welcomed side-effect. Now, we’re going to share with you a great conditioning secret that is going to get you the perfect Jiu-Jitsu body!

Gordon Ryan’s DVD/Digital/EBOOK is OUT!!! Check it HERE.

Gordon Ryan DVD/DIGITAL/EBOOK Getting Swole as A Grappler
Techniques and Programs List

Let’s make something very clear for the beginning. BJJ conditioning is not about the abs! That impressive Jiu-Jitsu body you’re after is a clear indication of elite level physical preparation. Now, most of the professional grapplers and fighters often use lots of state-of-the-art equipment. However, where they get the most bang for their buck is with good old basic exercises. And it doesn’t get more basic than picking something heavy and carrying it around. Hardly anyone that trains BJJ and competes at a high level is skipping over weighted carry exercises. And if you want the Jiu-Jitsu body that performs as good as it looks, you most certainly need them too!

Loaded Carries For The Ultimate Jiu-Jitsu Body

Carrying exercises are irreplaceable for developing a core of steel. The importance of the core in grappling cannot be overstated. The core consists of much more than just abs or lower back muscles. It includes all major muscle groups of the body and has a role in every complex movement it performs. The core is used for stabilization, flexion, extension, rotation, and anti-rotation. All of these movements are included in every roll or match a grappler does. Carrying heavy object in any of the manners I’m going to present further in this article, is a surefire way to get the core of a BJJ world champion.

Carrying exercises task the whole body in ways that are relatable to everyday activities. You’ve all heard the expression “farmer strong”. One look at Rousimar Palhares and you’ll know what it means. Loaded carries are often referred to as walks, due to the nature of the task. Now you can also get farmer strong but without the need to flip hay or wrestle cattle all day. That said, just picking something up and carrying it to exhaustion is not a very smart approach. Carries, just like all kinds of conditioning exercises, need proper programming in order for a maximal result. Furthermore, different types of the exercises need to be cycled at constant intervals in order to truly get you the perfect Jiu-jitsu body.

In terms of variation, it’s not only about the exercises. All aspect of conditioning training, like weight, duration, grip, loading style, equipment etc. need to be switched up. This is the only way to ensure your body adapts to as many different scenarios as possible. Just like in grappling.

How To Start Training Loaded Carries For BJJ

AS with all things BJJ, carries have a natural progression. Don’t just jump into the toughest variation possible unless you’re looking to get injured. Instead, the smart approach is to take it easy and allow the body enough time to adapt to imposed demand. After all the perfect Jiu-Jitsu body is not made in a month.

The first step of loaded carries is isometrics. The idea is that you pick up a weight in one arm and just stand with it. That way you train stabilization, correct posture and grip strength to name a few. Standing like this requires you to maintain a center of mass with a neutral posture against an external load. It is imperative that you know how to do this before going really heavy and starting to move around.

Begin by standing on one leg and holding a dumbbell on one side of your body. Standing in front of a mirror is perfect to get accustomed to the way it feels. You’ll also be able to track your posture through the exercise.  The goal is to avoid leaning either toward or away from the dumbbell. Oh, and one more crucial thing. There should be absolutely no contact between the weight and your body! Three to five sets of 30 seconds is a great place to start.

Gordon Ryan’s DVD/Digital/EBOOK is OUT!!! Check it HERE.

Once you’re comfortable with the isometric part of the movement, it’s time to introduce some dynamics. In that sense, the first look to add just movement before actually traveling with the weigh. The simplest way is to march in place, adhering to all the standards we set above. From there you can think about actually moving. The concept here is much the same, holding the load on one side of the body and performing a controlled walk while maintaining a neutral posture.

Two-Handed Loaded Carry Variations

Heavy bilateral carries are the meat and potatoes of any worthy carry program. They are perfect for increasing strength and conditioning, as well as building the ultimate Jiu-jitsu body.

The perfect tools here are very basic. Dumbbells and kettlebells are great, but long bars work exceptionally well too. Pick up a bar with each hand and take a walk. Furthermore, as you progress you might think about carrying sandbags or wrapping a Gi or towel around heavy kettlebells. That way you’ll add a grip training component that is very specific to Jiu-jitsu. In the beginning, stick to kettlebells, dumbbells, and a trap bar if you have access to one.

In terms of height, loaded carries can be performed high or low. This stands the same for both single-handed and bilateral carriesLet’s look at both of these groups of exercises.

Low Loaded Carries

To perform low carries you need to make sure you keep the weight at your waist, or lower. That way, you’ll really challenge your core in multiple e planes of motion. Trap bars are a great carry choice for overall core stability.T shape of the bar keeps the load off the body so the shoulders don’t have to do extra work. Furthermore, pick up a trap bar and switch its position so that the plates face forward. This challenges your wrist position and overall core stability by increasing the level of the load. Swiss bars or barbells are another great option for this both uni and bilaterally.

With dumbells and kettlebells, the focus is on the transverse and frontal planes. They’re both very effective in cases of hip collapse due to weak glute muscles. This also stands true for instances where you use two long barbells, each in every hand.

High BIlateral Carries

These are a great tool to use as a regression to the overhead press. Instead of battering your shoulders in a plane of movement you rarely us in BJJ, going for a high carry is much more worth your time. For the ultimate performing Jiu-Jitsu body, high carries are a must. They train the anti-extension quality in the frontal plane by applying a flexion force on the body. This means that the torso goes forward so that the erectors must work to keep it upright. At the same time, the anterior core must also activate to prevent the erectors from bringing the spine into hyperextension. This is essential for a multitude of grappling positions, especially when holding in an isometric fashion.

With high loaded carries, the goal is locking out barbells, dumbbells, kettlebells, or other weight overhead. Unlike front-loaded carries, they directly force the spine into hyperextension because the overhead lever is so long. This challenges you to maintain a tight rib-to-pelvis relationship. It also makes you stabilize an upward rotated position of the scapulae. However, just going overhead is not where these exercises end. Holding a weight in the goblet position is also a perfect option for grapplers.

https://www.youtube.com/watch?v=ycvAwDG0EfA

Final Thoughts

Finally, the reason why these are going to work long-term and help transform you into a beast is combinations. The possibilities here are endless. You can combine a high and a low carry, two highs, different bars, whatever you think about. You’re going to be tougher, quicker and have a better gas tank. And you’re going to look better than ever before in your high-performing Jiu-Jitsu body!

Gordon Ryan’s DVD/Digital/EBOOK is OUT!!! Check it HERE.

Gordon Ryan DVD/DIGITAL/EBOOK Getting Swole as A Grappler
Techniques and Programs List

Gordon Ryan DVD/DIGITAL/EBOOK – Getting SWOLE As A Grappler

Travis Stevens’ 3 weeks / 3x per Week Weight Lifting Program for Grapplers

A Jiu-Jitsu Workout Program To Lose Fat And Improve Performance

21 Strength and Conditioning Exercises For Jiu Jitsu!

Security Guard With a Huge Takedown and Knee On Belly Control on the Attacker

It’s pretty nice to see a security guard who’s obviously trained in grappling martial arts without using excessive force.

In the video, you’ll see a security guard easily taking down a guy who tried to punch him. No punches, no kicks, just take down and control. Beautiful!

Jiu Jitsu Guy With No Takedown Skills in a Street Fight – FAIL

Small Guy Takes Down a Big Bully

Small Guy did Double Leg Takedown on a Big Bully

Unleash Unbearable Pressure With The BJJ CrossFace

Ultimate BJJ Cross Face Pressure

Even when we wrestled as kids, knowing absolutely nothing about grappling, we always have the tendency to be on top. The human instinct dictates that the top position is far more preferable than the bottom. Most grappling martial arts, like wrestling or Judo, are also based on this concept.

When you take someone down, the winning points come from holding them while on top. In that sense, BJJ is not very different. Despite having the option of fighting off your back, unlike other martial arts, Jiu-Jitsu still emphasizes the top position. One look at the point system of Brazilian Jiu-Jitsu and it is clear that everything leads to the top position. There’s a great reason behind this, other than our primal instinct. That reason is that from a top position new can exert pressure that can debilitate an opponent. And from the many kinds of pressure, none is more devastating than the BJJ Crossface.

The Crossface in Jiu-Jitsu is one of the fundamental concepts of top position pressure. It allows a grappler to pin the opponent by controlling their head. In Brazilian Jiu-Jitsu, the Crossface is the primary mechanism behind the success of plenty of top positions. Side control, full mount, top half guard, and plenty of other positions rely heavily on the BJJ Crossface. Knowing how to control the head of an opponent with extreme pressure is an extremely important aspect of passing any guard in Jiu-Jitsu. In certain instances, the BJJ Crossface might even elicit a tap out of an unrespecting opponent. In that sense, it is only a few details away from a very powerful choke that’ll put people to sleep in no time.

The Crushing Pressure Of The BJJ CrossFace

The BJJ Crossface position is one of the fundamental characteristics of the pressure game from the top position in grappling.  The most prevalent use is when you’re holding down someone in side control. However, this is no the full extent of this powerful pressure move.

 The mechanics of the Crossface are based on pressure and head control, two major Jiu-Jitsu principles. A properly structured Jiu Jitsu Crossface starts by placing your hand under your opponent’s neck, going as deep as you can. For the purpose of explaining it, let’s say you’re in top side control. From there, the goal is to turn your opponent’s head away from you. In order to do this, and keep the head there without overcommitting you’ll have to use proper weight distribution and pressure placement. What this means is putting your shoulder down on their jaw at a specific angle that elicits maximal pressure.

In terms of keeping a safe position while going for a BJJ Cross face, remember that pushing forward with the shoulder is likely going to help your opponent reverse the situation. So when you have the arm deep and shoulder in place, pull the opponent inside towards you instead of only projecting your weight forward. This is when you feel the true power of the Cross face.

Controlling the head means that you easily control the body. The body’s movement is severely limited when the spine is not aligned. it is \, put simply, a way to break your opponent’s posture. , As you should know by now, controlling posture very often means you control where an opponent can go. A solid BJJ Crossface is a crucial piece in applying pressure on your opponent from the top.

Crossface Torture From The Top

The Crossface is also one of the staples of mount control.  The mount is a tricky position to control in the first place, with complex mechanics.  Usually, beginners are not able to maintain it for long due to incorrect weight distribution and balance. What happens is they get rolled back to guard, or pushed back into half guard. One of the key components to maintaining mount is having a brutally painful Crossface pressure.

Just like in side control, the focus is on head and neck control.  The BJJ Crossface completely neutralizes one of your opponent’s sides, making escapes impossible. From a solid chest to chest pressure, you need to go under their neck and turn their head in one direction, just like in side control. Once again the goal is a misalignment of the spine.  From the mount, you could also use the Crossface to set up submissions. Namely, it can be used to distract your opponent while you work on a submission.

When you’re passing the half guard you’ll need to employ the Crossface once again. It is a crucial concept in passing the half guard. When passing the goal is to flatten your opponent, both their shoulders firmly on the mat.  There are two ways to do this. First, use a BJJ Cross face to force their head and neck in one direction. Secondly, you could utilize an underhook. For the best control, however, you go for both an underhook and Cross face pressure. There are various ways to apply the Cross face from passing the half guard.

BJJ CrossFace To Von Flue Choke

Have you ever heard of the Von Flue choke? This choke is the perfect guillotine counter. At least that’s how it came to be.  Lately, UFC vet Ovince St.Preux has become hugely popular due to using it in MMA fights. Whenever someone stubbornly holds onto a guillotine choke even when you have passed their guard, it’s time to teach them an unforgettable lesson. The Von Flue choke It’s a highly effective and unorthodox technique. Even better, it doesn’t have to be set up from a guillotine defense. Instead, you could go for it straight off a Crossface.

The mechanism of the choke is similar to a triangle choke. On one side, you force the shoulder of the opponent’s far arm to block the arteries on one side. This is done by forcing the opponent to angle towards the ground. This puts their shoulder straight up against the side of their neck. To complete the choke, you need to drive your shoulder into the top side of their neck. From a strong Crossface, the shoulder is already there. All it takes is some pressure and you get the tap.

The Von Flue choke is a really fast one so be advised that your opponent might go to sleep before they get the option to tap. As such be careful both in training and competition and especially while rolling. In competition, there is a referee to monitor the situation. In rolling, you need to be careful not to hurt someone with the power of your Crossface!

VIDEO: Carlos Condit KO’s US SF Soldier After Sucker Punch

Carlos Condit KO Soldier

Carlos Condit was sucker punched by US Special Forces soldier and that was enough for Carlos Condit to Knock him out.

The story came from Michael Bisping and now here is footage of it. Something that was supposed to be soft sparring turned out in a huge knockout. As Bisping explains it, the soldier was the cool guy but suddenly he went pretty hard on Carlos Condit. Carlos was suddenly sucker punched by a soldier and when he recovered he went had on the soldier. Carlos had clear attention to drop him down and he did it.

In the footage of that sparring, you’ll see that Carlos was first light rolling with US soldier and after that, they went into light kickboxing sparring. The footage clearly shows everything that Michael Bisping said in a podcast.

“We did some very cool stuff. And one of the things we did was go to an out-base where there was a very small camp set up, very little people and it was where some special force — badasses basically — a small group of hardcore special forces guys and they had a tiny little gym set up.

“In that gym was a boxing ring and we went in there and we were meeting these guys and just shooting the shit, talking to them, and then one of them says ‘would you like to spar?’ I was like ‘alright cool. I’ll spar with you.’ So we put the gloves on and I’m just messing with the guy throwing out a couple of light jabs.

“To be fair, the guy was cool. We had a nice friendly spar and I threw a few jabs and I took it easy and that was that we finished. One guy then says to Carlos Condit — another one of the special forces guys — ‘do you want to spar’ and Carlos Condit says ‘yeah, sure, no problem’. Oh, and by the way, they call him the Natural Born Killer, that guy is cool as fuck. He never raises his voice and he’s super mellow. They put the gloves on and the special forces guy says ‘how hard do you want to spar?’

“Carlos replies ‘I’ll hit you, as hard as you hit me,’ which is a fair answer, but it was a very cool answer because he was [saying] ‘if you want to go hard motherfucker, we will go hard, but if you want to keep it light and friendly then we can go light and friendly, the ball is in your court’.

“So the guy says ‘cool’ but then all of a sudden, right then and there the special forces guy: bang … he suckers punches [Condit] as hard as he can. And I mean a fucking hard shot. And Carlos goes down to the floor.

“It was a big heavy shot, but Carlos gets up, shakes his head, gets his shit together, and then just goes at the guy. Jab, the right hand, left head kick, boom, knocks the special forces guy straight through the ropes onto the floor, unconscious, out cold. Everyone in the room was looking around like holy shit.

“I was like ‘oh Carlos, I’m not sure that was the best thing to do,’ but fair play, ever since I saw that I was like he’s a bad motherfucker man. He’s a great guy.”

Carlos Condit actually said one very interesting sentence to a soldier, “it’s up to you man, hit me as hard as you want to get hit”.
Well, the soldier got what he was looking for.

Check out the video of Carlos Condit knocking out soldier.

Make sure you don’t miss the opportunity, the Special offer from BJJ Fanatics and their Super Deals with discounts going up to 70% RIGHT NOW.
You can find the newest instructionals from Craig Jones, Tom DeBlass, Bernardo Faria and many others. If you decide to upgrade your BJJ don’t forget to use code “FANOM10” for 10% discount more!

Renzo Gracie B**chslapped a guy who blew an air horn in His Ear