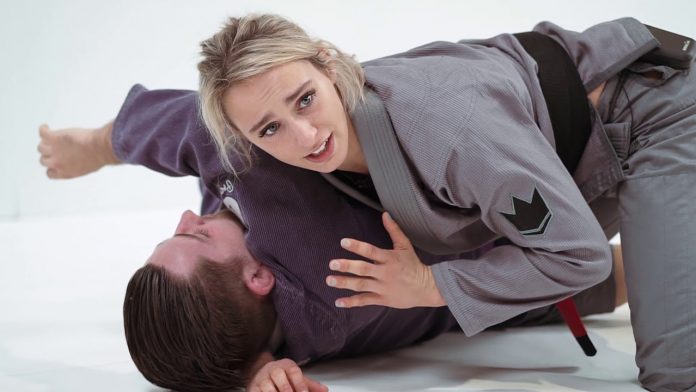
Systematization Of Head And Arm Choke Options. In BJJ the Head and Arm Choke is not just one choke. It refers to a principle, which then gives birth to a vast array of different techniques. In fact, there are so many Head and Arm choke variations across grappling martial arts that it is best if we put them into different categories. However, for all of them to work, they have to adhere to the main principle, which, as the name suggests, would be including the opponent’s head and arm in a structure in order to achieve a strangle-induced submission.
BJJ is endless when it comes to different ways of executing grappling goals. It is a great thing to have so many moves and techniques available when you‘re rolling. However, it also brings about the “paradox of choice”, where you end up never truly mastering or completely understanding something, because of the sheer number of available options. This changes throughout the years, but for those that have still some way to go, the best way of bringing a bit more order to chaos is thinking of categories of moves that share the same principle. Head and arm choke options and variations are a great example.
History Of The Kata Gatame Position
Where exactly do the concept of a Head and Arm Choke come from? Who knows, really. Grappling has been around ever since people first came about. That means that pinpointing its precise origin is impossible. However, it is possible to pinpoint when it was first recorded, initially as a move, and later on as a principle behind a myriad of choke techniques.
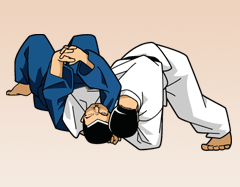
Other arts, like catch wrestling, have also included forms of the arm triangle choke since the early beginnings. However whether it was a Judo influence that prompted it, or they came about it on their own is a mystery. The fact of the matter is, there were not many head and arm choke options until BJJ came along. That is when the entire landscape of the Kata Gatame changed.
Head And Arm Choke Mechanics
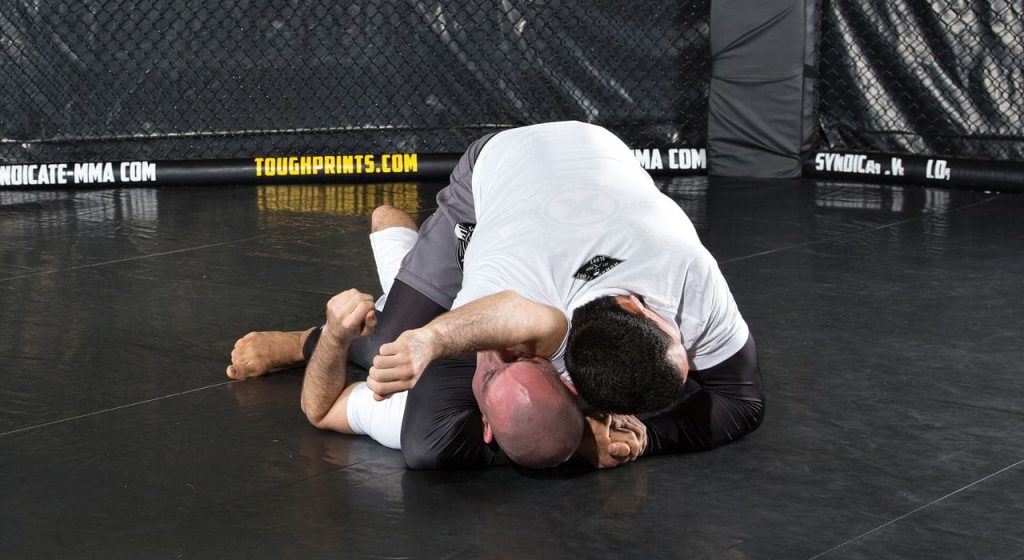
The way the head and arm choke works is fairly simple. However, missing out on several minor details often makes people struggle a lot more than they need to in order to finish the submission. For the sake of explanation, I will focus on the Arm-Triangle choke done from side control to try and pinpoint how you can use mechanics to ensure you get more taps while getting tired a lot less.
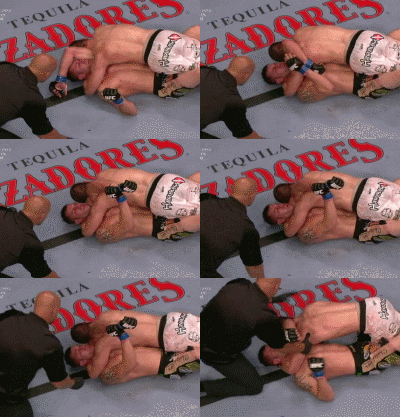
For the Arm Triangle choke, in particular, you have the biceps of your arm on one side, and the shoulder of an opponent on the other. Squeezing should be out of the question unless you absolutely have to. If you have to squeeze, you might end up only burning out your arms. So, instead of thinking about squeezing with your arms and shrugging your shoulder, focus on actually forcing the near side shoulder towards the opponent’s neck. Pushing with the collar bone is a great way of achieving this without any neck pain or muscle involvement. Moreover, for the finish, you just need to project weight into the neck and forward, and you should aim to finish without having to clasp your arms together.
Categories of Kata Gatame Strangles
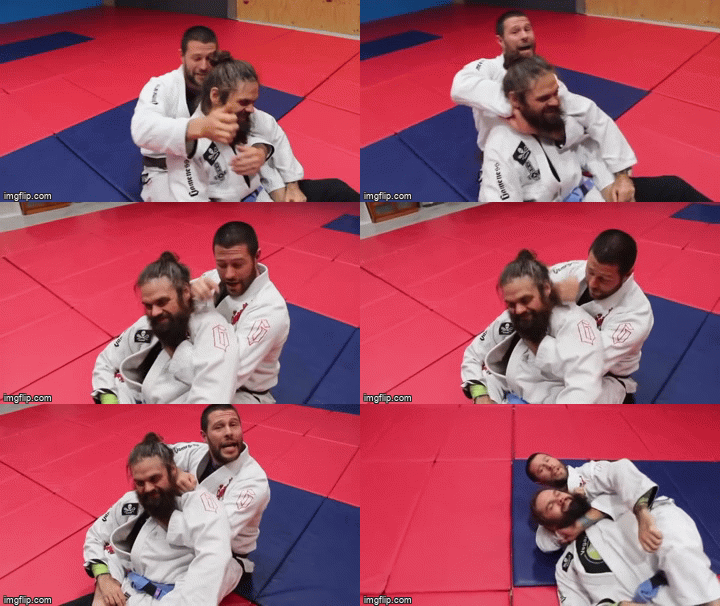
The head and arm choke get its name from the structures it involves in the actual strangulation. As we saw, having the arm in the loop means you have a shoulder that you can push into the neck. This is the underlining principle that makes all head and arm choke variations work. That said, the positioning of your body, the limbs you use to achieve the strangle and a few other factors help determine which category of a head and arm choke a certain submission falls under.
Arm Triangle(s)
Kicking things off is the Arm Triangle choke or the Kata Gatame. The position for the choke is what makes it so powerful – side control. Actually, it is not even side control, but rather a position in which you’re parallel (almost) to the opponent’s body. However, while they’re on their back, you are facing the ground, with one of your arms going around their head, including the near side arm in the loop.
Front Chokes
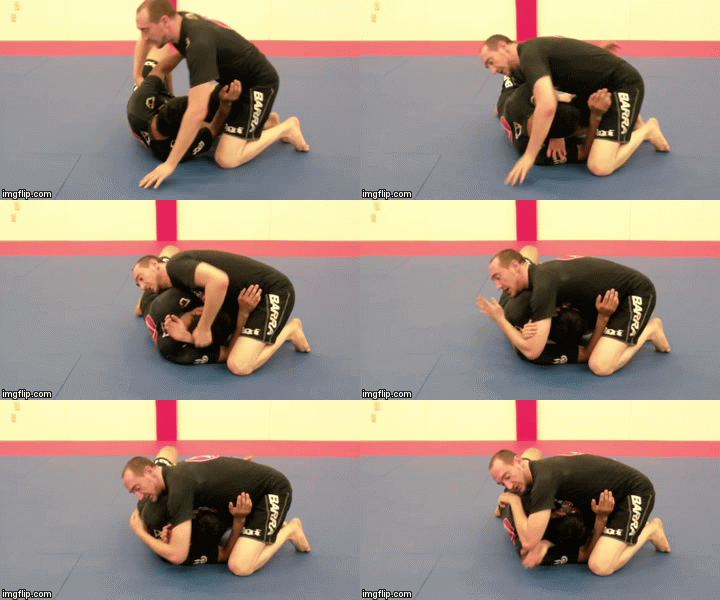
Probably the most used versions of the head and arm choke in BJJ are the front chokes. This category includes the D’arce and Anaconda chokes, as well as the lesser-known, but just as effective Mizzou choke. We won’t factor in the guillotine choke here, because despite having an arm inside, it doesn’t really fall under the head and arm choke category due to finishing mechanics.
Neckties
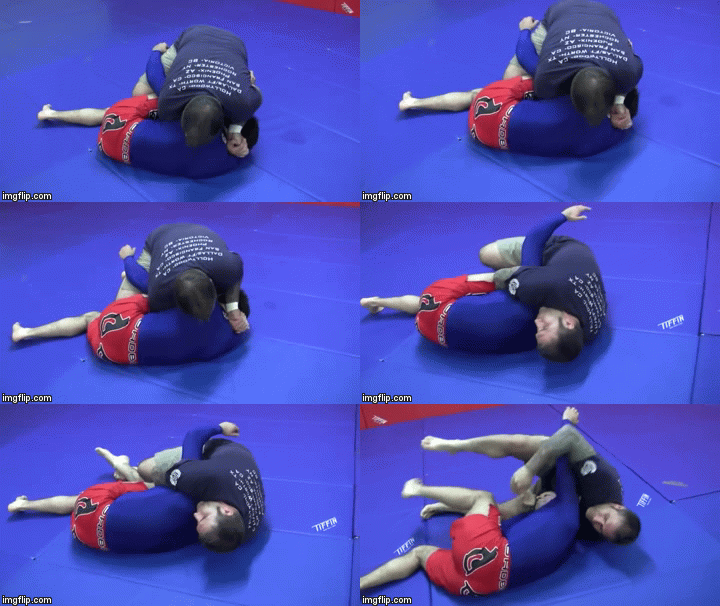
This I probably my favorite head and arm choke variation. In fact, this is a “Chank” or a combination of a choke and a crank. The technique of neckties is actually that of a clean choke, but it just so happens that on occasion (which is not that rare) they turn into cranks or combinations of both. Still, they’re very effective and legitimate submissions.
The difference between a necktie and the front head and arm chokes is that your arms are placed a lot more shallow on the neck. For neckties, you’re using your forearm(s) to place direct pressure on one artery, and the mandatory shoulder to compress the second one.
There are too many neckties (all of which you can find here) to look into this article. We’ll use the Peruvian and Japanese neckties as examples, though. The Peruvian is done from a front headlock against a turtled-up opponent. An S-grip or Gable grip will do the trick, as long as you include the arm of the opponent on one side. You then swing a leg over the head, and the other over the back, while sitting down.
Arm-in Ezekiel
Final Words
Today’s focus was on using the upper body (arms and torso) to secure different head and arm choke variations from multiple positions. However, there’s another category of chokes that also involves the same head and arm principle – triangle chokes with the legs. The front, side, reverse, rear, and inverted triangle choke all involve the use of the head and arm choke principle to achieve a tap. Just food for thought as you go about trying to catch people in the “loop of hell”.
DVD and DIGITAL Instructionals Related to Head and Arm Chokes :
JAMES CLINGERMAN – PERUVIAN DOZEN 2.0
Darces From Everywhere by Kade & Tye Ruotolo
The Japanese Necktie and Unorthodox Front Chokes by Keith Krikorian

![Darce Choke Encyclopedia – Origins, Mechanics and Variations [2025] BJJ, choke, Brabo, BJJ Darce Choke, D'arce Choke, Darce BJJ Choke](https://bjj-world.com/wp-content/uploads/2017/11/JungPoirierLeeYahoo-218x150.jpg)





![Get Off My Legs Gringo Craig Jones DVD Review [2025] Get Off My Legs Gringo Craig Jones DVD Review](https://bjj-world.com/wp-content/uploads/2025/03/get-off-my-legs-gringo-craig-jones-dvd-review-218x150.png)

![Leg Lock Entries Helena Crevar DVD Review [2025] Leg Lock Entries Helena Crevar DVD Review](https://bjj-world.com/wp-content/uploads/2025/03/leg-lock-entries-helena-crevar-dvd-review-218x150.png)
![Special K Guard Neil Melanson DVD Review [2025] Special K Guard Neil Melanson DVD Review](https://bjj-world.com/wp-content/uploads/2025/03/special-k-guard-neil-melanson-dvd-review-218x150.png)
![Arm Bar It All Shawn Melanson DVD Review [2025] Arm Bar It All Shawn Melanson DVD Review](https://bjj-world.com/wp-content/uploads/2025/03/arm-bar-it-all-shawn-melanson-dvd-review-218x150.png)


![Leg Lock Stock And Barrel Taylor Pearman DVD Review [2025] Leg Lock Stock And Barrel Taylor Pearman DVD Review](https://bjj-world.com/wp-content/uploads/2025/03/leg-lock-stock-and-barrel-taylor-pearman-dvd-review-100x70.png)
![Neil Melanson DVD Bundle Review: Filthy Brutal No Good Attacks [2024] Neil Melanson DVD Bundle Review: Filthy Brutal No Good Attacks](https://bjj-world.com/wp-content/uploads/2024/10/neil-melanson-dvd-bundle-review-filthy-attacks-100x70.png)
![Special K Guard Neil Melanson DVD Review [2025] Special K Guard Neil Melanson DVD Review](https://bjj-world.com/wp-content/uploads/2025/03/special-k-guard-neil-melanson-dvd-review-100x70.png)
![Standing Leg Entries Alex West DVD Review [2025] Standing Leg Entries Alex West DVD Review](https://bjj-world.com/wp-content/uploads/2025/03/standing-leg-entries-alex-west-dvd-review-100x70.png)
![Roger Gracie Guard Passing System DVD Review [2025] Roger Gracie Guard Passing System DVD Review](https://bjj-world.com/wp-content/uploads/2025/02/roger-gracie-guard-passing-system-dvd-review-100x70.png)


![Countering Triangles And Omoplatas Adam Mazin DVD Review [2024] Countering Triangles And Omoplatas Adam Mazin DVD Review](https://bjj-world.com/wp-content/uploads/2024/10/countering-triangles-and-omoplatas-adam-mazin-dvd-REVIEW-100x70.png)
![Unpinnable Mount Escape Mastery Haleem Syed DVD Review [2025] Mount Escape Mastery Haleem Syed DVD Review](https://bjj-world.com/wp-content/uploads/2025/01/mount-escape-mastery-haleem-syed-dvd-review-100x70.png)

![No-Gi Defense Xande Ribeiro DVD Review [2024] No-Gi Defense Xande Ribeiro DVD Review](https://bjj-world.com/wp-content/uploads/2024/11/no-gi-defense-xande-ribeiro-dvd-review-100x70.png)


![Jeff Glover Deep Half Revolution DVD Bundle Review [2024] Jeff Glover Deep Half Revolution DVD Bundle Review](https://bjj-world.com/wp-content/uploads/2024/10/jeff-glover-deep-half-revolution-dvd-bundle-review-100x70.png)

![Advanced Chin Control Concepts David Petrone DVD Review [2025] Advanced Chin Control Concepts David Petrone DVD Review](https://bjj-world.com/wp-content/uploads/2025/01/chin-control-concepts-david-petrone-dvd-review-100x70.png)
![Understanding The Distance On Top Gui Mendes DVD Review [2024] Understanding The Distance On Top Gui Mendes DVD Review](https://bjj-world.com/wp-content/uploads/2024/10/distance-on-top-gui-mendes-dvd-review-100x70.png)


![Master The Move The American Lock John Danaher DVD Review [2024] Master The Move The American Lock John Danaher DVD Review](https://bjj-world.com/wp-content/uploads/2024/12/the-american-lock-john-danaher-dvd-review-100x70.png)
![Complete Fundamentals Curriculum Eliot Marshall DVD Review [2025] Complete Fundamentals Curriculum Eliot Marshall DVD Review](https://bjj-world.com/wp-content/uploads/2025/02/fundamentals-curriculum-eliot-marshall-dvd-review-100x70.png)


![Henry Akins Black Hole No-Gi Closed Guard DVD Review [2024] Henry Akins Black Hole No-Gi Closed Guard DVD Review](https://bjj-world.com/wp-content/uploads/2024/09/henry-akins-black-hole-no-gi-closed-guard-dvd-review-100x70.png)
