
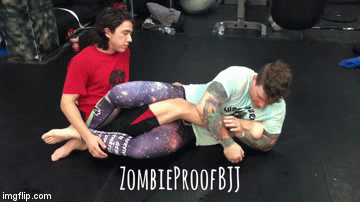
The devil is in the details. This is one of the truest statements you’ll ever here in regard to Brazilian Jiu-Jitsu. Speak of the devil, heel hooks are still the most notorious move in BJJ, despite all efforts to the contrary. Still, for those brave enough to accept them as just another powerful and reliable submission, they are a great grappling tool. There’s hardly a better lower body submission than a heel hook. SO far, positions for hunting heel hooks, as well as heel hook types have bee beaten to death. Yet, one very important aspect of heel hooking seems to go by unnoticed. Today, we’ll try to shed some light on the grips you need to finish a heel hook on anyone under any circumstances.
As I go deeper into the world of grappling I definitely realize the importance of the small things in Jiu-Jitsu. There are plenty of things we take for granted at the beginning. Grips are high on the list of important things that people only address when they’re more advanced. Grips area actually the essential part of any BJJ exchange. They allow a connection, control, attacking or defensive actions and execution of submission holds. To that extent, most BJJ techniques have more than one grip position. Furthermore, grip positions tend to have a hierarchy, where some work a lot better than others. Heel hooks are no different and with a solid understanding of grips, you’re finishing rate is going to skyrocket.
The heel hook is a great submission to have in your toolbox, regardless if you’re training in the Gi or No-Gi. Heel hooks are very high percentage of submissions that have their place in BJJ. There’s no need to outlaw them for fear of injury if training and teaching are approached correctly.
Heel Hooks Overview
The heel hook is a twisting submission that puts your whole leg under tremendous pressure. It works much as a wrench does. The basic principle is one of leverage. You use the ankle joint as the wrench to a strong elicit twisting motion of the knee. The force from the trapped ankle joint travels along the shin, multiplying as it reaches the knee joint. The control over the ankle, as the name suggests, comes from “hooking” the heel. Damage occurs in different ligaments of the knee, depending on the variation.
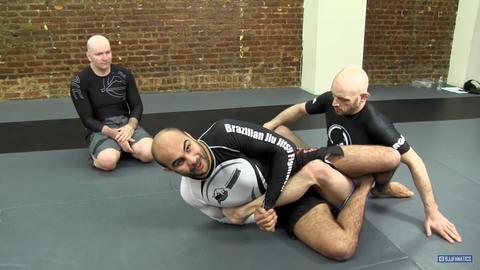 For heel hooks, there are two main variations you need to be aware of. Those are the outside heel hook and the inside heel hook. The outside version is when you have your opponent in a straight Ashi Garami, for example. The goal is to place the heel of the opponent in your elbow crease while placing the toes of the foot under your armpit. From there, you grip and use braking mechanics (pull and twist) to tear the lateral ligaments of the knee.

 While both heel hook variations can cause significant damage, the inside heel hook is considered to be the more dangerous one. This is mainly due to positioning, which dictates the move’s mechanics. The 4/11 position is the ultimate spot for inside heel hooks. For an inside heel hook, you have the inside of the opponent’s leg facing Up. This means that you need to hook the heel on the opposite side compared to an outside heel hook. This means that the pressure on the knee is much greater, due to the fact that your body is now to the side of the knee, as opposed to behind it. Placement of the foot and finishing is pretty much the same.
Grip Hierarchy
Even if you get everything right with positioning and placing the opponent’s foot between your elbow crease and armpit, you won’t get a submission unless you connect your hands. For heel hooks, there are three basic grip positions that pretty much guarantee you’ll get a tap.
The basic idea behind connecting your arms is to create a closed circuit situation where the foot can’t slip out. Furthermore, the arms help reinforce each other in a position of control. This means that even if you lack in hip control, your grip is going to allow you to stay connected until you adjust your overall position. Even if an opponent rolls, you can easily follow and decide where to finish the submission. While not something to be encouraged, you could also use grip variations to ensure a last-ditch tap when an opponent is already slipping out of both position and submission.

 Craig Jones is a master of heel hooks that has no problem re-adjusting grips as he goes. Learn all the secrets of the heel hooking trade, along with crucial gripping information from the “Down Under Leg Attacks” DVD instructional. It will answer all your leg locking questions, guaranteed!
There’s one more aspect of grip placement for heel hooks you have to consider. Usually, when opponent’s see that they can’t beat your Ashi Garami, they’ll focus all their attention on grip fighting. While grip fighting is not the subject today, maintaining grips can spare you a lot of time and effort. A well-placed grip is going to be immensely difficult to break, especially those higher up the hierarchy.
Palm To Palm Grip
The most basic grip people usually associate with heel hooks is the palm to palm grip. Suffice to say, all grips we’ll cover today work on both the outside and inside heel hook. With the palm to a palm grip, the goal is to use the sharp part of your wrist, right below your thumb, to create a sort of a platform for the opponent’s heel. The bony part of this wrist area needs to come under the heel and prop it upwards towards your ribs. It also acts as a wedge to keep the foot stuck along with your armpit squeezing on the toes.
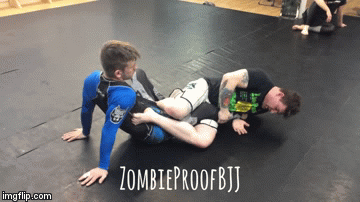 The other arm is going to go over the shin and connect with the first one. For a palm to a palm grip, you need to remember that you need a thumbless grip. Keep both your thumbs tightly glued to your palm. Involving them in the grip is going to make it a lot weaker. To place the grip, make sure the thumb of the second arm goes to the pinky finger of the arm that is holding the leg. From there, interlock both palms and stick your elbows as close to your torso as possible. Now, you can think about finishing.
Butterfly Grip
The palm to palm grip is the first grip in the first one in the heel hooks gripping hierarchy. It is very effective and the easiest one to obtain. However, it is the least secure of all the grips and certainly not the tightest one. Second, on the ladder is the butterfly grip. it is essentially an extension of the palm to a palm grip, one that offers much more control and tension.
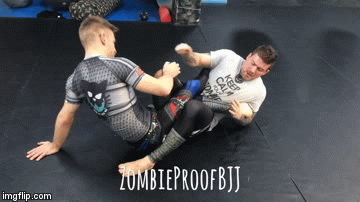 You can get to the butterfly grip directly, or move up from the palm to palm grip. For this grip, you want to focus on the same part of the wrist you’re using to create a platform for the heel. This time, though, you want the same wrist area of the top arm, reinforcing the arm holding the heel. SImply place this part of the wrist right under the palm on the opposite side of the other arm. The Butterfly grip makes everything much tighter and requires less range of motion for you to finish a heel hook.
Reverse Butterfly Grip
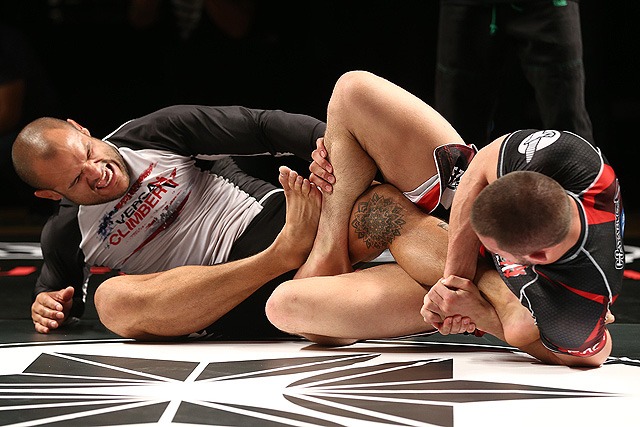
The reverse butterfly grip is the ultimate heel hook finishing grip. Pair it with an inside heel hook attack form the 4/11 and you have an all but certain tap. The reverse butterfly grip in not only the tightest and deepest one, but it is also the most secure one. There’s no way of breaking this grip before a heel hook comes on.
 Getting to the reverse butterfly is best done from a butterfly or palm to palm grip. However, there are direct setups as well, in case you need one. For the reverse butterfly grip, you want to use your far side arm as the hooking arm. This is opposite to both grips we saw before. Namely, you want to thread your far side arm under the heel, your fingers pointing toward the sole of their foot. The same area of the wrist creates a platform here, only your palm is facing towards you now. From there, you place the fingers of that palm on the biceps of your other arm. The goal is to get your arms in a rear naked choke-like configuration.
This one is the ultimate inescapable heel hook grip. Make sure you exercise real caution with it as it takes only the slightest of pressure to cause a major injury.
https://bjj-world.com/leg-locks-ultimate-guide-positions-submissions/